This post may contain affiliate links. If you purchase something through any link, we may receive a small commission at no extra charge to you. Supplies used may be given to us free of charge, all projects and opinions are my own.
{Post contains affiliate links, you will pay no more for your products by shopping through our links, thank you}
Who’s already decorated for Easter? I am so far behind on decorating this year that I haven’t even gotten the boxes out yet but that didn’t stop me from creating a few new projects for this year. I’m a little in love with my burlap bunny reverse canvas and think you should make one too. Keep reading to find out how to make your very own and to see the other fun burlap projects that our Create with Cricut group created this month.
 Easter is one of my favorite holidays to decorate for. I love the pastel colors it makes everything seem so bright and fresh. I also love that it’s easy to extend the Easter decor through the rest of spring. I love spring in Utah…it’s possible I say that about every season in Utah and it’s the truth because I love having all four seasons where I live. Spring means baseball season begins as volleyball season ends, grass is turning green, there is always the possibility of one more snow fall usually on top of freshly planted flowers. It’s truly the season of newness and being outdoors more and we look forward to it with excitement.
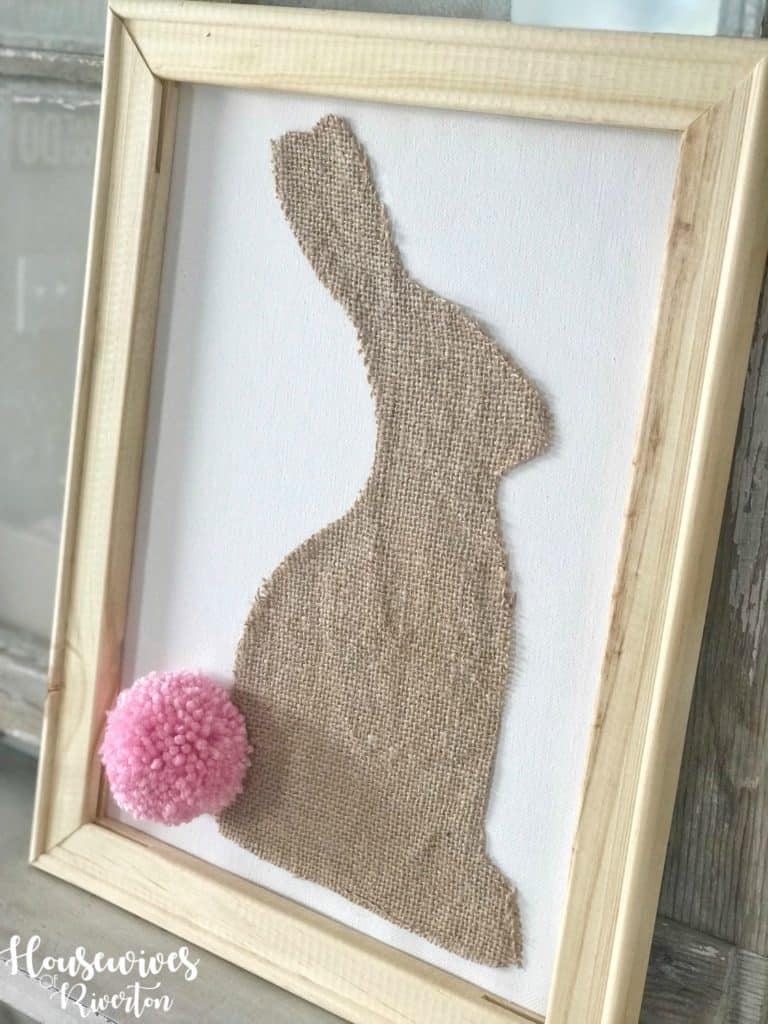 Have you heard of a reverse canvas yet? I recently learned about this fun new type of project and had to give it a try. When I heard the “secret ingredient” in our monthly challenge was burlap I knew I needed a burlap bunny. I bounced between a burlap bunny banner (which I still really want to make) and a this burlap bunny reverse canvas. I’ve been wanting to try my hand at a reverse canvas so the burlap bunny reverse canvas won my inner debate.
 A reverse canvas is actually really simple, easily customizable, and quite inexpensive.
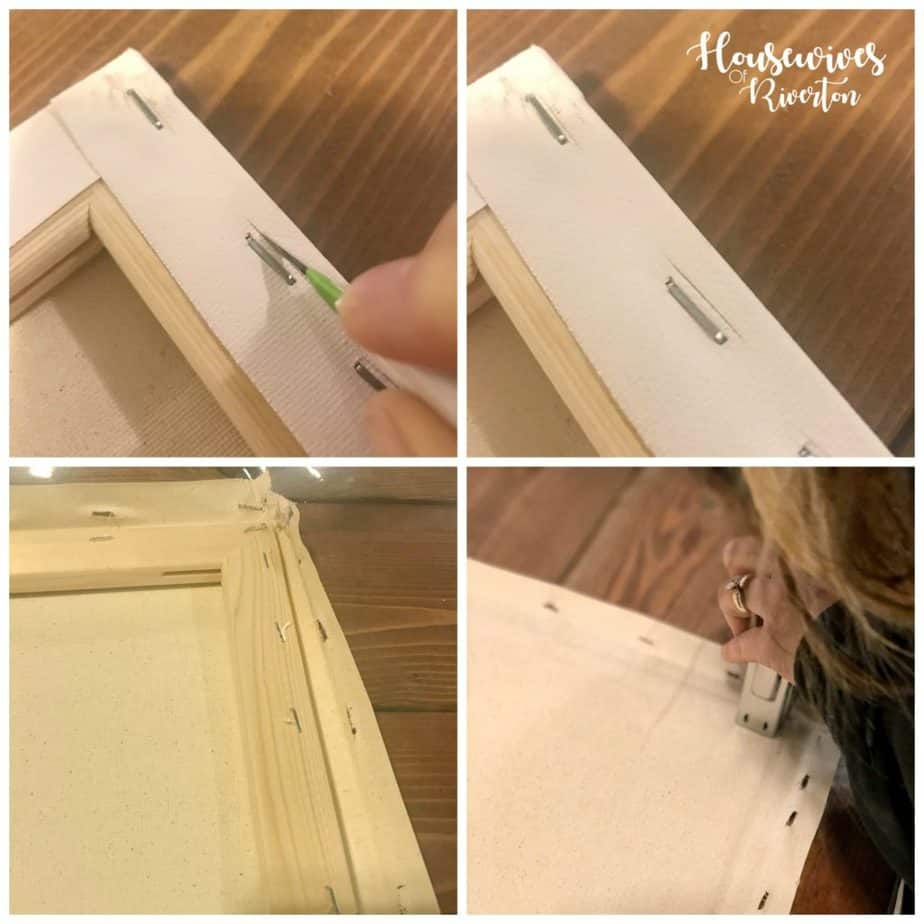
Step 1. Remove the canvas from the frame. To do this I used an exacto-knife and cut a small slice on the outside of each staple.
Step 2. Slowly pull the canvas from the frame.
Step 3. Once the canvas is removed from the frame you can stain or paint the frame if you’d like. I pressed the canvas nice and smooth to make applying my burlap bunny on it easier.
Step 4. Once you’re canvas is complete using a staple gun attach the canvas to the back of the frame making sure to pull it taut.
Step 5. After you have the canvas back on the frame using an exacto-knife trim the excess canvas off.
 To create your own burlap bunny reverse canvas you’ll need the following:
Canvas
Cricut Maker Machine
Rotary Blade
Bunny Cut File (this is set for an 11×14 canvas)
Fabric Grip Mat
Burlap
Glue
PomPom Maker
Yarn
Hot Glue Gun & Glue
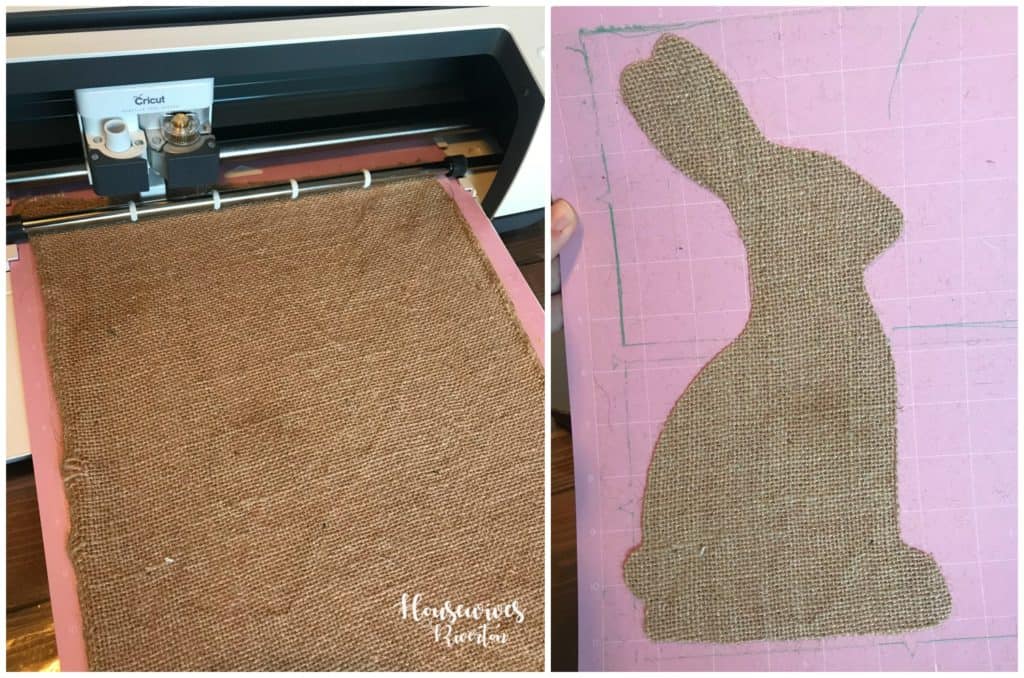 I love the Cricut Maker. I wasn’t at all skeptical that it could cut the burlap but I was still blown away at just how easily it cut the burlap. In no time at all I had a perfect burlap bunny!
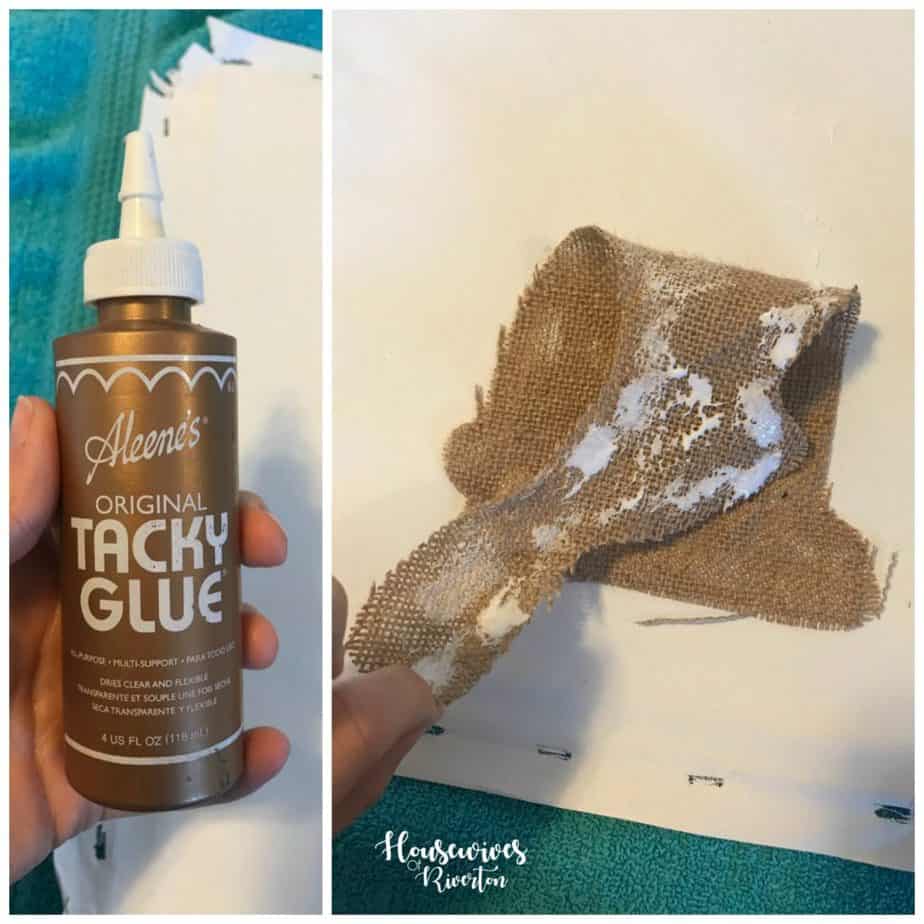 I used Aleene’s Original Tacky Glue to attach the burlap bunny to the canvas. I used a foam brush to dab it to the back of the burlap bunny. Anywhere the burlap pulled away along the edges I just dabbed a little of the glue to the canvas and pushed the piece into it, worked like a charm.
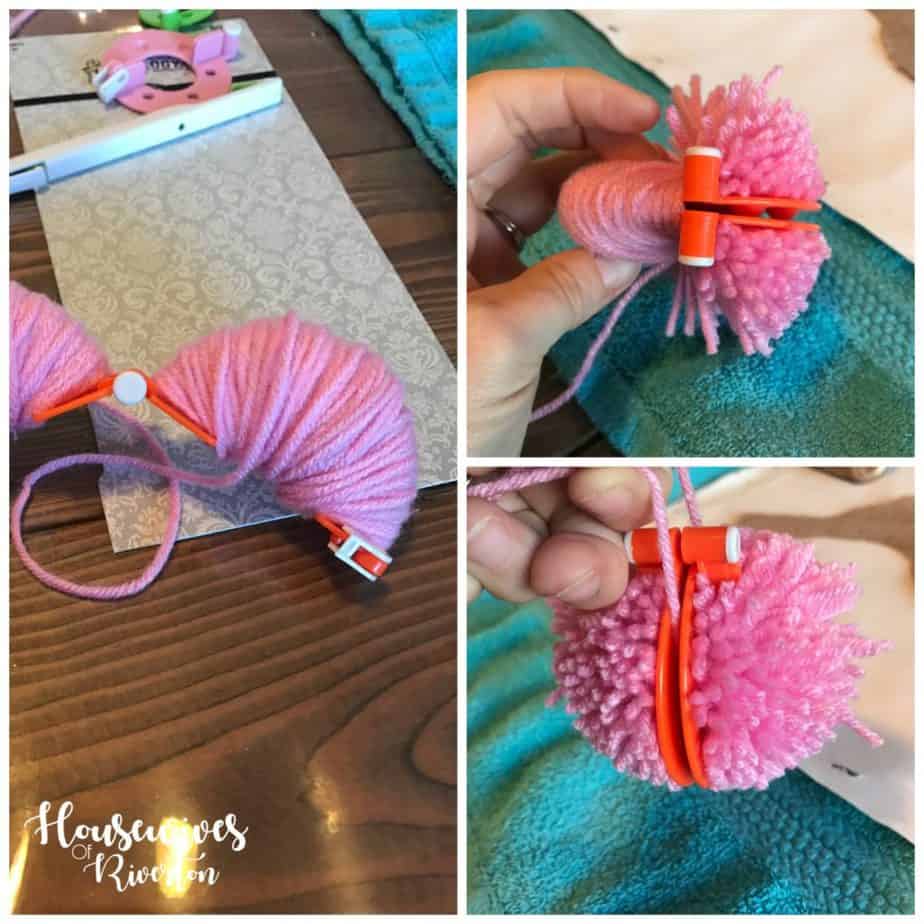 Next step is to create the pom pom bunny tail. I used this style of pom pom maker and it made the process so quick and easy. I wasn’t sure which size I would need so I tried the two middle pom pom makers. They are quite addicting to make, they come together so fast I had them done before I knew it.
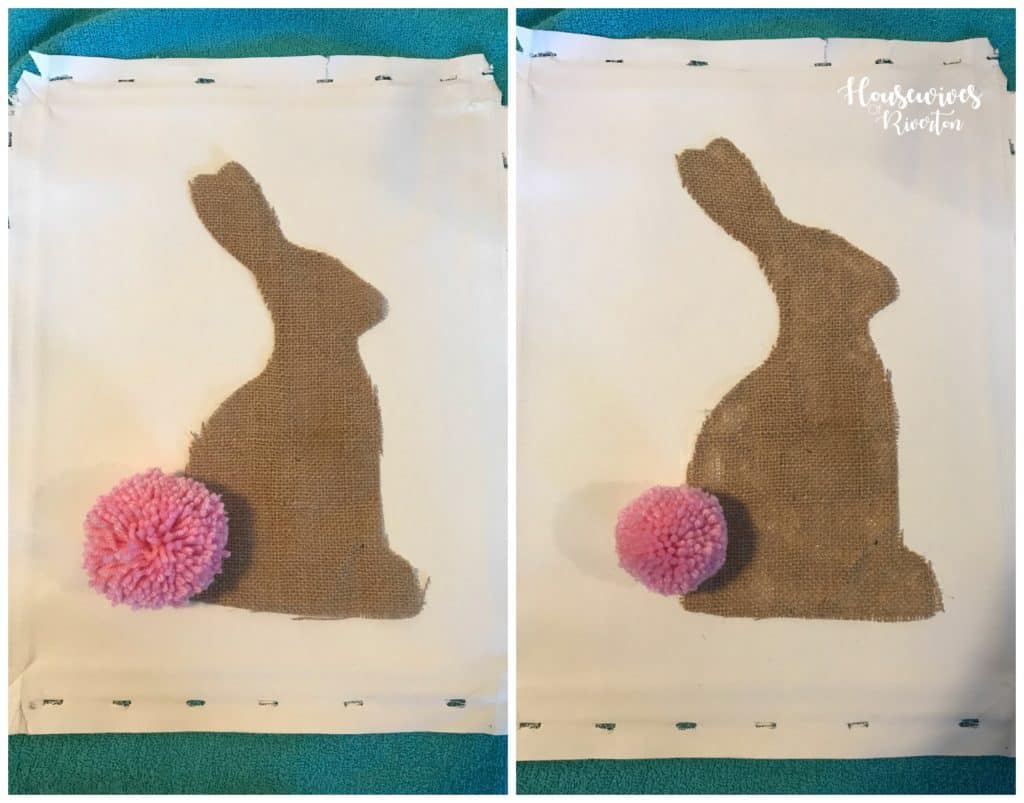 Once I had the two different sizes made I decided the smaller pom pom was the better size for this project. After I had decided on the size I trimmed one side down so I could adhere the pom pom tail flat to the canvas using a hot glue gun. Then once everything was dried I attached the canvas back to the frame.
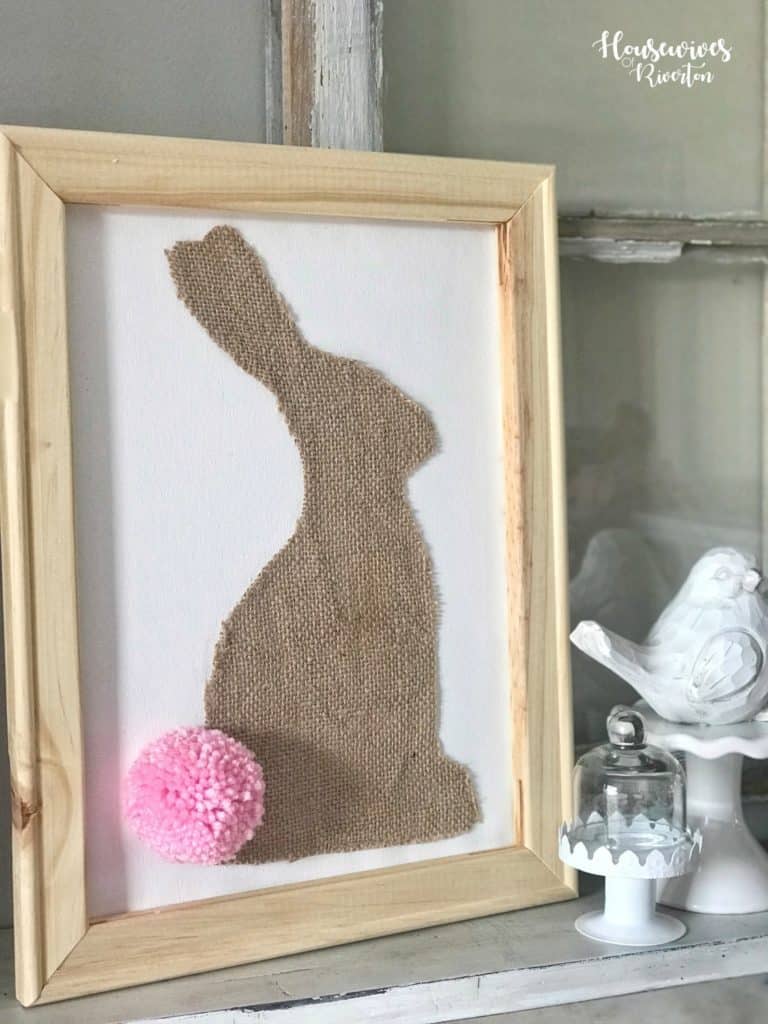
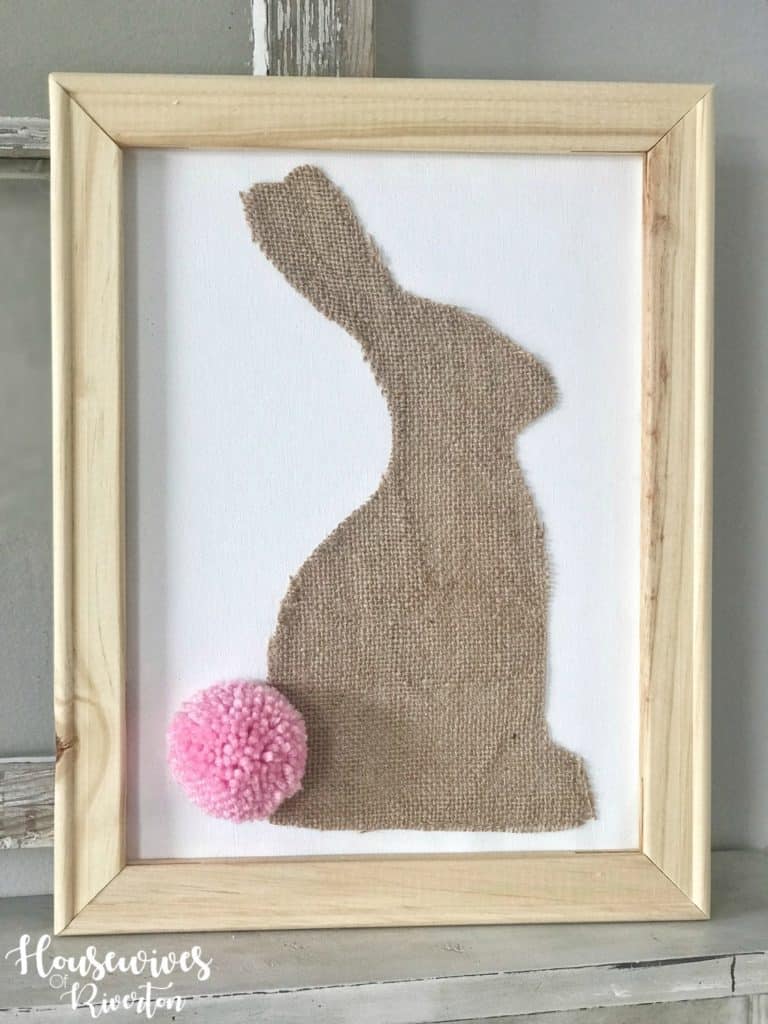 I decided for this project I really liked the frame left natural. It feels perfect for spring and Easter!
Now you have to tell me, will you be making a burlap bunny reverse canvas yourself? If you like this project you’re going to love seeing the rest of the burlap Cricut projects our team made this month!
[inlinkz_linkup id=771746 mode=1]
- Bringing Home Baby Chicks - March 11, 2025
- Is RootsTech for Moms? - February 23, 2024
- How to Get Oil Stains Out of Clothes - May 5, 2023


[…] you how to use it but it makes making yarn pom poms SO easy! Thanks to my sweet friend Jenn from Housewives of Riverton for the […]
[…] out your design using this cut file. Jenn did a great post that you can find here that shows the step by step for preparing your reverse canvas. Just follow those steps and you […]