This post may contain affiliate links. If you purchase something through any link, we may receive a small commission at no extra charge to you. Supplies used may be given to us free of charge, all projects and opinions are my own.
Monday morning EARLY EARLY (like 2:30am early) a website I love (groopdealz) posted a darling little burlap banner to their facebook page.
It was a great deal and for a minute I thought about just buying it, but then I got my head back into the right frame of mind and reminded myself that I had EVERYTHING to make it which would mean it was free. Free is even better than a great deal (and everyone who knows me knows I really dislike paying for shipping) so I decided to just make it.
I can’t link to the image and the business (boutique goods) that makes them requires a business license to get into so I can only show you the one I made.
I love it. It took very little time to make especially since I figured out how to cut freezer paper on my cricut machine.
It was my little reward to myself for tackling my craft closet.
Like I said, it took very little time to make and was really easy and fun.
I used my cricut to cut out a banner shape the size I wanted onto cardstock and then used it as a template to trace with marker onto the burlap. You could easily freehand the banner pieces however you wanted them to be. A cricut is not required to make this project.
I don’t have a picture of the cutting the burlap out step but I will tell you this, pinning is your friend. The burlap will stretch and move if you don’t make sure and pin it well.
Once I had all my pieces cut out I started cutting out my letters onto the freezer paper. I did use my cricut to do this but I have also done it free hand with scissors and with an exacto knife. It can be done.
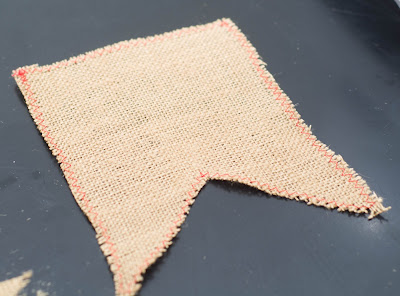
Before I did any painting I broke out my sewing machine and red thread and did a zigzag stitch all the way around each of the banner pieces. IF I had had 4 spools of red thread I would have used my surger but I don’t so the zigzag stitch worked. I set my width as wide as it would go and put the length to the longest it would go. It really helped to keep the burlap from stretching too much.
Once I had all my pieces sewn around the edges I ironed the freezer paper to the burlap.
I will warn you the freezer paper does not adhere as well to the burlap as it does other surfaces (as you would probably expect) but if you dab the paint on straight up and down and not brush it on it works great. I didn’t want the paint to bleed so I removed the freezer paper as soon as I was done putting the paint on (before it dried) and am very happy with the results.
I used my red/white bakers twine across the back to put it all together and then used my stapler to attach the bakers twine.
I then used some different valentine ribbons I had on hand to dress it up even more and I am loving my fun new banner! I even made one for my sister in law for her birthday. I love projects that are fun to do. I didn’t even mind making 2 of them!
- The Best Vinegar Paintbrush Cleaner Method - May 6, 2023
- 10 Fun and Easy St. Patrick’s Day Games - March 1, 2023
- Valentine’s Day Felt Wreath DIY - January 20, 2023


Ooh I want one! I am so not crafty! I will trade you something sweet! Lol. I would love to win one of these!
~Amber @ Dessert Now, Dinner Later!
http://dessertnowdinnerlater.blogspot.com/
be sure to come back tomorrow then because the banner won’t be the only thing included in the give away 😀
This comment has been removed by the author.
Hi Barbara! Thanks so much for following us. This is the post that is the tutorial for the banner. Make sure you go to the giveaway and post that you’re following our blog and following us on Pinterest 😀 Thanks so much and GOOD LUCK!
~Jenn
This comment has been removed by the author.
[…] I love love love Valentine’s Day and everything about it. One of my favorite projects is this Be Mine Banner and this Button Heart Sign, I look forward to putting them up each year. You can see why I love […]