This post may contain affiliate links. If you purchase something through any link, we may receive a small commission at no extra charge to you. Supplies used may be given to us free of charge, all projects and opinions are my own.
I shared this craft last year but I just love it so I wanted to share it again. It is really simple, you could get it done in a day and they could still have all of December to play with it.
I have done my best to get the images out to everyone who asked for them, if I missed you please let me know, I have them ready and available to email quickly.
Merry 1st day of December!!!
Since I got married 14 years ago my wonderful in-laws have given me and my husband pieces to a beautiful nativity set. It is the Fontanini brand, I love it because even though it looks beautiful it is not breakable. That has become quite the blessing with having 7 kids (as I’m sure you can imagine).
Although it is durable it is still *mine* and I prefer the kids not play with it. I’ve tried to encourage them leaving it alone by having their own sets to play with.
Years ago for their birthday my daughter got the adorable Fisher Price Little People Nativity. I loved that they had their own pieces to move around and play with as we talked about the birth of Christ.
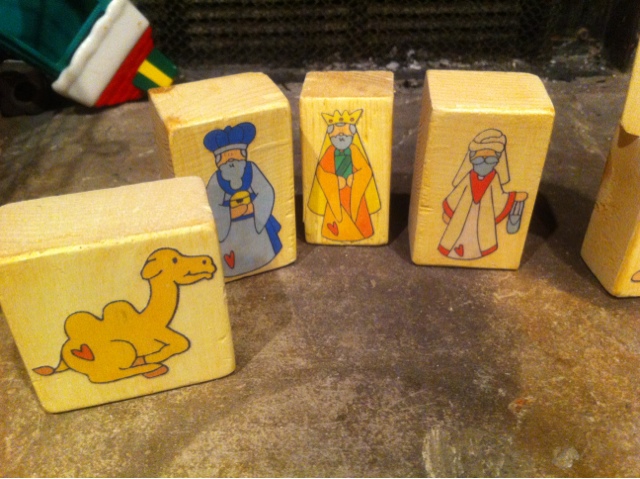
As time went on and more kids came 1 set just wasn’t enough. I saw a small picture once a few years ago of a cute idea to make my own child friendly nativity and so with a little work (searching for images and then even manipulating them for my needs) I created another nativity for the kids. I think it’s played with even more than the little people one.
The cost was very minimal since I had the wood scraps on hand and then it only required a printer, paper, the blocks and mod podge.
I printed the images out on the quick print so there wouldn’t be excessive ink when I put mod podge on it.
Step 1 – print out the images.
Step 2 – figure out what size (based on the images) I needed to cut my blocks.
Step 3 – cut out all the images.
Step 4 – paint the blocks.
Step 5 – stain the edges.
Step 6 – use the mod podge to stick the images on the blocks
Step 7 – mod podge over the whole thing to seal the paper down.
Step 8 – have fun with your new nativity!
- The Best Vinegar Paintbrush Cleaner Method - May 6, 2023
- 10 Fun and Easy St. Patrick’s Day Games - March 1, 2023
- Valentine’s Day Felt Wreath DIY - January 20, 2023


Jenn, I would love this. I have a 16 mth boy who would love this. Is the little people one still available.
I emailed you the files and also gave you the link for where you can purchase the little people one. Let me know if it doesn’t come through 🙂
I just found this nativity. I would love the files if you still have them. They are adorable!
I do have them – sorry I just found this message. If you’d like the file I need your email address. Thanks so much for stopping by.
I would love the file, these are great! I have a two year old and he will love them. Thanks for sharing! [email protected] is my email.
I would love the files for these blocks,[email protected] what a cute creative gift this would make.
This is such a cute idea, and so easy. Could I please have the file sent to me at [email protected]? Thank you for sharing this idea!
[…] family tree and ornaments. Be sure to check out these other fun, kid friendly Christmas projects! Kids Block Nativity Santa Beard Advent Calendar What is your biggest hurdle when it comes to Christmas with small […]