This post may contain affiliate links. If you purchase something through any link, we may receive a small commission at no extra charge to you. Supplies used may be given to us free of charge, all projects and opinions are my own.
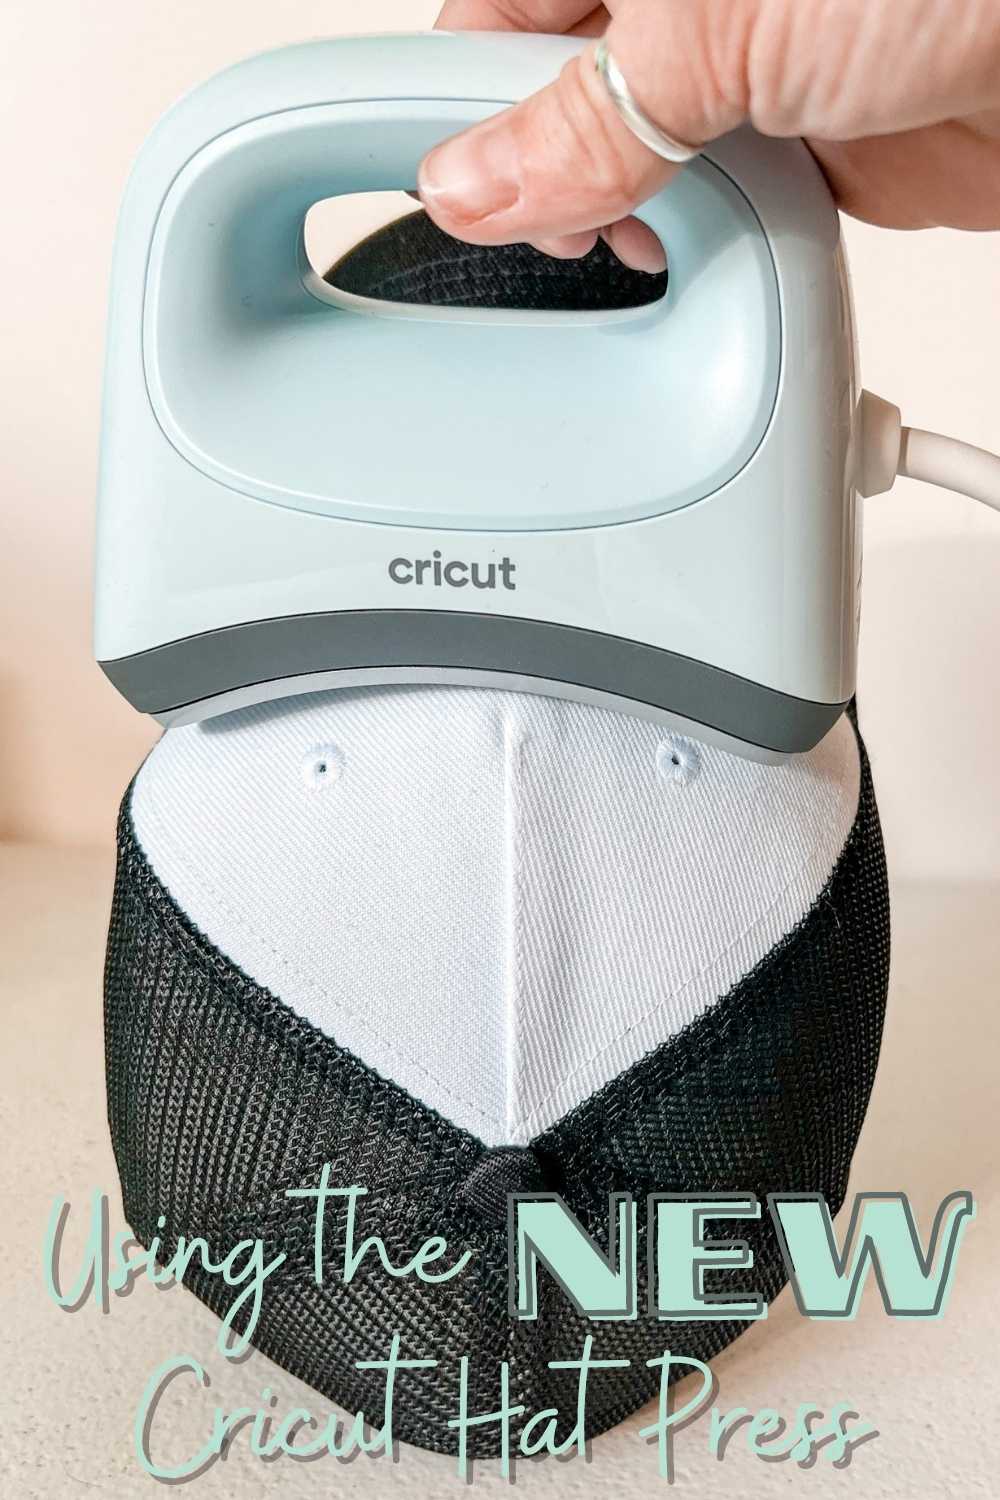
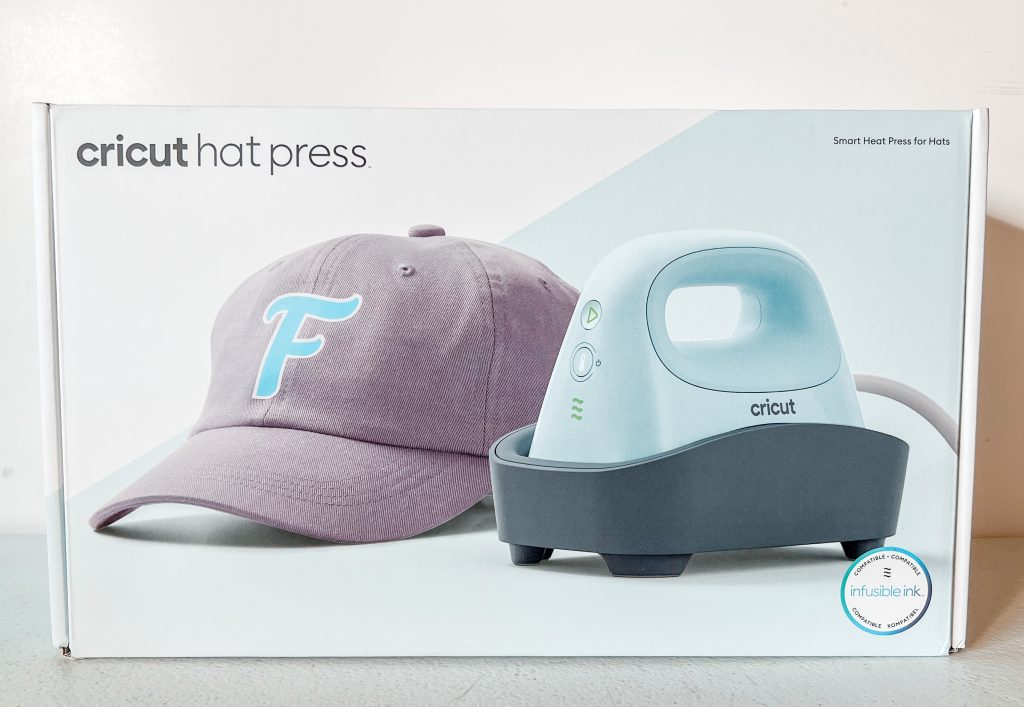
Cricut recently launched a few new products and one of them is the new Cricut Hat Press. If you or someone you know loves hats you need this machine. From the included Cricut Hat Pressing Form to the curved heat plate to the detailed instructions in the new Cricut Heat app the Cricut Hat Press sets you up for success right out of the box!
*Cricut did send me this Hat Press however they are not paying me for this post.
Does Cricut make a Hat Press?
Until Cricut released this new hat press in March they have not had a press or form specific for making hats. We were all figuring out ways to make our own custom hats using the Cricut EasyPress Mini or other brands of hat presses. That’s why, as a lover of a great hat I was so excited about this announcement.
What is included with your Cricut Hat Press?
Are you ready to see what’s inside the box? Let’s open up the Hat Press and see what’s included.
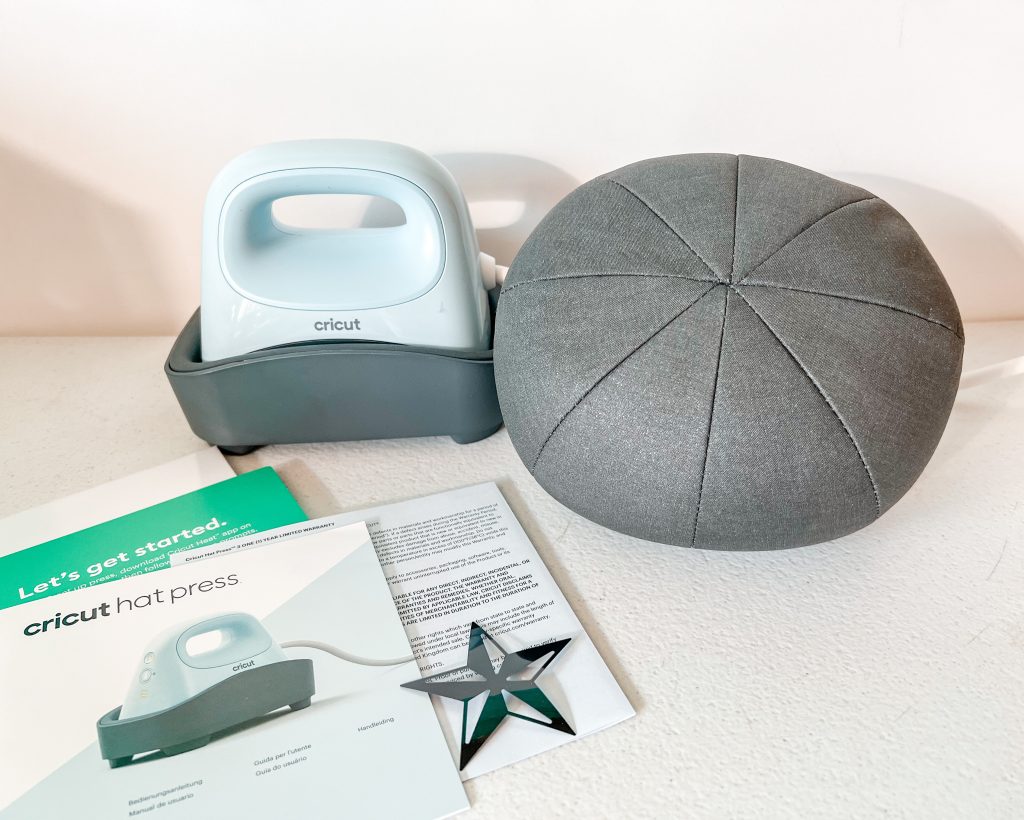
Inside the Cricut Hat Press box you’ll find the following:
Cricut Hat Press
Hat Press Form
Safety Base
Strong Heat Resistant Tape (just realized that isn’t in the above photo- it is included)
Start Guide
Safety/Warning Instructions
Instruction Manual
Precut and weeded Iron-on Design
Hat Form Allergy Warning
Be aware that there is an allergy warning with the Cricut Hat Press. That’s because Cricut used walnut shells to create the firm surface of the hat press form. I don’t personally think the warning on the outside of the box is noticeable enough since I don’t think people buying craft supplies are considering a walnut allergy but it is there. But the warning on the form itself is very noticeable. The form is completely sealed in plastic inside the box. Just something to be aware of.
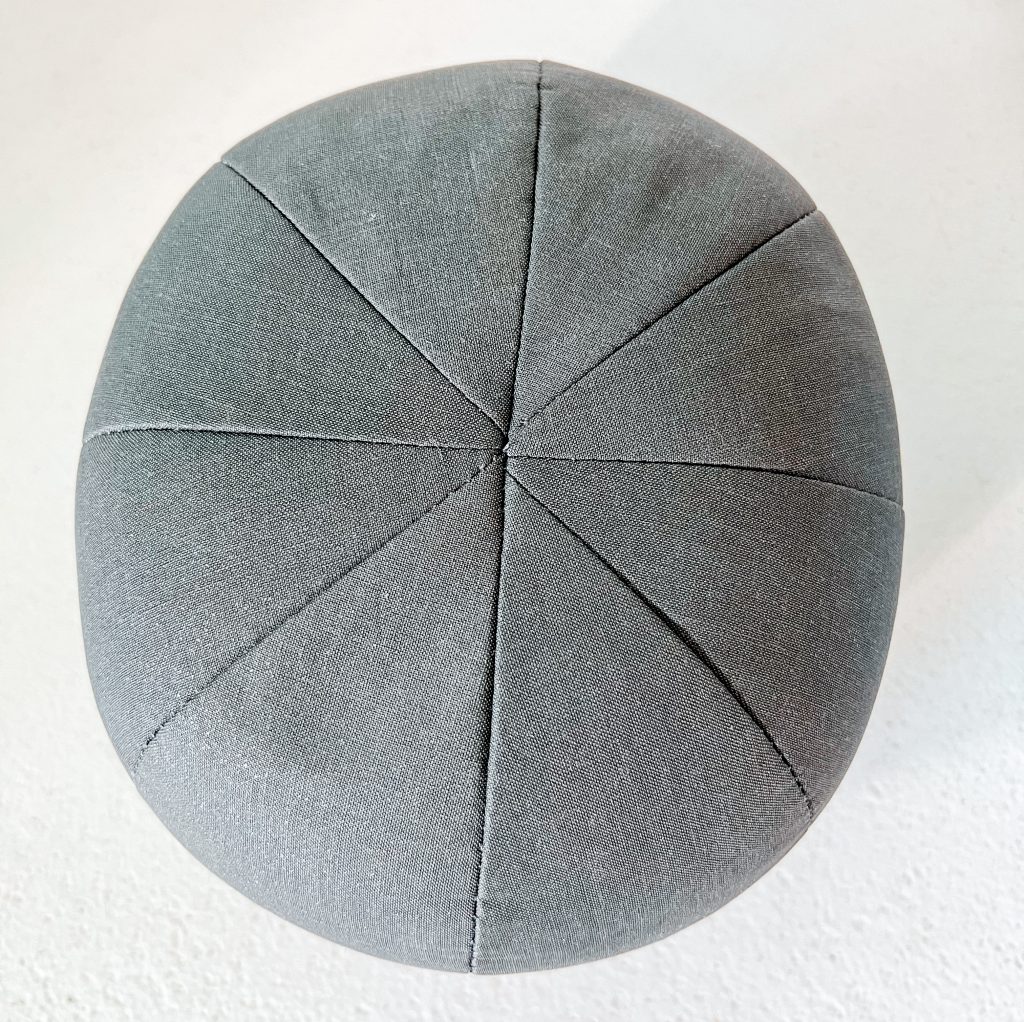
The forms job is to go inside your hat so you have something to press against. Since walnut shells are firm and hold heat well they are an ideal pressing surface.
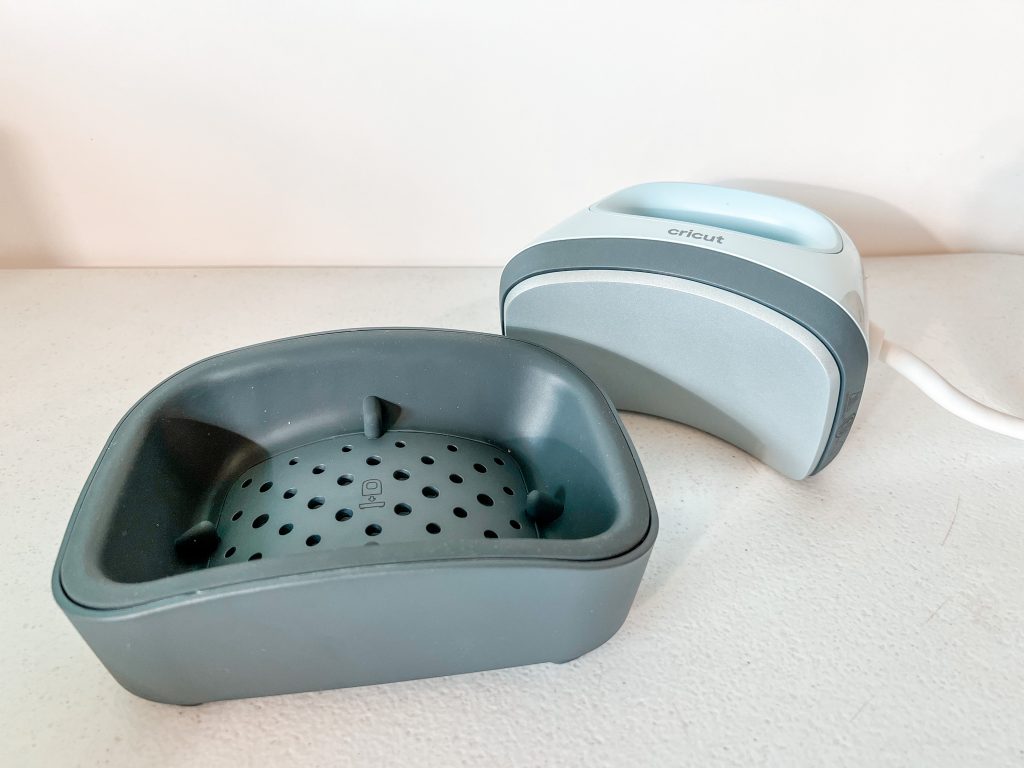
Hat Press Close Up
Let’s take a closer look at the Hat Press itself. See how the ceramic heat plate has a curved surface? This makes the pressing process easier because you get the best results by having your whole image being pressed at the same time.
Always use the included base for holding your hat press while not in use or while heating up. I love these safety-conscious features that limit your chance of being burned by the heat plate. See how the base comes up higher than the heat plate all the way around? So smart!
What do the Hat Press Buttons do?
There aren’t a lot of buttons on the Cricut Hat Press, 2 to be exact, which is great. Not too many steps to get crafting.
The bottom button controls both your power and heat settings. You’ll first press the power button to turn your hat press on and then press it again to pick your temp settings. There are three different temperature settings and the lines at the bottom represent the levels of heat. If there are no lines lit up, your machine is in standby mode. Bottom bar is low, middle bar is medium, and top bar is high temperature. When the lights on the press are green it is at the correct temperature. If the lights are orange your hat press is still warming up.
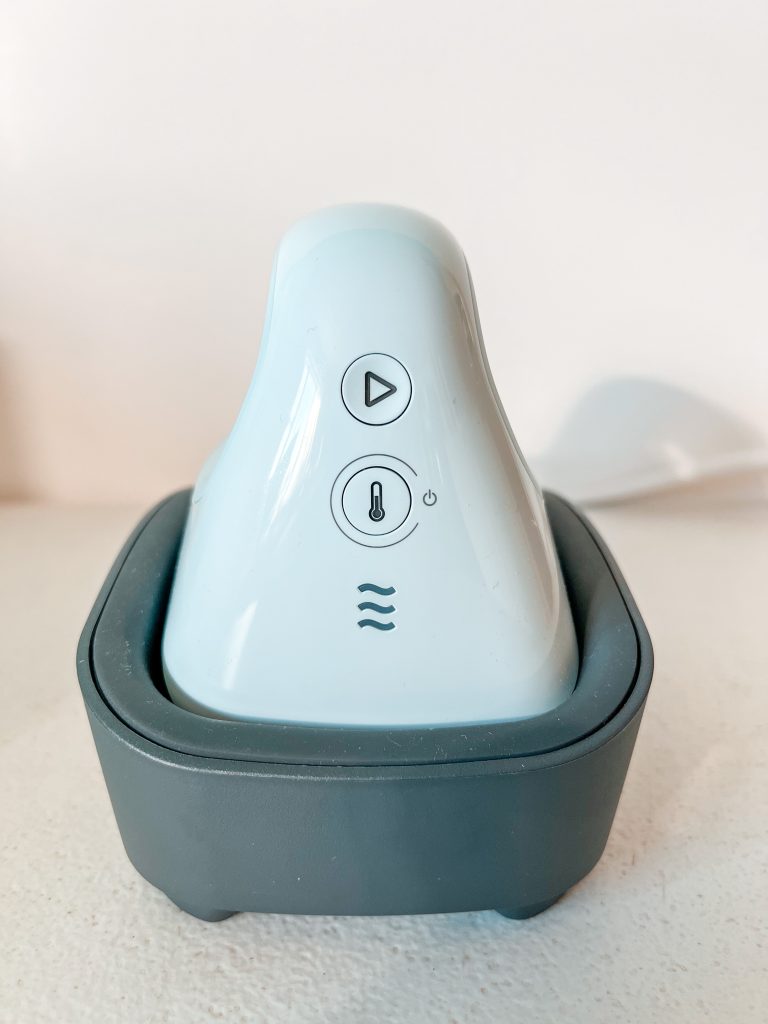
The top button is the play button, or go button. Press this button when you’re ready to start the timer. You may have noticed there isn’t a timer button. You may also be asking yourself how you’re supposed to set a timer if there isn’t a timer button.
The Cricut Hat Press actually works with the new Cricut Heat App! We’ll dive deeper into the app down below.
When you’re done crafting just press the power button and hold it until it turns off. And no worries! If you forget – it does have an auto-off feature. After 13 minutes of inactivity your hat press will turn off (it will give you a warning beep before it turns off). This is just another of the great safety features the Cricut Hat Press has.
Ready to use your Hat Press for the First Time?
Before you can use your Cricut Hat Press you need to activate it. To do that you will need a mobile device (smartphone or tablet) that can connect to the free Cricut Heat App (available in the apple app store and for your android device). The Heat app will allow you to activate your hat press.

Plug in your hat press and open up the heat app. The app is free to use but you will need to log in with your Cricut account. If you don’t already have one you can create one, also for free. Click setup in the app to begin the activation process. You will need to turn on your hat press so the app can find it (yay for wireless technology) but the app will walk you through all the steps.
The app will talk to your hat press via bluetooth connectivity so there are no additional cords or ports on the hat press to connect. Allow the app to connect via bluetooth and once it finds your press select connect!
Once you’re connected the registration process will begin. It will register your hat press to whichever email address you used to log in. Just follow the steps in the app and click activate. Your press may beep a few times as it’s activating, that is normal, just let it do its thing. Keep your mobile device close to your hat press with the app open and the hat press turned on while it’s activating.
The activation process can take a few minutes. Once it’s done you’ll hear a beep and you should see SUCCESS on the app. Now that it’s activated we can get crafting!
What Hats should I use?
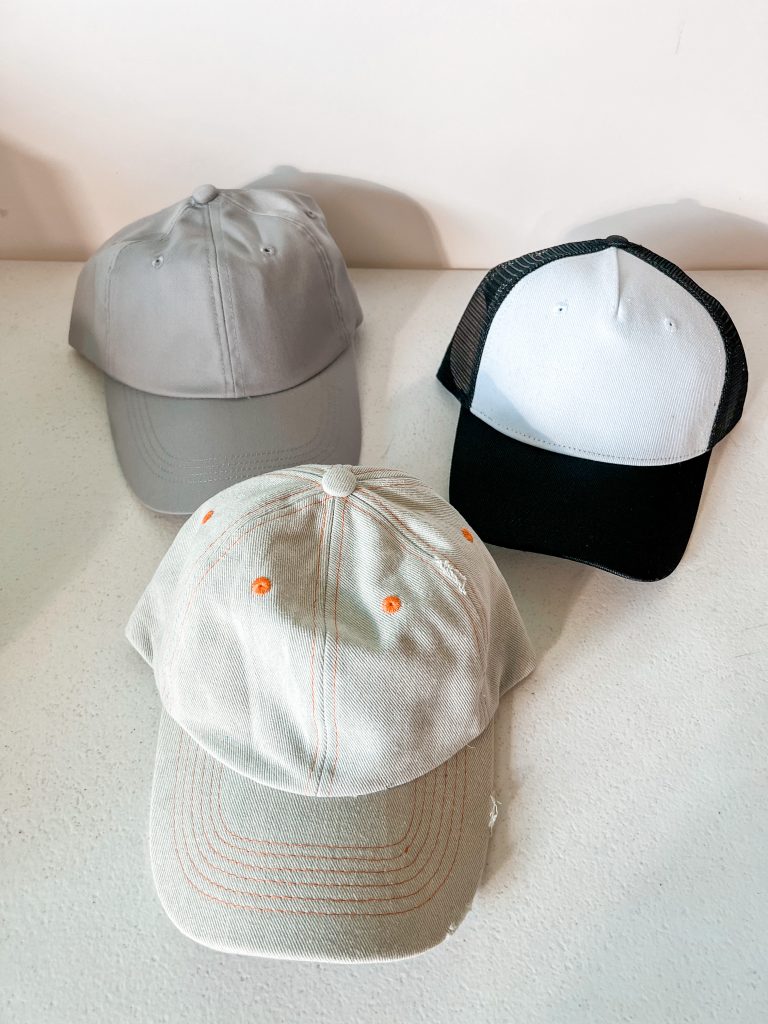
This is where the awesome news comes in! You can use any hat with the Cricut Hat Press that will fit the included form. The form lines up with the curved surface of the hat press to give you a perfect press each time. You can use trucker hats, bucket hats, a ball cap…heck you can even customize sun hats and visors with the Cricut Hat Press.
Cricut came out with their own line of hats when they released the Cricut Hat Press. A trucker hat and a regular ball cap (the black/white and grey hats above). On the Cricut trucker hat the front is polyester so you can use sublimation products or Infusible Ink on the front. Oh, did I forget to mention that? The Cricut Hat Press gets hot enough that you can do Infusible Ink and sublimation on it! Make sure you’re using a sublimation compatible hat for those projects.
Something else to note
Cricut does not recommend adding sublimation or Infusible Ink to the bill of the hat. The high heat will likely distort the bill.
Notice that the sides and back of the hat on the trucker hat is mesh – don’t use your hat press (or any press) to add something to the mesh – direct heat will likely melt and then you will be sad.
The grey ball cap that Cricut came out with has a high enough polyester count that you can use sublimation or Infusible Ink on it and you can use it all the way around the hat. Just avoid the bill.
If you really want to add something to the bill of your hat use regular HTV.
Design Sizing
Cricut recommends a maximum 2.25 inches high by 4.25 inches wide for your design. This is due to the size of the hat press and the fact that you have to move it back and forth in constant motion when pressing. It is also recommended that you place your design no closer than half an inch from the bill of the hat. Just a couple things to remember when picking a design. We all know I like to test limits though sooo I did with my first hat and we’ll talk about that below.
If you’re trying to get a good visual of how your design will look make sure you have a flexible measuring tape. You can find them in the sewing section of your craft store or you may have one of the Cricut ones that came with their sewing set. A straight ruler makes it hard to really see where the image will hit when it is curved around the front of the hat. With your hat blank and flexible ruler it’s much easier to get an idea of what size you want your design and how it will look once applied.
How do you Heat Press a Hat?
We’re going to use the Cricut Hat Press and Heat app to do that right now!
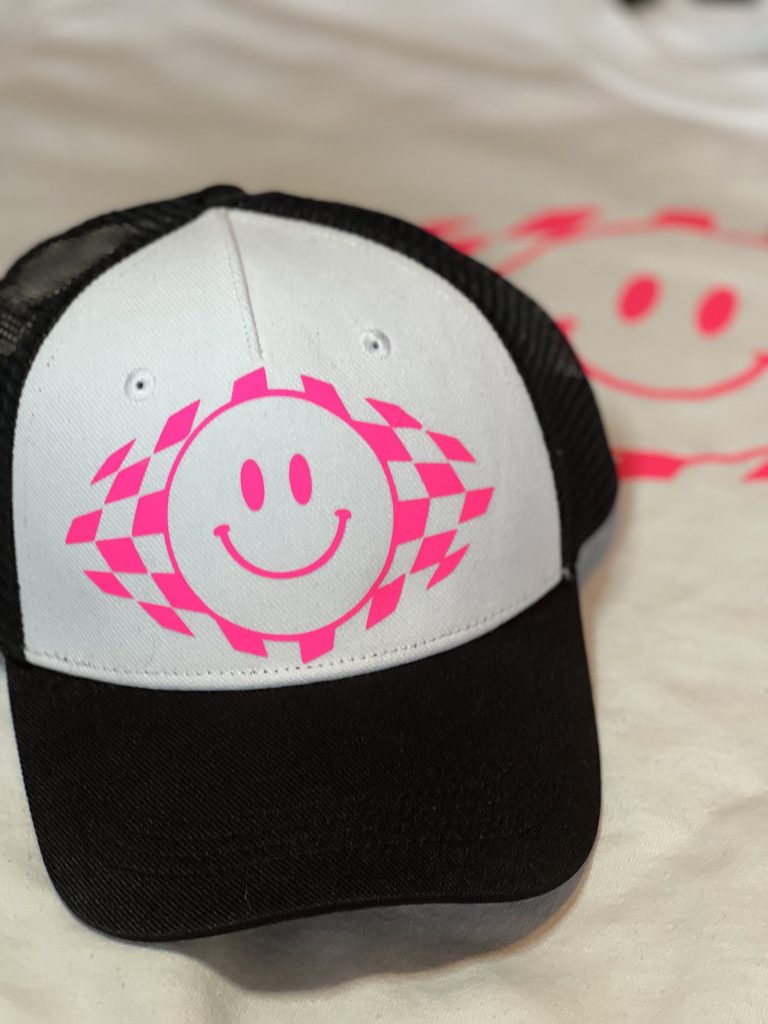
For my first hat I am using the Cricut Trucker Hat as my base material and heat transfer vinyl (HTV). I’ve recently become slightly obsessed with the neon colors popping up everywhere. I created this image in Design Space for a sweatshirt and thought it would be so fun on a hat as well. As you can see, my image is slightly larger than the recommended Cricut sizing and there are some things to note about that as we go.

I have all my supplies together:
Hat Form
Strong Heat-resistant Tape
Lint Roller
Cricut Heat App on my Mobile Device
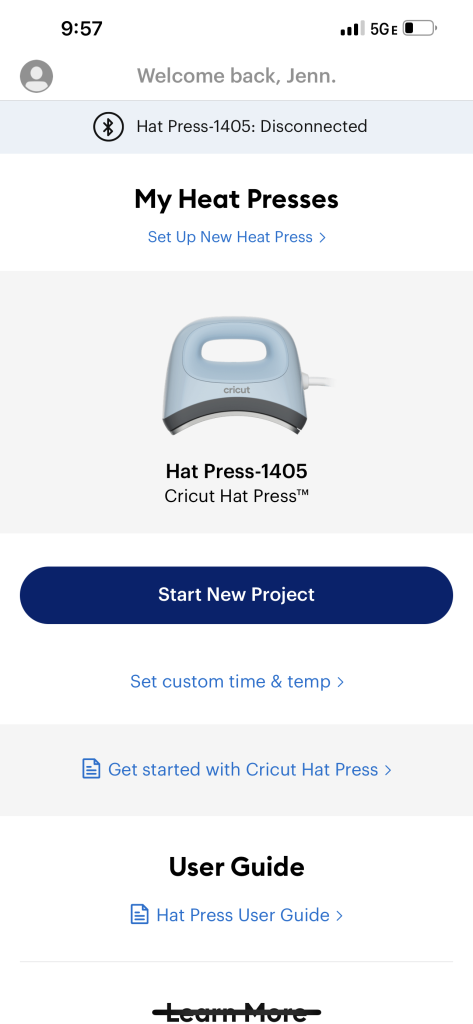
Open the Heat app on your mobile device, select hat press, and then click “start new project”
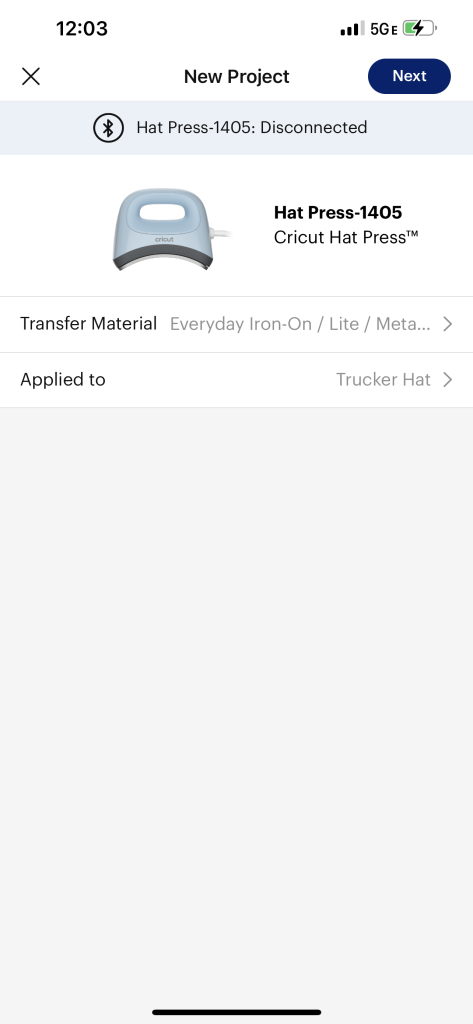
On the next screen you will select your heat transfer materials and what you will be applying it to.
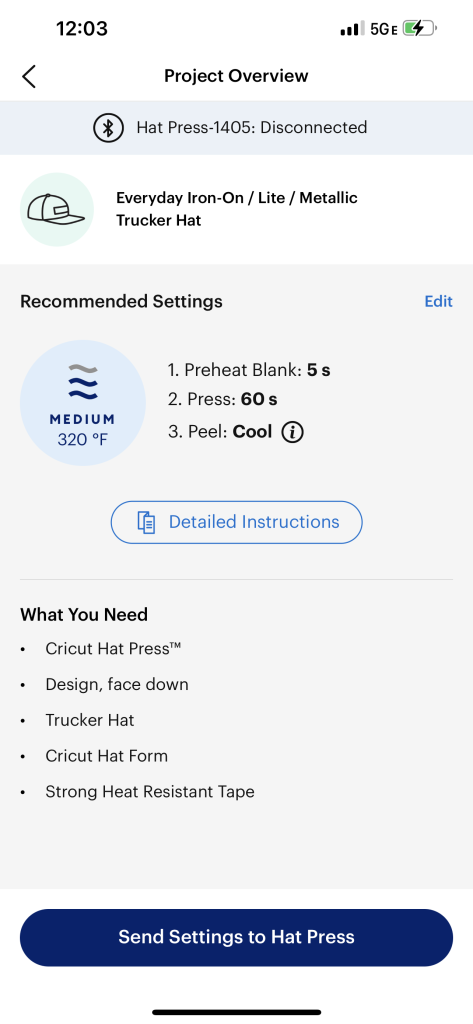
Make sure your hat press is on and connected to the heat app. Once it is connected you can click “send settings to hat press”. Your app will now send the precise time and heat settings right to your hat press and your hat press will begin warming up.
Please note that when using the Heat App you get the exact time and exact right amount of heat for your base material and heat transfer materials. When manually using the buttons on the hat press itself you don’t get that.
How to use the Hat Form
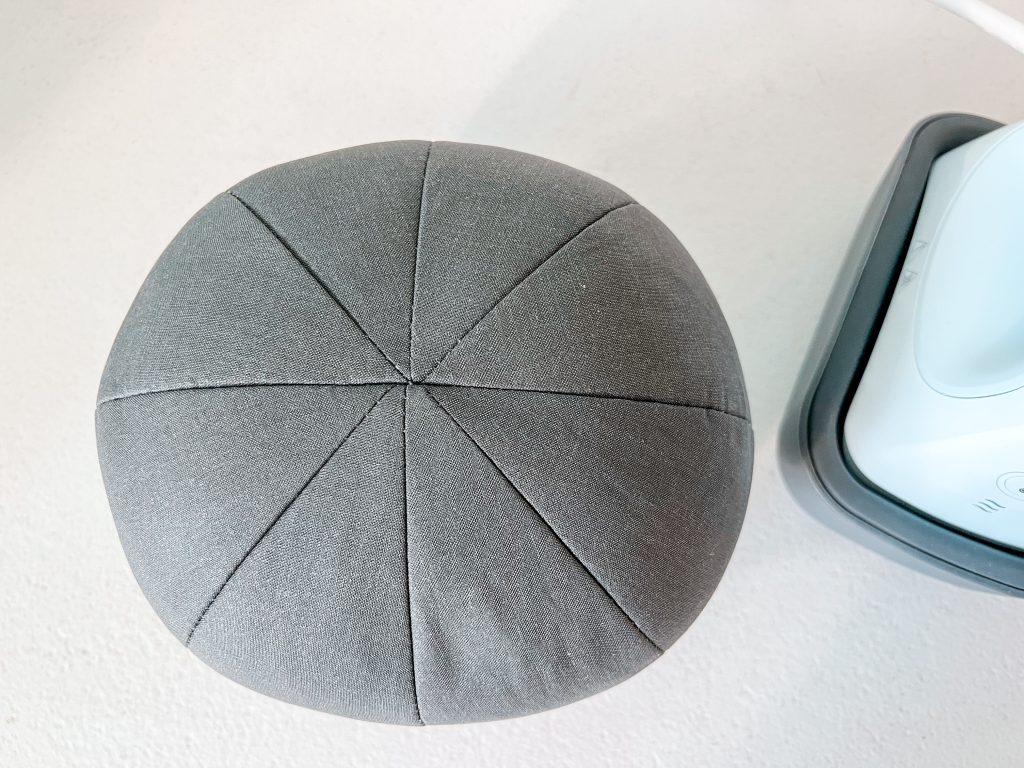
One of the things that makes the Cricut Hat Press the perfect heat press for hats is the hat form itself. The form holds your hat while you’re pressing and gives you a nice firm surface to press against. The hat form is relatively heavy and the top is smooth and rounded to fit the hat press perfectly.
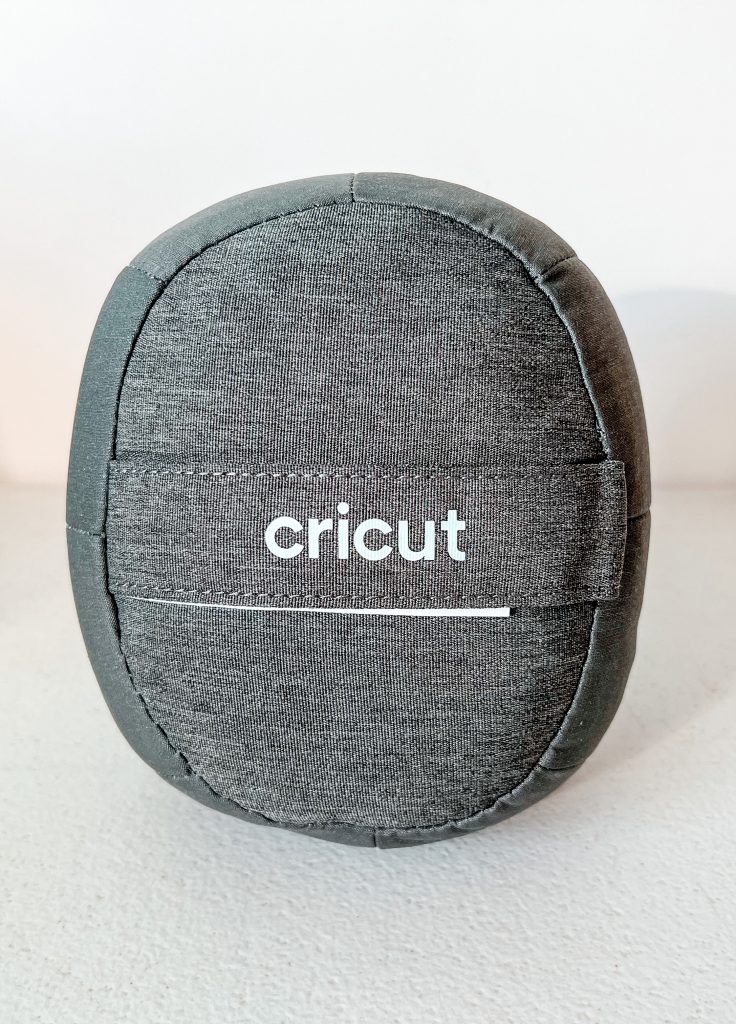
On the bottom of the hat form is a handle. This is great for a few reasons. 1. It gives you something to hold on to while carrying the hat form. 2. It is something to hold on to while putting the form inside the hat. 3. It gives you something to hold on to while you’re pressing the hat. The bottom of the hat form is also flat which is great so you don’t have to worry about your form rolling off the table.
Before adding your hat to the hat form make sure you remove anything (cardboard, stickers, etc) from the inside of your hat. Then flip the sweatband (if there is one) down so it’s not between the hat and the hat form.
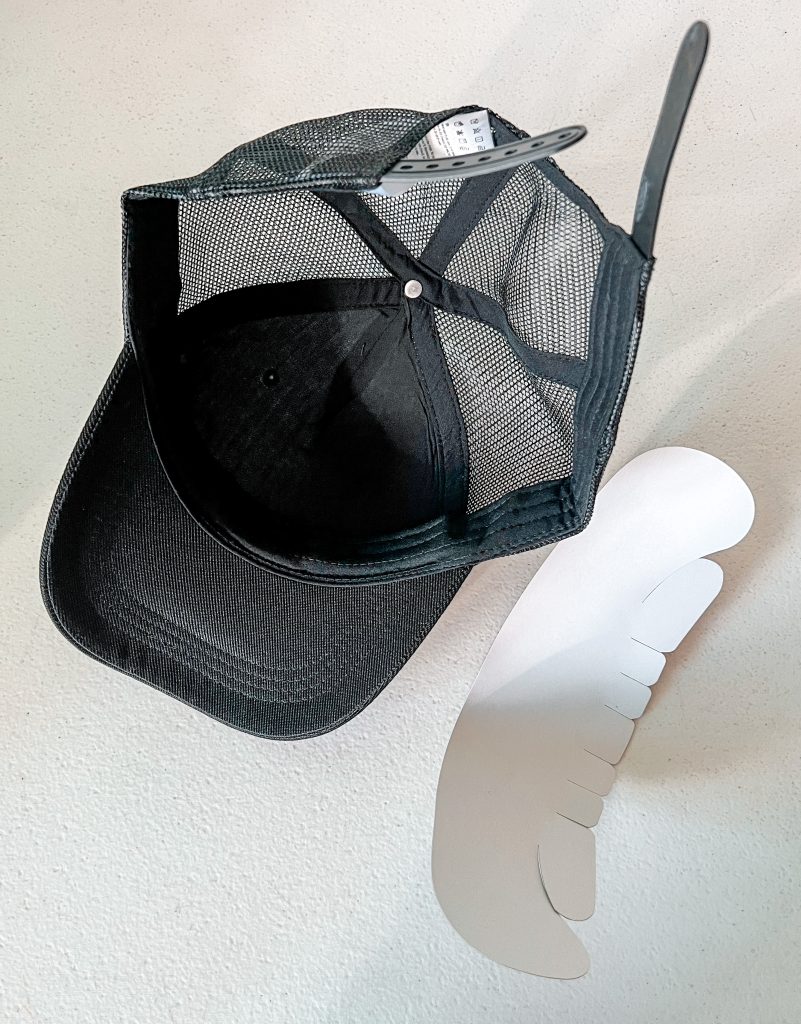
Either open up the back of your hat or, if it can’t be opened, loosen it up all the way.
Get Ready to Press
Now, work your hat onto the hat form making sure to keep the sweatband out. We don’t want anything between the hat and the hat form. Any extra ridges or lines can effect the pressing of your heat transfer material.
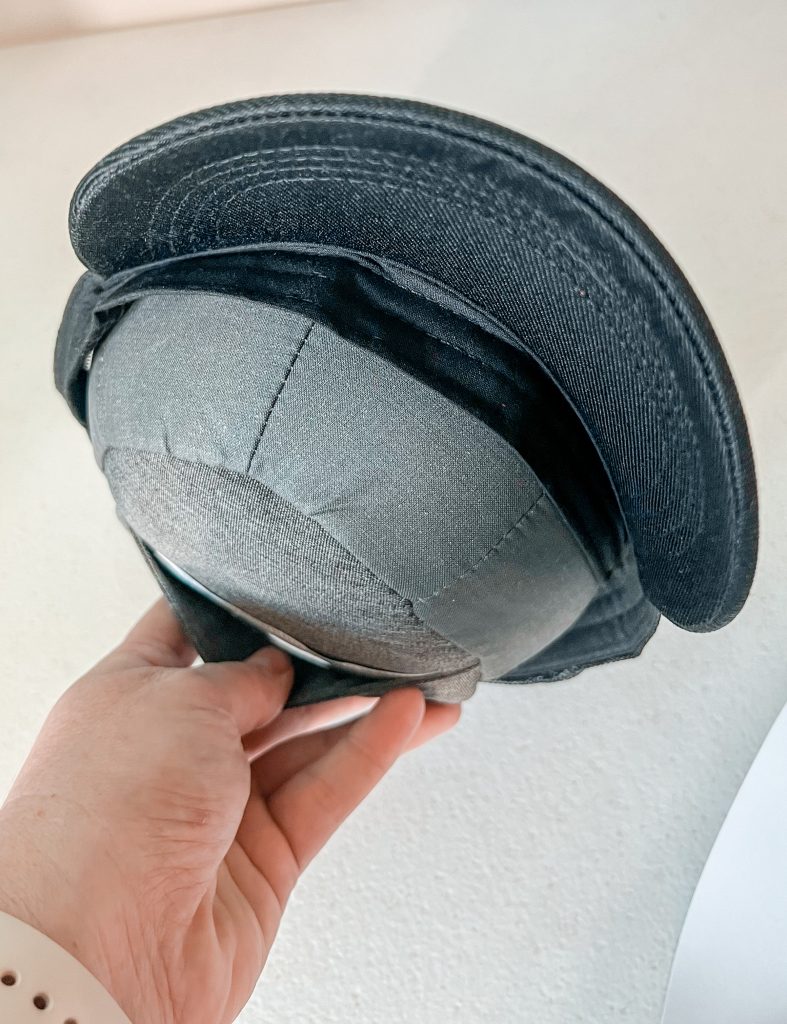
Here you can see the hat form is completely inside of the hat. Now you can tighten the back as much as possible. We want the hat as tight onto the form as possible, especially the area that you are going to press onto (for this hat it’s the front).
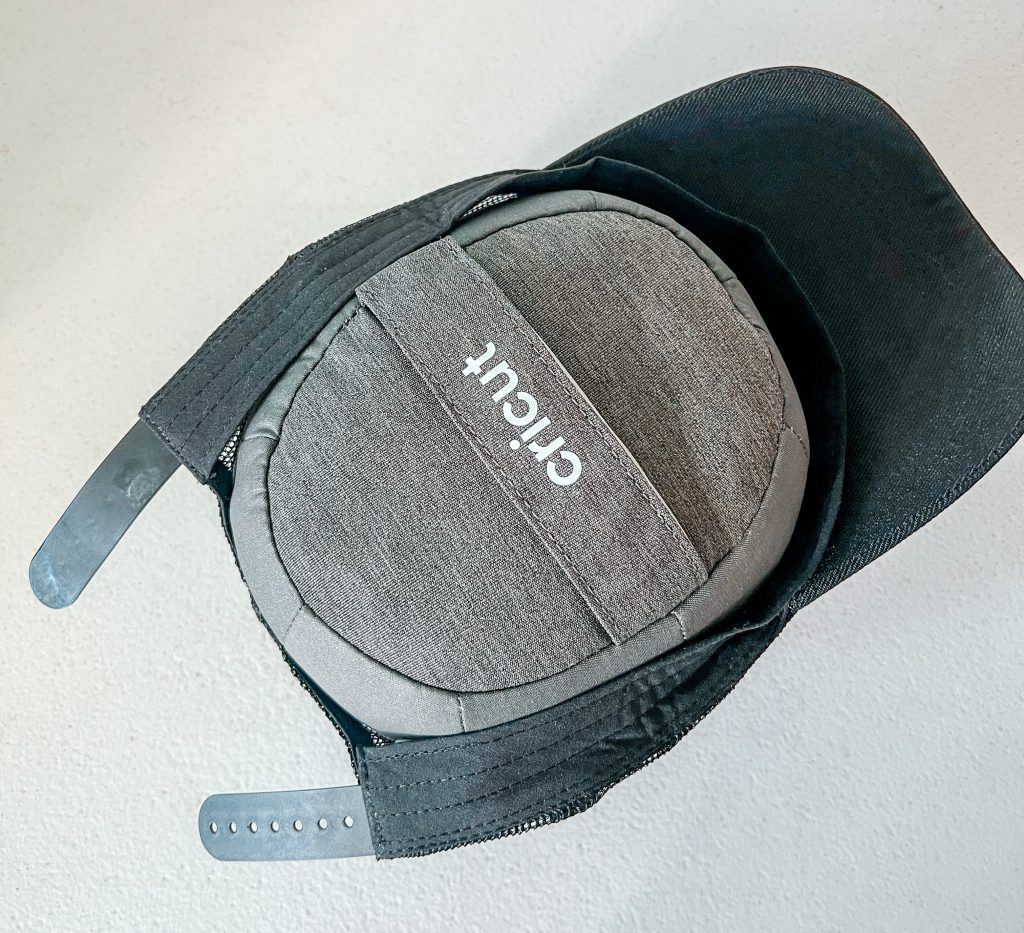
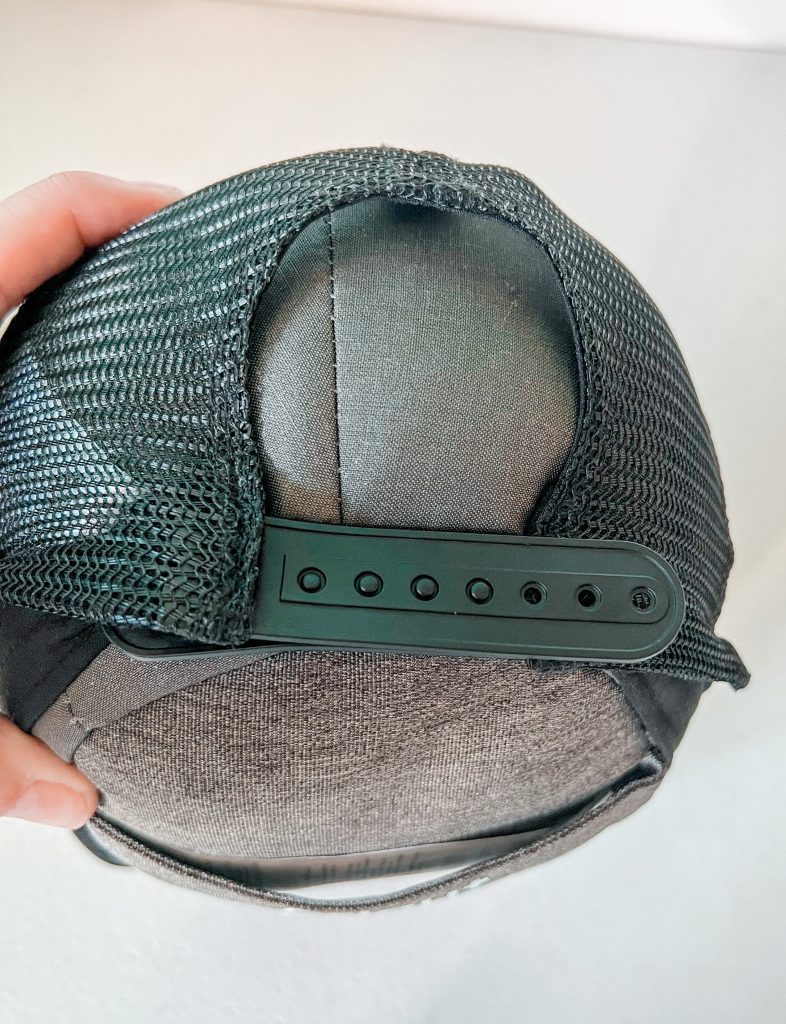
Hats like bucket hats or sun hats may not have a sweatband – in that case you don’t need to worry about flipping those out. They also often can’t be loosened or tightened. In those instances I would just make sure you’re pulling the hat as firm as you can against the hat form and holding it that way while pressing. I’m currently looking into some clips that may be a good option in these instances.
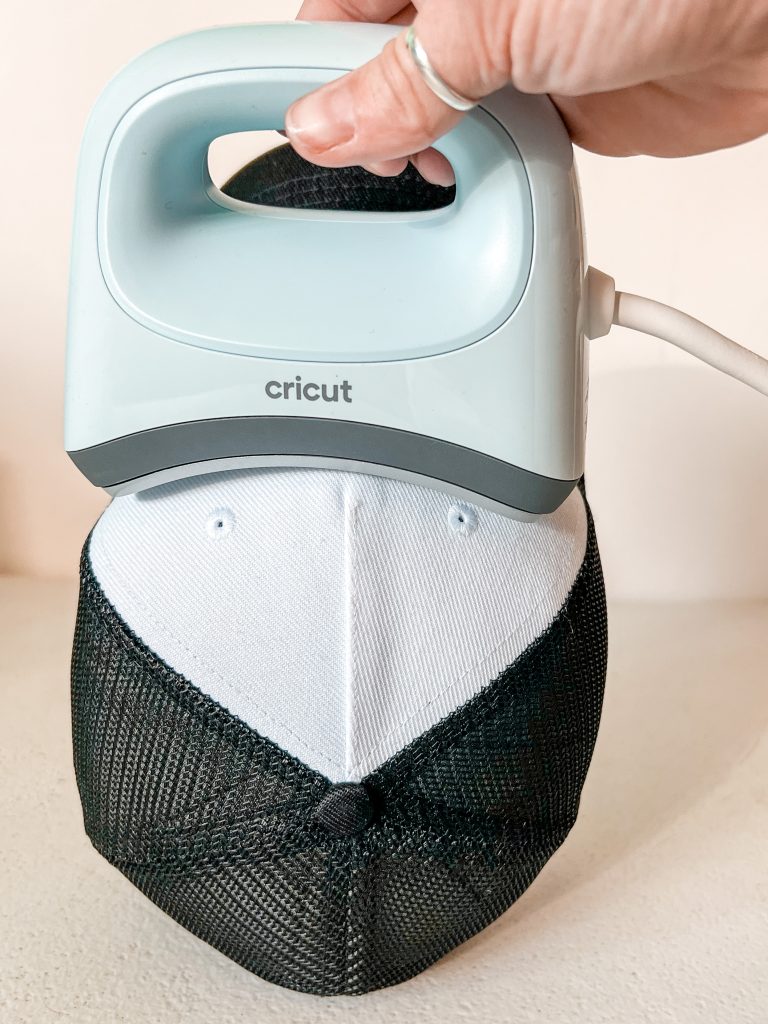
Now you can see that the hat form will stand up on your surface when it is inside your hat and the hat press curves perfectly around the hat and form.
Pressing your Hat
Now that we know all about the hat form let’s jump back into the Heat app. I love that the heat app includes step by step guidance to really help you have a worry-free experience. Click “detailed instructions” and you’ll see that the app walks you through the supplies you will need, the preheat blank instructions, and then step by step instructions for pressing and peeling.
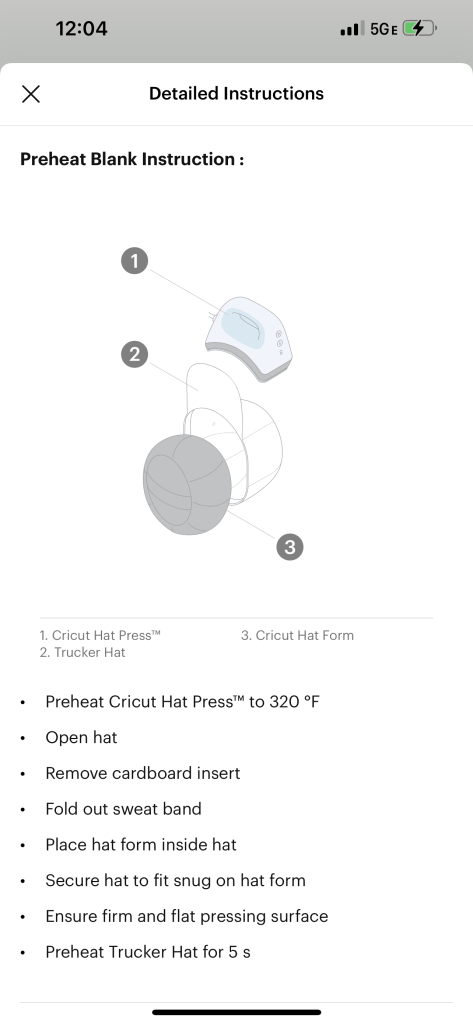
For instance with my project, for the press instructions it reminds me to place design face down with carrier sheet up. Secure with strong heat resistant tape. Hold hat form securely with one hand. Press with light pressure at 320 degrees for 60 seconds. Slowly lift press when done. Really the heat app is an excellent companion to the hat press!
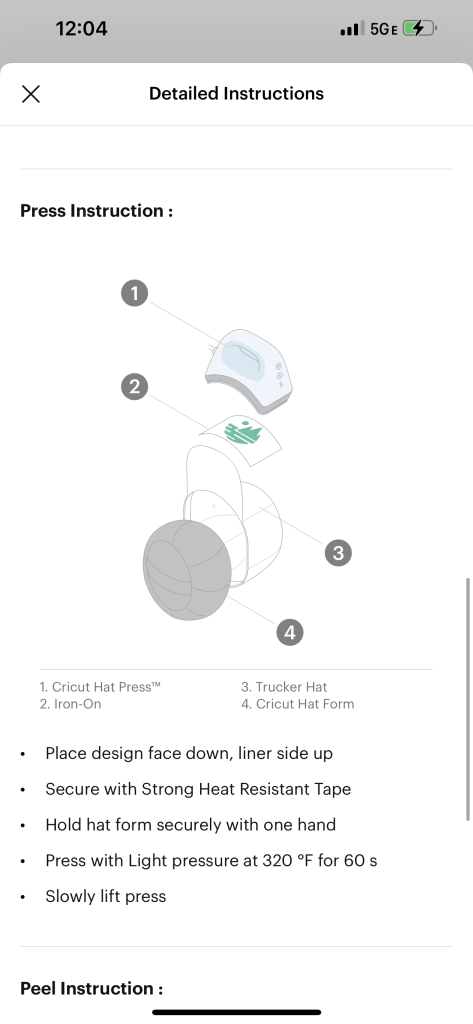
So follow the prompts in the Heat app. Preheat as instructed, press as instructed (remembering that you are supposed to continually move the press back and forth while pressing), and remove carrier sheet as instructed.
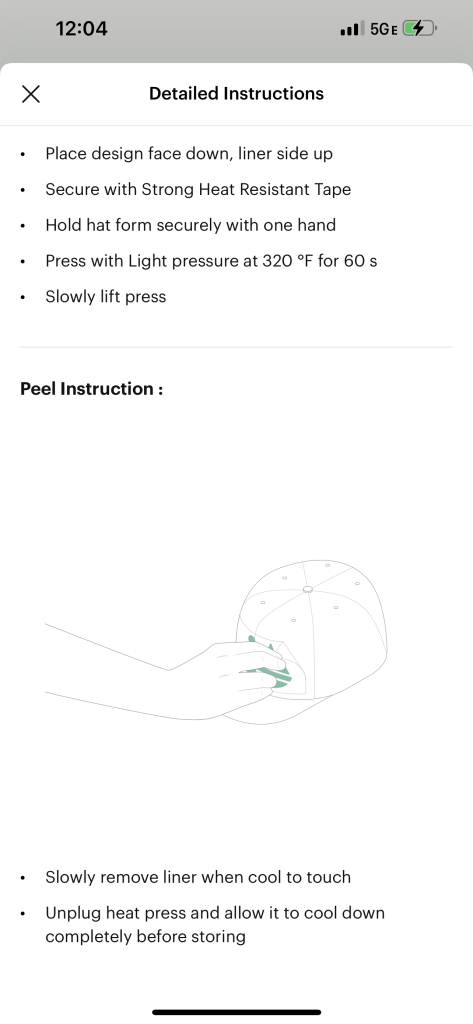
If you use the Heat app you don’t have to worry about setting any time or temperature controls. By following along with the steps in the Heat app you’re way more likely to end up with wrinkle-free transfers. It’s pretty much fool proof.
I have learned to always lint roll my surface well before adding any material, HTV or Infusible Ink, to it. This just results in a much nicer, professional looking end product.
Other Hats to Make
We can’t get into all the different hats you can make in one blog post. But I can quickly tell you the extra things you would need if adding an Infusible Ink design to a hat. You will need:
Sublimation compatible hat (Cricut hats work for this)
Infusible Ink Design
Piece of Butcher Paper
Piece of light colored Cardstock
Plus the supplies used for a HTV hat
If you’ve used Infusible Ink or sublimation before you have a good idea of how it works. Following the steps in the Cricut Heat App will help you create beautiful, permanent, flawless transfers that you don’t have to worry about EVER lifting from the hat.
Final Thoughts on Cricut Hat Press
As I mentioned above I used a design that is slightly larger than the Cricut recommended size for the Hat Press and I was still VERY impressed with the results. I did have to press a little longer to get the edges all the way around but other than that I don’t feel like the larger size was that big of a deal. Because I knew ahead of time I was trying something *not recommended* I made sure to check my edges carefully before slowly removing the carrier sheet so I didn’t lift the image if it wasn’t pressed all the way.
I’m VERY excited to try more things with the Hat Press including of course hats with Infusible Ink and customized visors for my daughter’s softball team. I’ve also been thinking that the Hat Press and form would be AWESOME for adding designs to sleeves and can’t wait to try that.
I was really impressed with how sturdy the form is and how easy the Hat Press was to work with. It has a comfortable grip, so even though you may have to add pressure to your project it isn’t uncomfortable to do.
I will say, if you only plan on making 1 or 2 hats I’m not sure the Hat Press is for you. At $149 you may be better off putting that money elsewhere and hiring a friend that has one to make the couple of hats. If you’re like me and have a lot of children who love hats and you love them yourself OR you’re looking to add that option to your small business I think the Hat Press is a great option!
What are you excited to try first? Do you have any questions? Let us know in the comments.
Here are a few frequently asked questions we’ve already seen pop up:
Can you use an EasyPress for hats?
You can and we have BUT it is definitely a lot easier with the Hat Press and form. I’ve really only had GOOD success using the EasyPress Mini and it took a LOT longer and rolling a towel inside the hat to try to have something to press against didn’t work nearly as well as the form included with the Hat Press.
Can you heat press vinyl on hats?
Yes and no. You can heat press Heat Transfer Vinyl (HTV) on hats but regular adhesive vinyl can not be pressed onto hats. It will result in a big melted mess and a ruined hat and again you’ll be sad.
Will the Cricut Heat App work with the EasyPress I already own?
It will not. The original EasyPress and the EasyPress 2 are not compatible with the Cricut Heat App.
Do I need internet to use the Hat Press?
You will need compatible internet on a mobile device to activate the Hat Press using the Heat App. After it is activated you can use the Hat Press without connecting it to the Heat App and the internet.
Can’t I just use my Iron?
I know there are instances when people have had success using an iron for all sorts of projects I wouldn’t recommend them doing. I would say those are the exceptions, not the rule.
Even major brands of iron don’t have consistent heat across the heat plate. Typically the tip and edges are significantly cooler than the middle and then you have the spots for the steam where there is next to no heat. You have to make sure there is no water in your iron and that the steam option is turned off, etc.
Personally I think the possibility of wrinkle-free heat transfers are so hit and miss it isn’t worth the wasted materials and blanks.
Does this work on hats with a seam down the middle?
I have not yet tried one but Cricut says yes and I’ve seen people do it with both Infusible Ink and HTV successfully. Cricut does recommend that if your hat has the like vent holes you do NOT try to press over those.
What else can I use the Hat Press for?
I can’t wait to put this to the test. I’ve already mentioned I think it might be great for adding designs to the sleeve of a shirt but I have a few other ideas I can’t wait to try. Just remember we’re kind of limited because of the size of the form and the curve of the hat press. It won’t work on just anything.
Where can I buy the Cricut Hat Press?
The Cricut Hat Press became available on March 13, 2022 and can currently be purchased online (and in some stores) at:
Joann
I’m sure it’ll continue to pop up other places as time goes on.
Along with the new Hat Press Cricut released a new EasyPress 3 that also works with the Heat app. Coming soon (like May 15, 2022) is the Cricut AutoPress and I cannot wait to try it out.
I really hope you found this post on the Cricut Hat Press helpful and that you feel confident to make your first project with the Hat Press. I’d love to hear your thoughts on my hat AND the Hat Press in the comments.
Have a great day and HAPPY CRAFTING!

If you enjoyed this post make sure you check out our other Cricut posts here.
We’re sharing our 10 MUST HAVE craft supplies here.
If you’re looking to get inspired here are 10 Cricut Projects you can make at home!
- Bringing Home Baby Chicks - March 11, 2025
- Is RootsTech for Moms? - February 23, 2024
- How to Get Oil Stains Out of Clothes - May 5, 2023

