This post may contain affiliate links. If you purchase something through any link, we may receive a small commission at no extra charge to you. Supplies used may be given to us free of charge, all projects and opinions are my own.
Best news ever! Have you seen the new Cricut Card Mat for Maker and Explore machines? If you've been wanting to make insert cards but don't own a Cricut Joy machine you're going to love this new product. Keep reading to learn all about it.
As of the writing of this post this product has only been out for a couple days and the mat has only been in Cricut Design Space since yesterday. We have run into a couple hiccups but I'm sharing how to work around them and will update as soon as Cricut has these things fixed.
What is a Cricut Card Mat?
If you don't own a Cricut Joy you may not actually know what a Card Mat is. If you don't own a Joy and do know what a Card Mat is you've probably been jealous that there wasn't one for your Cricut Explore or Cricut Maker machines. Basically, a Card Mat works with Cricut Insert Cards and cuts just the front of the card. Insert Cards come with a folded cardstock card and insert pieces that show through when cut.
No more having to arrange your image so it cuts on the correct side of your card. AND, the insert cards require NO adhesive! They're perfect for last-minute birthday cards, event invites, or really any card you might need.
Closer look at the new Card Mat
Want to know everything you need to know about the new Card Mat?! Watch the video below for a full review of the card mat and learn how to customize cards so you can cut 4 different cards at once. If you missed something or don't have time to watch the video right now keep reading to learn all about Cricut's new Card Mat.
How many cards can I cut at once?
You can cut 4 cards at once. Right now Design Space doesn't allow you to select more than one ready to make Insert Card at a time. Which means, if you want to use a ready to make card design you can only select one. You can change things up by using four different colors of insert cards but you can only cut one image design at a time.
To get around this limit you can create your own insert card designs!
What do I need to make my own Insert Cards with the New Card Mat?
To make your own cards with the new Card Mat you need the following:
Cricut machine – this can be a Cricut Explore Air, Air 2, Explore 3, or any of the Cricut Maker Series of machines. This card mat will only fit the larger machines not the Cricut Joy
Insert Cards – you can use any of the Cricut Insert Card sizes with this new card mat or you can make your own cards using those sizes as a guide.
How do I create my own Insert Card Designs?
To create your own insert card designs you will need a few things. You will need the size of the cards you're using AND the size of the card insert with your card. For my example I am using the R40 card size. The overall measurement of the card is 4.75 x 6.6. The measurement of the insert is 4.5 x 6.4.
Now that you have your sizes you can head to your Design Space canvas.
The first thing you're going to do is get an idea for your design. One of the best ways to do this is to look at the ready to make Insert Card projects. For my example I am looking at birthday card ideas. In the insert card designs there is a Cactus Birthday card and a Birthday Cake card.
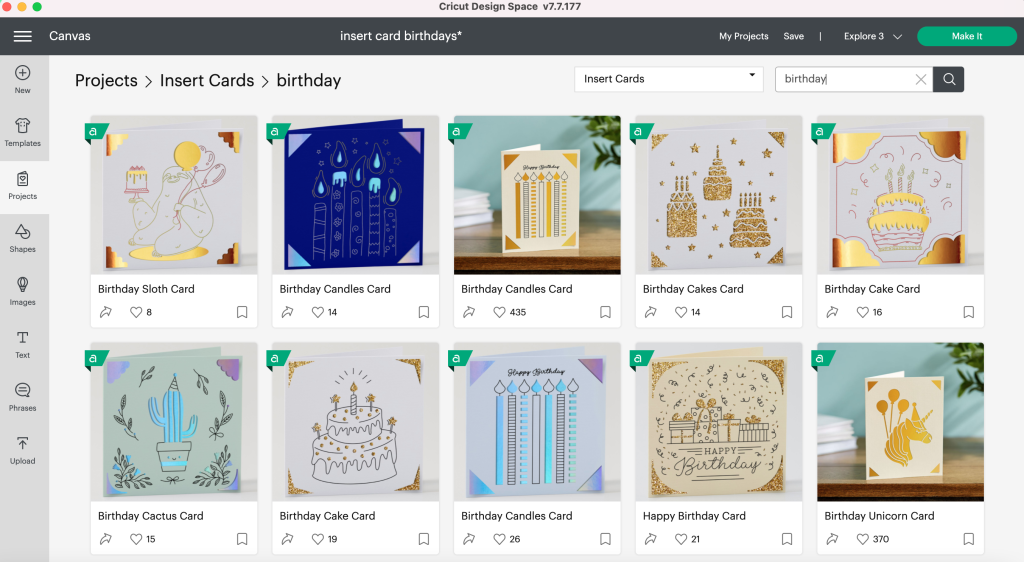
Using the title of the ready to make card designs I am going to search images.
Select “New Project” to start your project and then we can get building our own insert card!
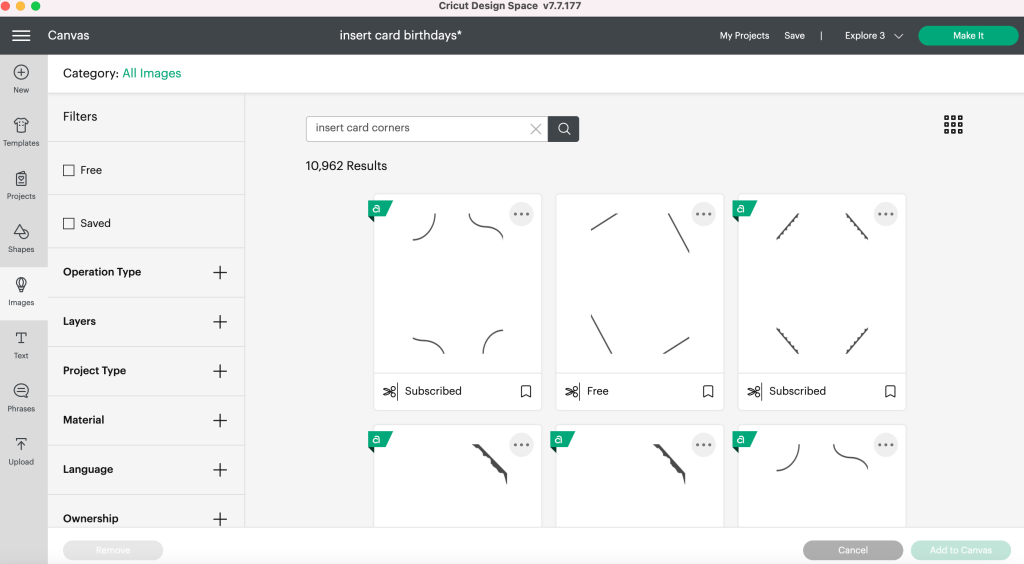
First let's search “Insert Card Corners”. You will need card corners for your card insert to slide into. You can choose any that you want or you can try to match the ready to make design – totally up to you. I just selected two different corners and added them to my canvas.
How do I find a good design for my Insert Card?
One of the reasons I like using the ready to make insert card designs as an example is because I know the image works with insert cards. I can't guarantee that every ready to make card will have an image you can find but most of them do!
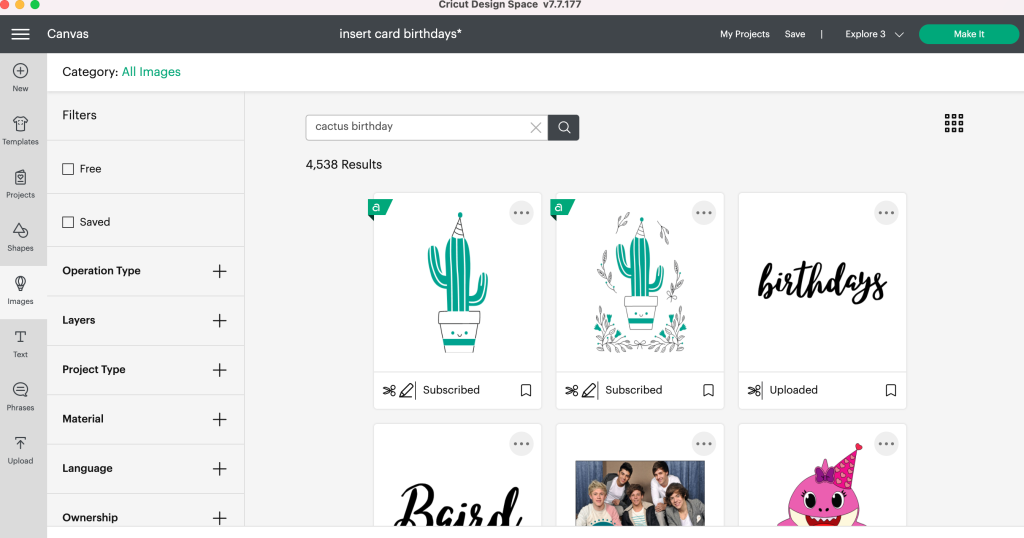
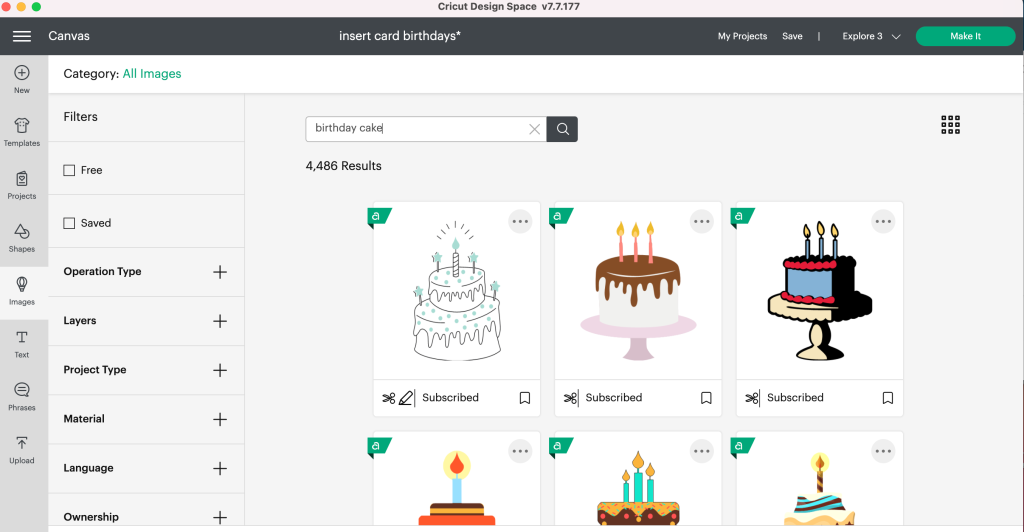
So I am going to keep it simple and search “cactus birthday” and you can see that design is right there in images so I can add it to my canvas. Now I am going to search “birthday cake” and there is my image again! Select that one and add it to the canvas.
What size do I make my Insert Cards?
What size you make your insert card will first depend on the size of your card. You will want to make your design on the canvas fit the same size as the card you're using. I am using the R40 size card so I will create my card to fit those sizes.
To help me visualize my whole card I am going to select shapes and then a square. From there I am going to go to my tools and unlock the size and set it to a 4.75 width and 6.6 height. This is the size of my card itself.
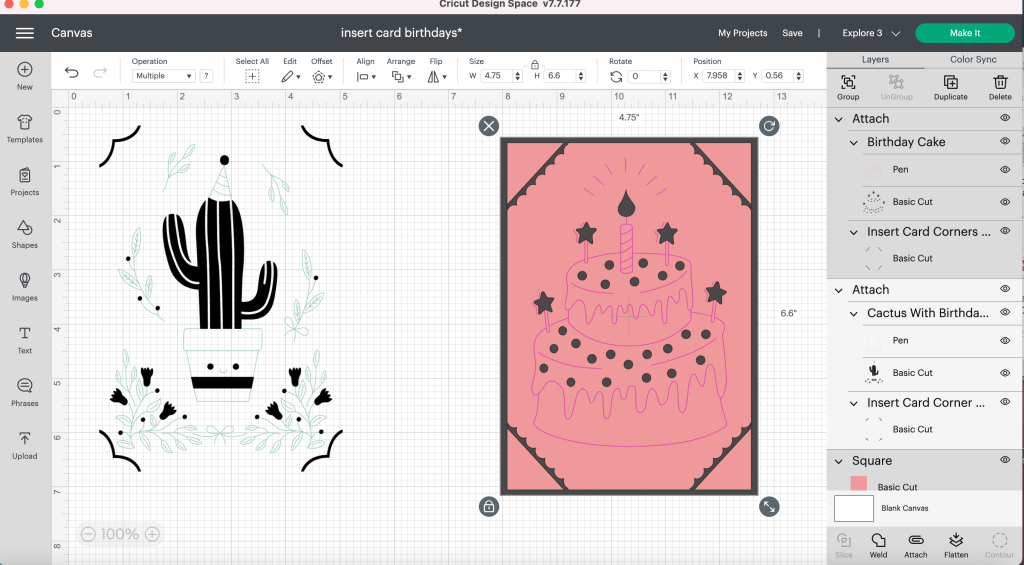
Now I am going to repeat those steps again and size them to fit my card insert. Unlock and set width to 4.5 and height to 6.4. Now I can set the size of my insert card corners to the same size of my card insert – 4.5 x 6.4.
You don't NEED to add the squares/rectangles to your canvas – this just helps me visualize how the card is going to look which is helpful for me.
Let's size our image!
There is no set size for the image, just size it to what looks good to you. Make sure that your image (draw and cut) doesn't run into your corner cuts. I like my image to take up as much room as possible because it's the star of the card! You can make your image smaller or larger – it is completely up to you, just make sure it fits within the corners.
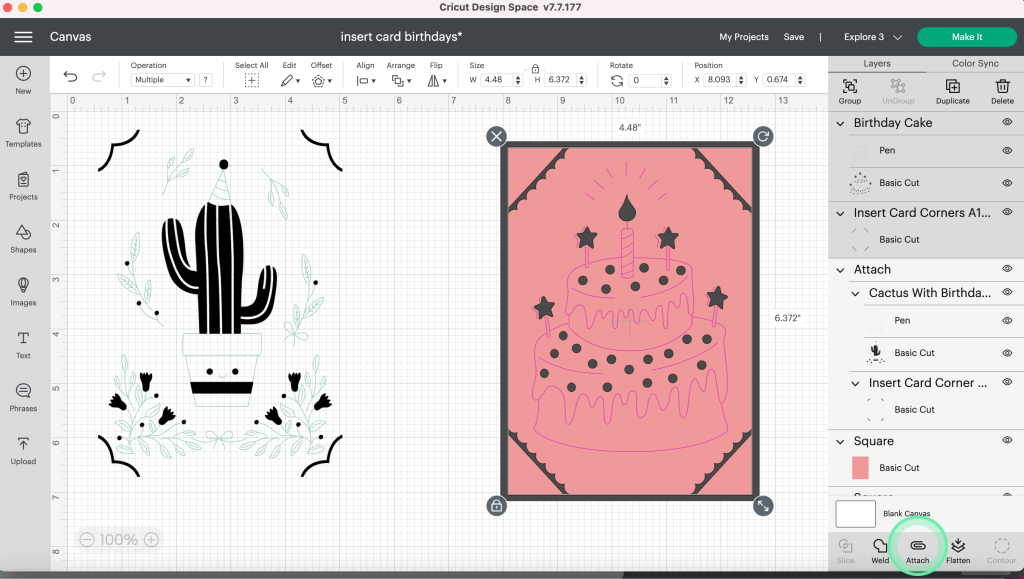
Once you have your image the size you want select all the layers for your card and up in your toolbar select align and then go down to center. This will make sure your corners and your image are set exactly where they need to be when the card is being cut.
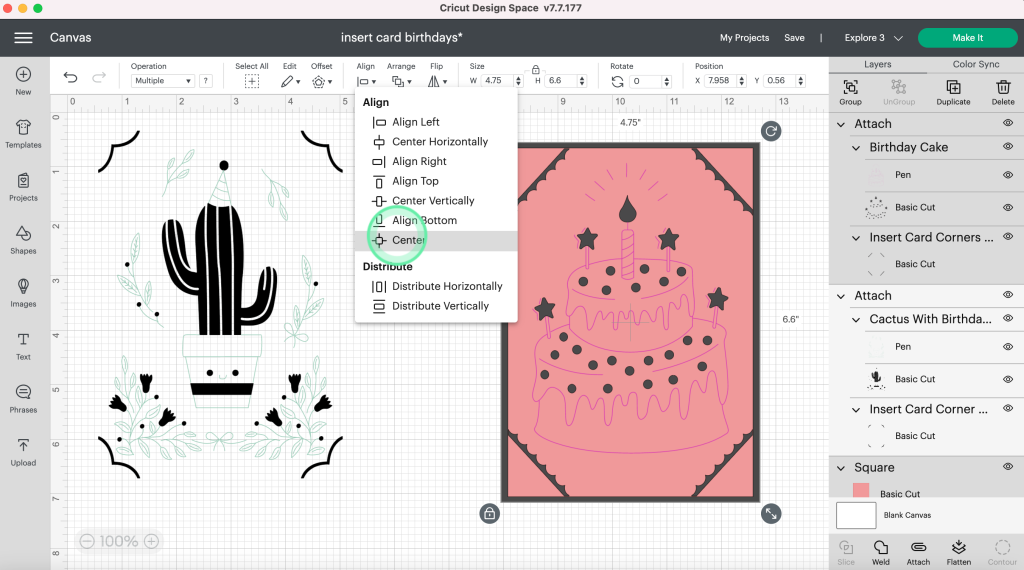
Once you have your image centered click just the corners and the image and click “attach” on the layers panel.
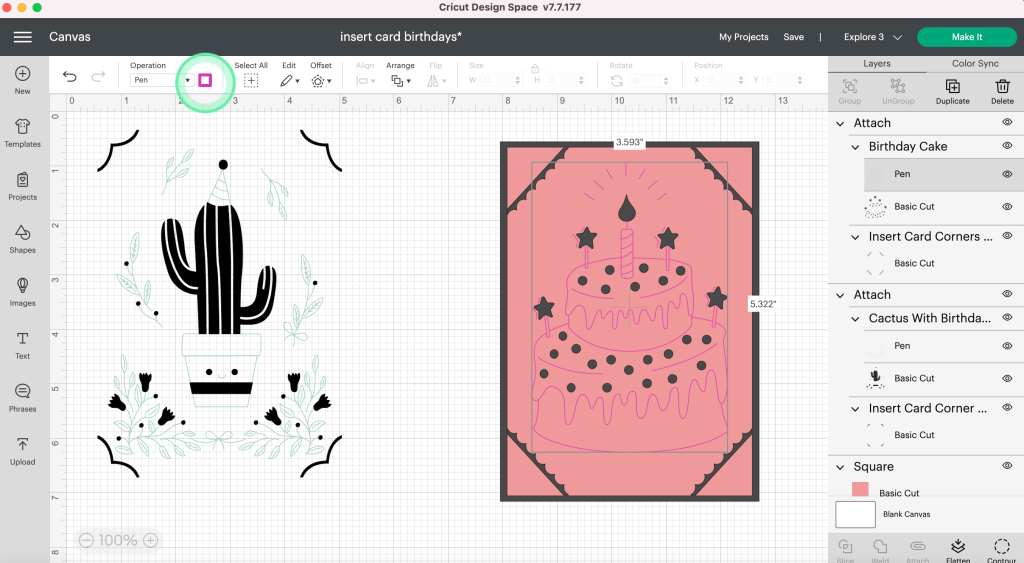
Something to note – if you want to have your cards drawn with different pens make sure you change the pens on your canvas screen. You don't have to select the exact color you want just make sure you have the cards set with different colors so Design Space will prompt you to change the pen when it moves cards.
Repeat all the steps above for each additional card you want to make. Once you're done with the card design either delete or hide your rectangle images. We don't want Design Space trying to cut those out.
Current Card Mat Hiccups
Right now we're running into a few weird problems in Design Space with the new mat. For instance, today I made a card from start to finish using all the steps I listed above using my Explore 3 machine and it cut perfectly.
When I was cutting the cards for filming with those exact measurements and the same machine it would not give me the card mat as an option. I reached out to a couple friends that I knew were also working with the card mat – Angie from thecountrychiccottage.net and Sydney from tastefullyfrugal.org and they were having the same problem.
The only work around we found was making the image slightly smaller. I ended up cutting my final card at 4.48 x 6.372. My card insert did fit into those measurements so that was great.
Angie said she found that making sure your image was a quarter of an inch smaller than the finished card design all the way around seemed to work for her. Which means I could keep the 4.5 wide measurement but would need to stick to a slightly smaller height measurement of 6.35. This is a great tip if you're using a variety of card sizes so you don't have to mess with the sizes to see what works.
If you want to try to get the largest size possible for your card I suggest you mess with your sizing .01 increments at a time and see what works for you and your machine.
Cricut does have a scheduled maintenance in Design Space for 5/5/22 – so I'm really hoping they fix some of these hiccups.
Let's make Custom Cards!
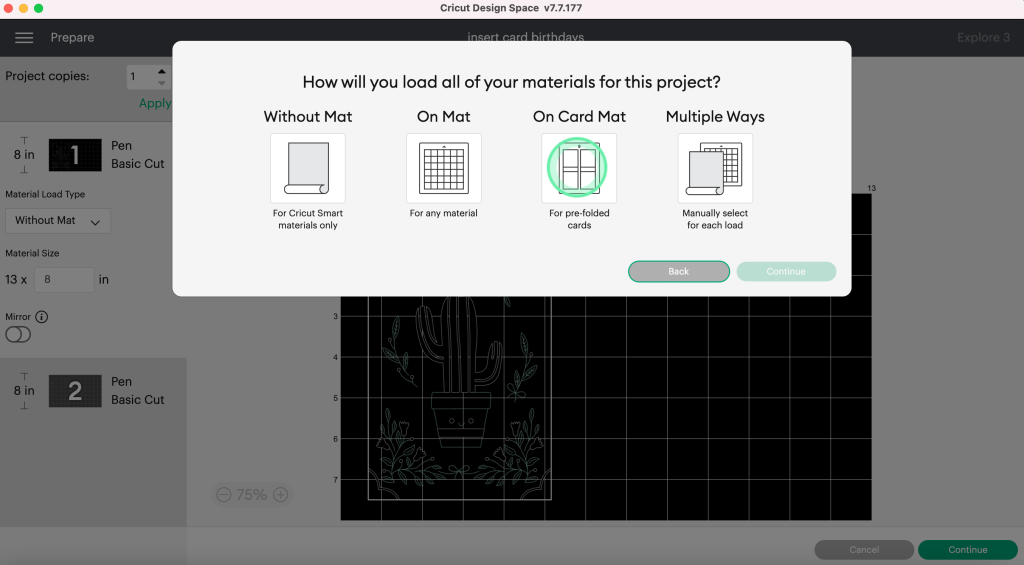
Now that we have our design done and sized we're ready to send them to the mat. On the top of your Design Space select “Make It” and you'll be taken to the mat screen. Here you can select that you want to use the card mat.
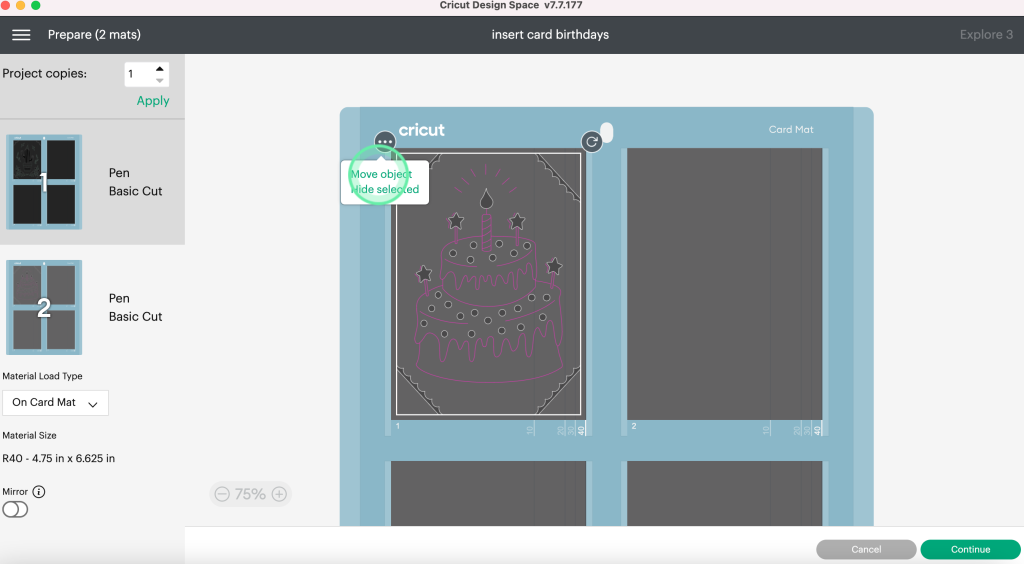
Another quick hiccup that happened after I made my first set of cards – it automatically sent each card to it's own mat. If this happens to you it's an easy fix. Click the image and then click the 3 dots and select “Move Object” and then just click the other mat. It will put it into a card slot on that mat for you.
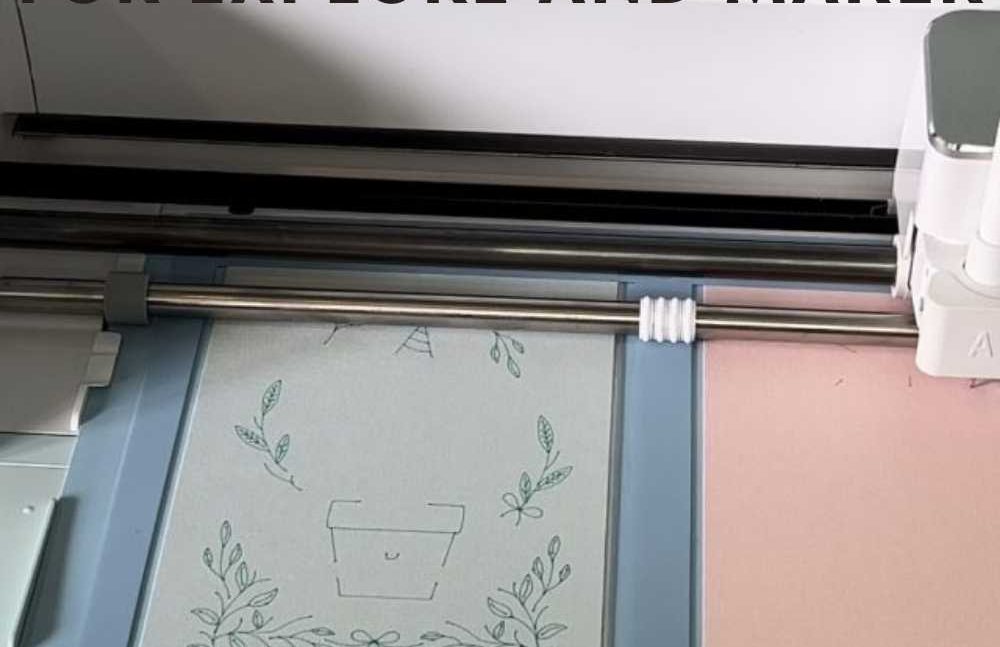
Load your Cards onto the Cricut Card Mat
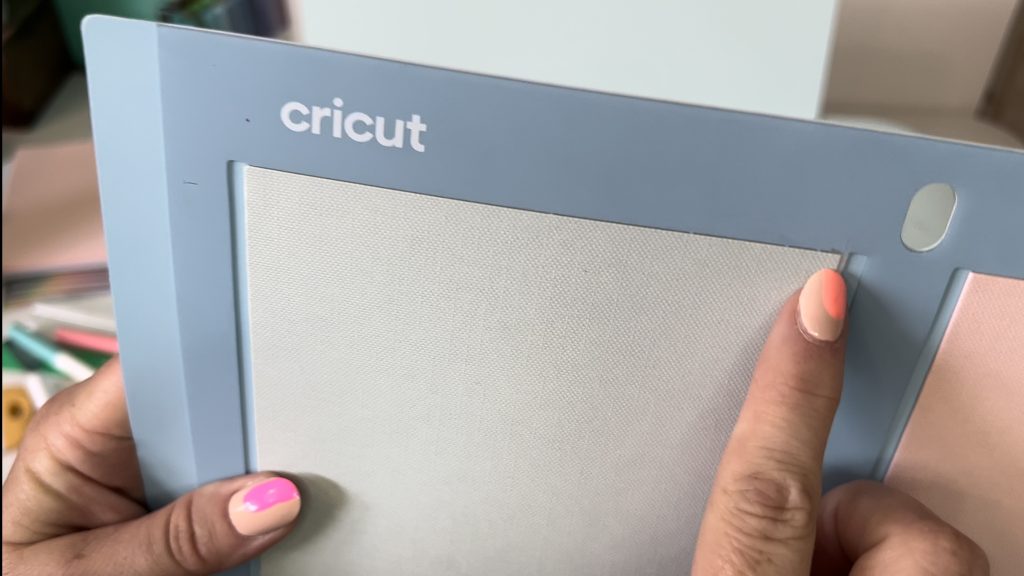
Your Cricut Card Mat has a spot for 4 pre-folded cards. You can use Cricut's Insert Cards sets or your own cards cut to the same size as Cricut cards. This mat is different than a regular mat. You'll notice that instead of just one there are two protective covers.
This is great if you're only making one or two cards, you can just uncover one side and keep the cover on the other side. You need to make sure you remove this top layer to expose the adhesive of the mat. With the Cricut Joy card mat in the beginning we heard DAILY, complaints from people about their card not sticking to the mat – they hadn't removed the protective layer. I do feel like the cover on this card mat is more noticeable than the one on the Joy card mat so that's good.
It also has a matte side and a shiny side. This is brilliant! Now you know which side sticks back to the adhesive. Always keep your mats covered when not in use to protect them from dust, pet & human hair, and anything else that may make them dirty and therefore less sticky.
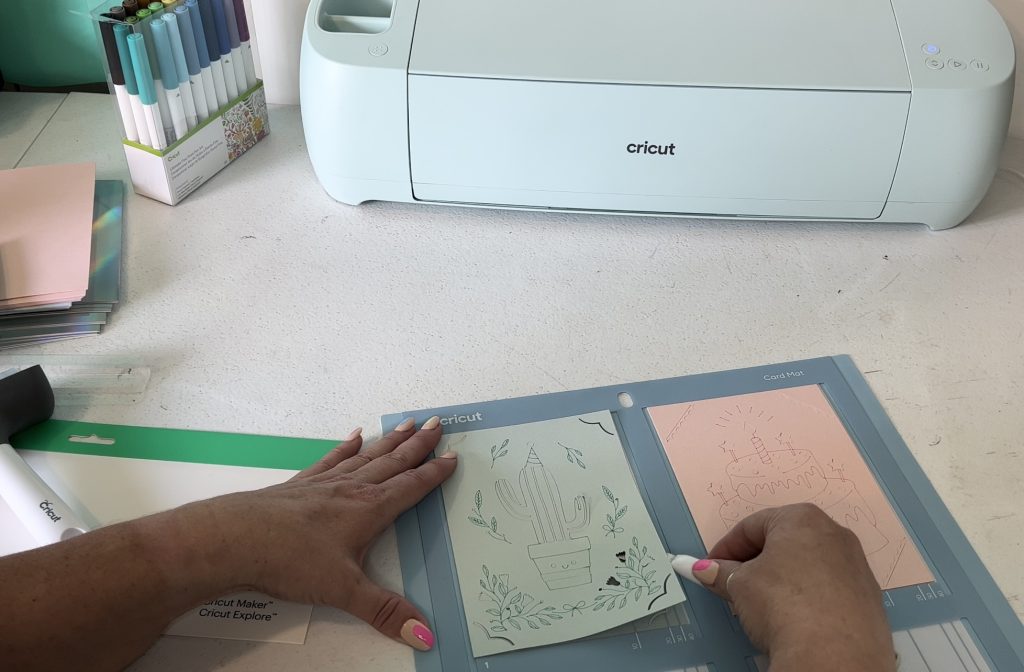
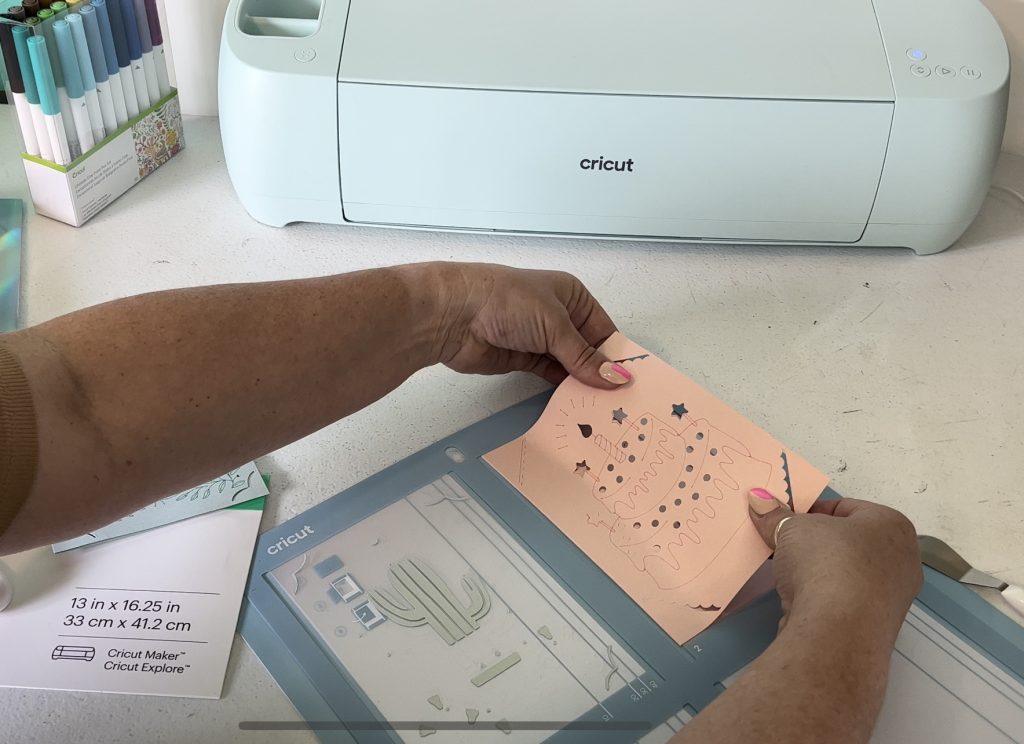
You will load your card into the card mat by sliding the back of the card under the top layer and then arranging your card so it sits at the top of the card slot. You want to make sure it is lined up right with the top and pushed in as far as it will go, this will keep your image in the right space and prevent cutting off the edges of the card.
Next, use your brayer to make sure your card is stuck down REALLY well to your card mat. The adhesive on the card mat isn't super strong. To prevent your card from lifting use a brayer to really press the card onto the mat.
Let's Cut Out Our Cards!
Now that your cards are loaded onto the card mat you can load the mat into your machine. In Design Space you will select continue from the mat screen and then Design Space will connect to your machine. Once it's connect you need to select your materials. I am using the Insert Card setting and notice the warning on the screen.
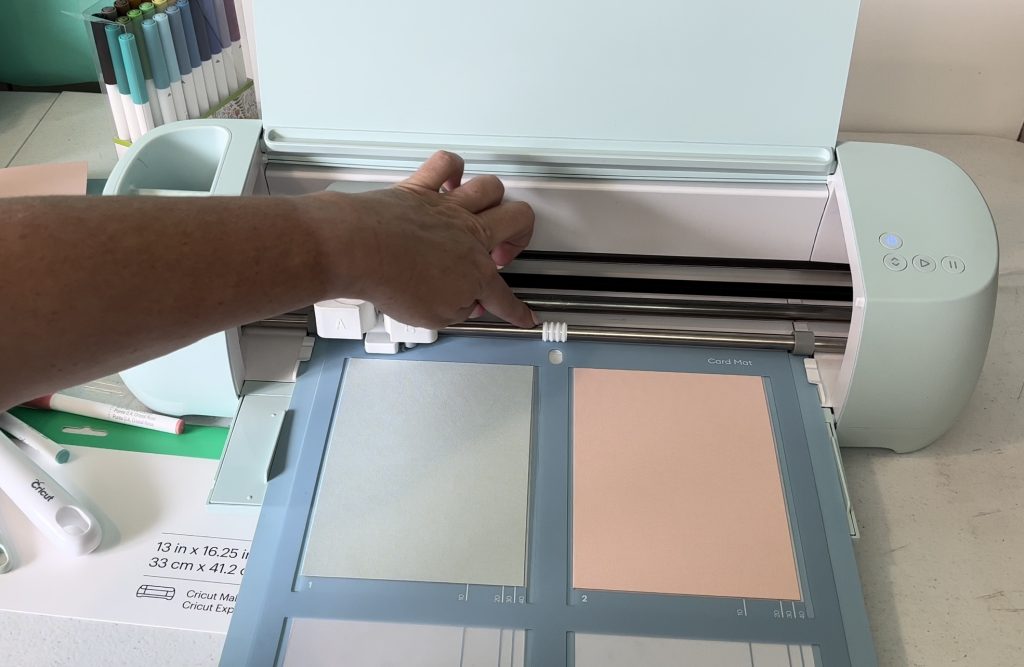
You need to move the star wheels to the center of the mat so they don't run over the cards or the mat. This is very easy to do just make sure to check your hands after moving the star wheels. If you touched any of the insides of the machine you may have a little grease on them and you don't want to get that on your card.
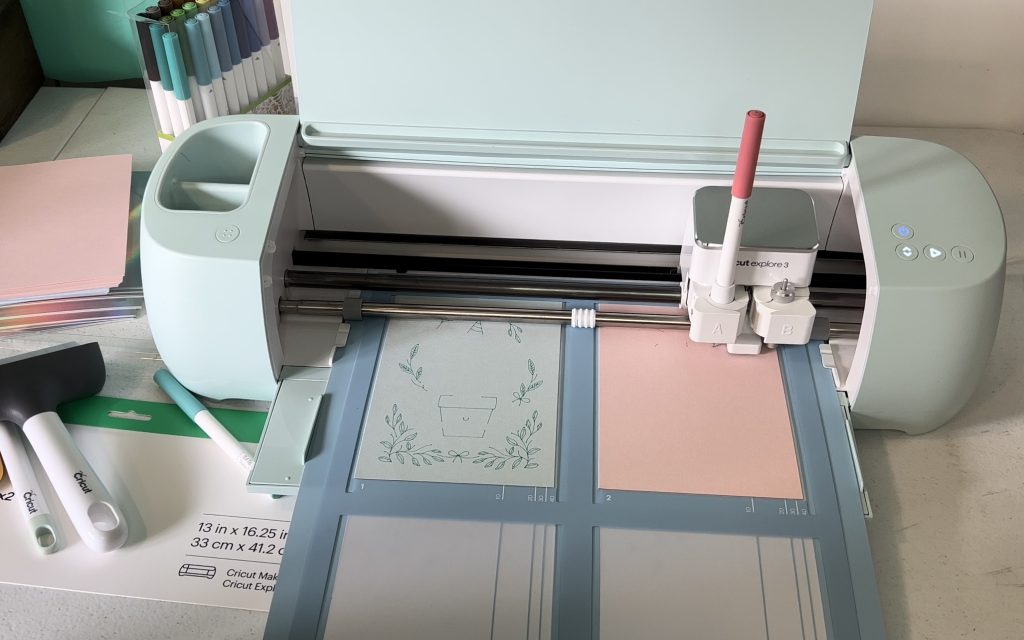
Now you can load your mat and insert your first (or only) pen and select go.
Your machine will do all of the drawing first so if you are using multiple colors of pen don't go too far, you'll be prompted to change the pen before it proceeds. Once it gets to the last pen color it will cut all the cards without prompting you to remove the pen (unless you're using the Explore One and the pen and blade go in the same carriage).
We're almost done!
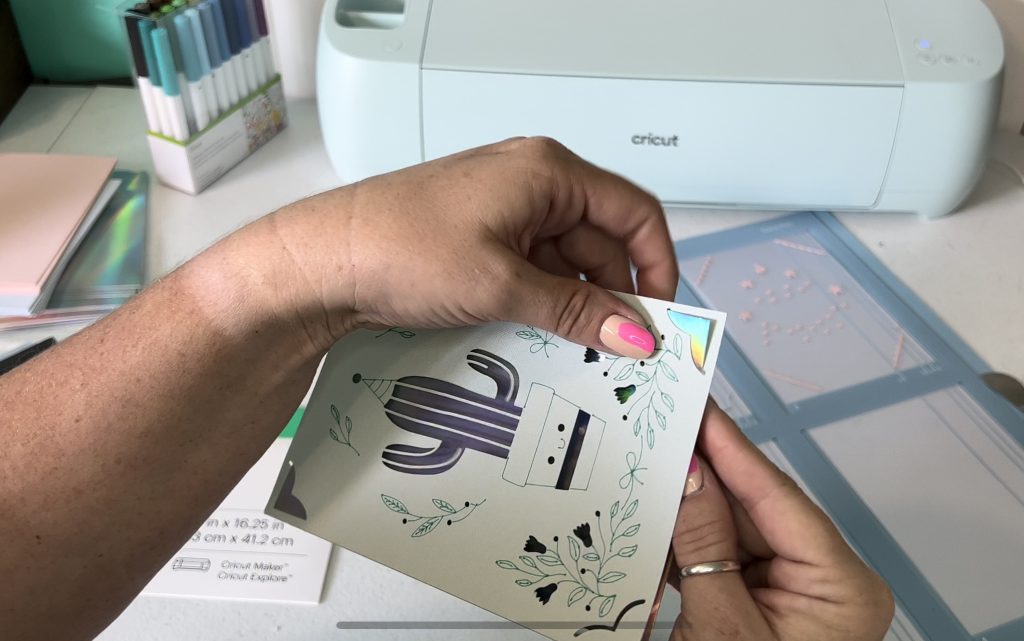
Now that the cards are finished in the machine it's time to unload the mat and remove the cards from the mat.
To do this I use my spatula and gently work it under one corner then slowly slide it up the card. Once the outside edge is released from the mat you can use two hands to gently remove it from the mat. There are often small pieces and cuts and you don't want to go too fast and rip those – especially your corner cuts.
If you've found that your card has rolled a little you can gently bend it back the other direction and it'll be flat again.
Last step!
The last step for finishing our card is adding the card insert. Just like removing the card from the mat you want to take your time so you don't rip your card. Just insert one corner at a time and when you hit corner 4 you have a completed card!
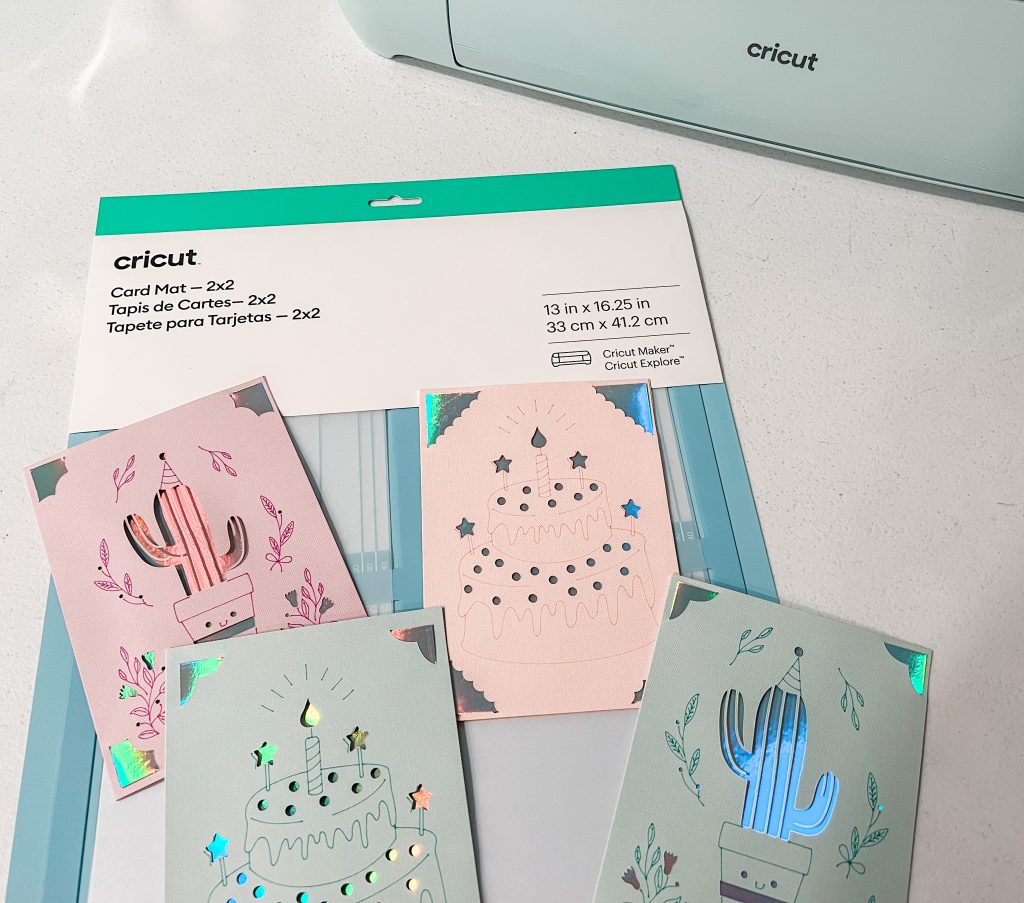
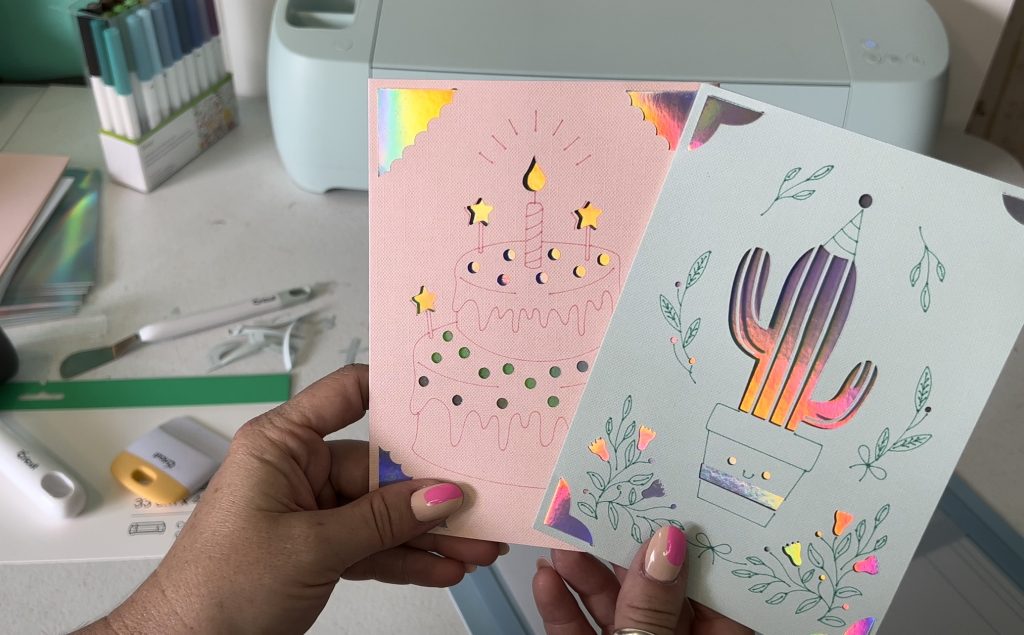
Finished Customized Insert Card with Cricut Card Mat
How great are these cards. Really the options are endless, I can't imagine needing to go buy a card any time soon at all. They really are so quick and easy to make and if you're using the Ready to Make cards they're even quicker and easier.
What do you think? Are you ready to try making your own?
I think this handy reusable card mat is quickly going to become my favorite mat. I'm already planning how easy it will be to train my youngest to make a few batches of birthday cards so we have them ready on hand! These are quite possibly the easiest paper craft there is, I promise you'll love making your own cards and will be designing custom cards in no time.
Frequently asked questions:
Will my Cricut Joy Cards work with the new Card Mat?
Yes!! All Cricut Insert Cards – including the Cricut Joy cards will fit in the new card mat.
I keep hearing about Cutaway Cards – what are Cutaway Cards?
Cutaway cards are a newer card product from Cricut. Instead of having an insert the back side of the front of the card is adhesive and you apply a sheet (much like the card insert) to the adhesive. Now when you cut your image it does what is called a kiss cut – it cuts through just the top of the card so you can remove it and it exposes the pattern of the other sheet. We'll be breaking those down in our next video/post.
Will this mat work with older machines and cartridges?
As we don't currently own an older machine any more I can't say for certain but I don't believe so. It is listed as compatible with Maker and Explore machines not any of the legacy machines. I believe you need to use the digital files in Design Space to work with these cards and this mat.
How many new card sizes are there?
Currently on Cricut's site they have the following new card sizes available:
S40 (square card)
R10 (rectangle card)
R40 (rectangle card)
They still have all the Joy cards available that will also work with your new card mat.
Where can I find the Card Mat 2×2 and Insert Cards?
Currently you can find them all at:
Michaels stores (maybe in store)
HSN (online a couple great bundle options)
Hobby Lobby (in store)
Joann (online, maybe in store)
I hope you've found this information helpful and as always if you have any questions don't hesitate to leave them in the comments. You can also find us on instagram at @cricutinspiration and @creativehousewives as well as all the other social platforms.

If you enjoyed this post make sure you check out these other fun Cricut projects!
- The Best Vinegar Paint Brush Cleaner Method - May 6, 2023
- 10 Fun and Easy St. Patrick's Day Games - March 1, 2023
- Valentine's Day Felt Wreath DIY - January 20, 2023

thank you for the video, it was real helpful. I was running into the same issue as you did with the option not coming up for the card mat.
I’m so glad it was helpful for you!!!