This post may contain affiliate links. If you purchase something through any link, we may receive a small commission at no extra charge to you. Supplies used may be given to us free of charge, all projects and opinions are my own.
Drinking enough water every day can be a chore but it doesn't have to be boring! I created a Cricut water bottle with hourly markers to help make sure I'm drinking enough water every day. Keep reading to learn how to make your own Hydrate or Die Water Bottle.
How to Make a Cricut Water Bottle
We all know drinking water is important. If you're like us you're regularly setting a goal to “drink more water” and you may also (like us) wish it was anything but water as you're drinking it!

This post was originally posted in January 2020 – it has been updated to include more information and updated links.
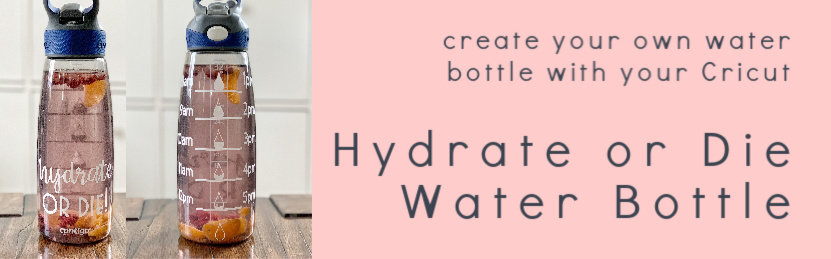
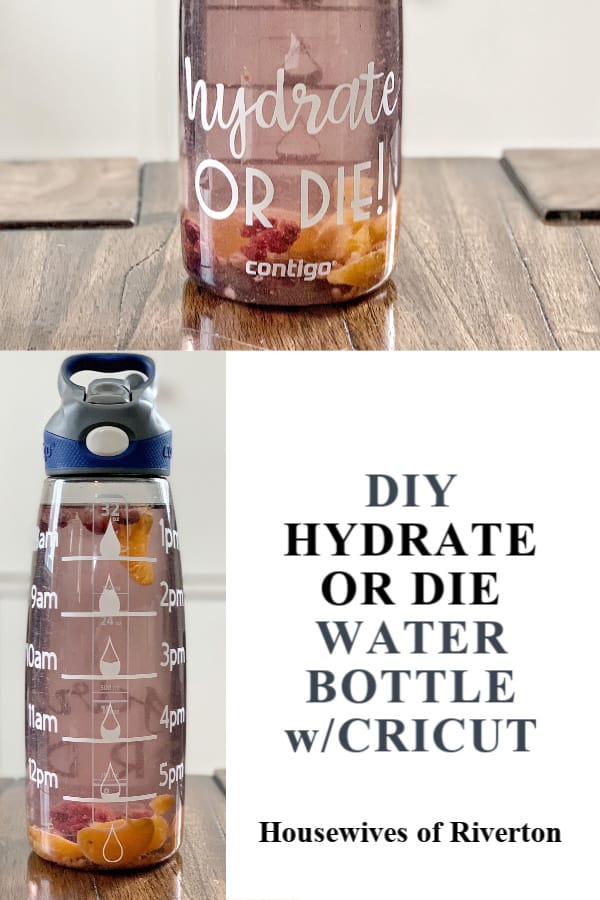
Hydrate or Die Water Bottle
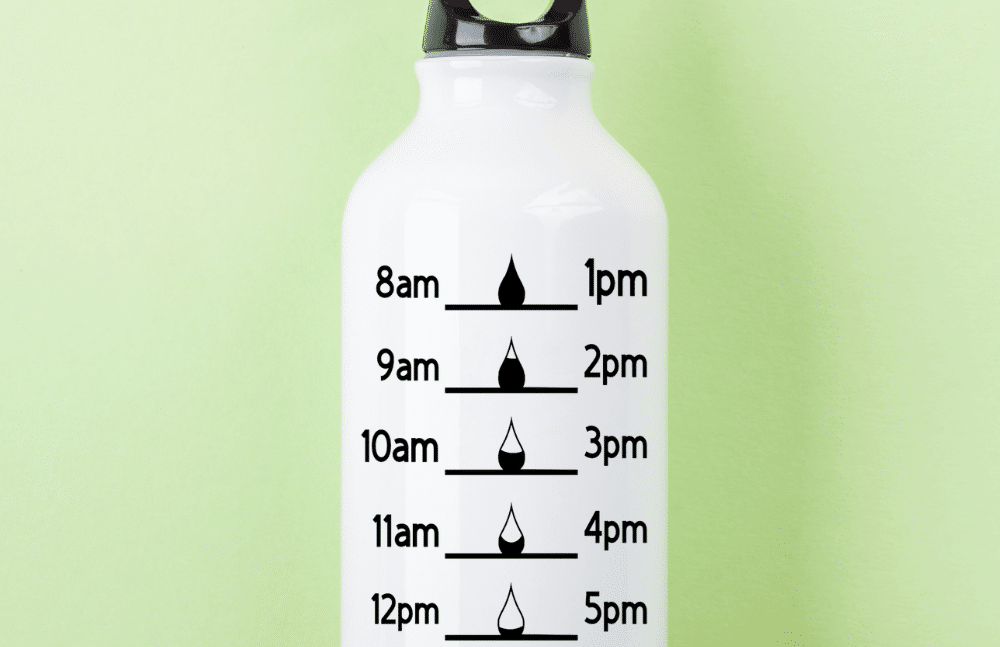
I'm usually a pretty good water drinker, but I really wanted to make sure I was drinking at least 64oz each day which makes our Cricut water bottle PERFECT! It not only has the fun “hydrate or die!” phrase on one side but the other side has hourly markers to help keep you drinking all day long.
If you have a 32oz water bottle like my own water bottle (linked below) you just need to fill your bottle twice a day and you're good to go! I've actually found myself drinking even more than my 64oz goal because I always have my water bottle with me.

What Type of Water Bottle Should I Use?
Are you ready to make your own Cricut water bottle? We have the water tracker SVG files separated into two different Design Space files so you can easily use just the Hydrate or Die image or just the hourly markings if you'd like.
These files are sized to work with our favorite water bottle – the 32oz Contigo water bottle, if you're using a different water bottle make sure and double-check that the size is correct for yours.
You can make this project with any Cricut machine – Cricut Maker, Cricut Explore Air, or even the Cricut Joy. You just need to make sure the size of your custom water bottles design fits the size of your machine. This image can work for water bottles of different sizes.
It may be helpful to use a measuring tape to find out the size you want your image to be.
Something to note – we have had the BEST success with smooth surface water bottles like this Contigo one or stainless steel water bottles. If you use a water bottle with a textured surface (like a Hydroflask or Yeti) I would recommend making sure whatever image or font you use is nice and thick so there is plenty of adhesive to stick to the surface.
Supplies Needed to Make Your Own – Cricut Water Bottle
- Cricut Machine
- StandardGrip Mat
- Premium Vinyl – Permanent (we used white)
- Water Bottle of choice
- (we like the Contigo 32oz)
- Weeding Tool
- Scraping Tool
- Transfer Tape
- Hydrate or Die cut file
- Markings cut file
Another note – for best results Permanent vinyl should cure for at least 48 hours before washing or using. During this time DO NOT wash your water bottle. Try hard to not handle it at all and if you're you're using a water bottle with a texture I would wait 72 hours.
Let's Make a Cricut Water Bottle!

- Gather your supplies.
- Open a new project and find your image in Design Space. Size to the correct size for your cute water bottle and prepare to cut. Choose the setting for the vinyl you're using. Make sure you've done a test cut if you haven't used that type of vinyl before.
- Place your vinyl backing down on your green StandardGrip mat and load into your Cricut machine. Press the flashing C on your machine and cut.
- Once your vinyl is cut, unload the mat.
- Weed all excess vinyl with your weeding tool.
Using Transfer Tape with Vinyl
- Once you have your weeding done trim a piece of Cricut Transfer Tape to the correct size for your project.
- Carefully align your Transfer Tape over your weeded image and press down.
- If you haven't already – remove your adhesive vinyl design and transfer tape from the cutting mat. Flip your image over (Transfer paper down) and using your scraping tool push the vinyl to the transfer tape.
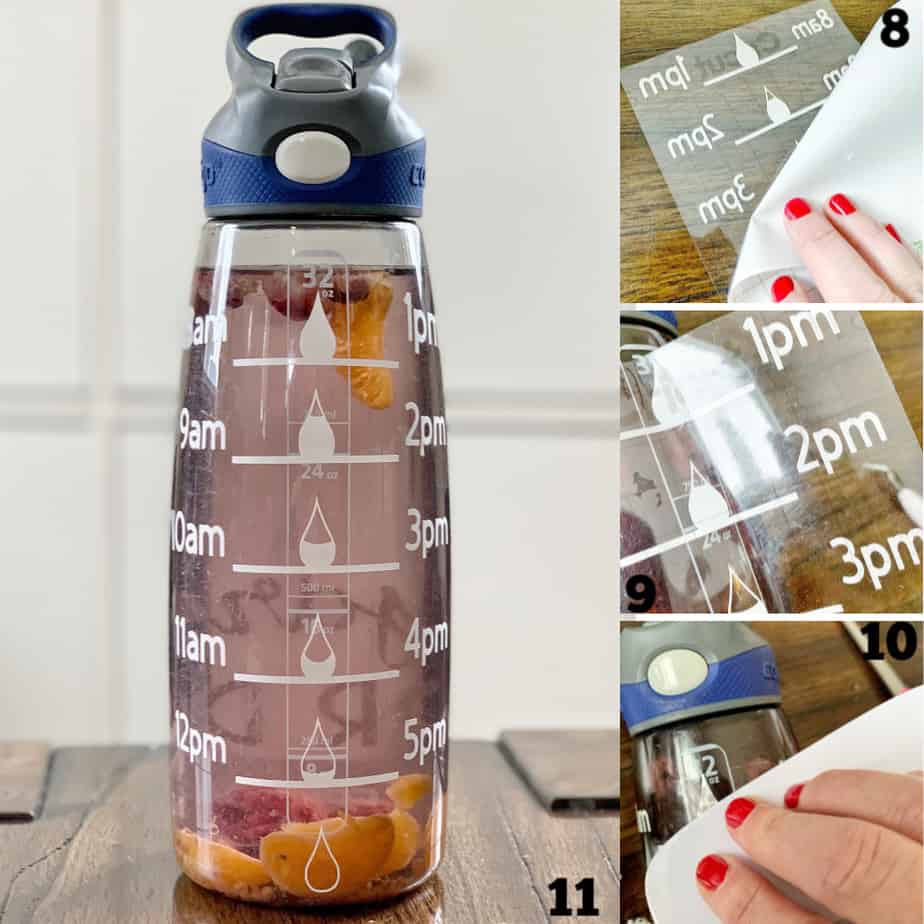
- Slowly pull the backing off making sure your vinyl is sticking to the transfer tape. You can use any vinyl color you want, we used white.
- Before applying your vinyl use rubbing alcohol to make sure your surface is completely clean. Starting from the middle of your image slowly roll your image out onto the water bottle.
- Using your scraper press your vinyl down onto the water bottle and then slowly peel back the transfer tape making sure the vinyl is sticking to the water bottle. Pay special attention to thin lines and dots.
- Sit back and admire your water bottle! Don't forget to let it sit for at least 48 hours so the vinyl adhesive can cure.
Bonus tip – if you're having a hard time enjoying your water add some fruit to your water. I have been adding frozen raspberries and mandarin orange slices to my cold water. It adds just a bit of flavor and is so good!
Here is a video of me making water bottles if you'd like video instructions on how I apply vinyl to a water bottle.
I hope our Cricut water bottle tutorial helps you create a water bottle that will help you reach your water intake goals!
Frequently Asked Questions:
Do I need to use blank water bottles?
For the size of my design, a blank water bottle worked best but you could use just one part of the design and that would work with your water bottle DIY.
Can I use Infusible Ink to make Cricut Water Bottles?
You can use Infusible Ink if you have a sublimation blank water bottle and other supplies like:
- Shrink-wrap sleeve
- Silicone Mug Wrap
- Tumbler press or the new Cricut Mug Press
Infusible Ink works like a sublimation design and is more permanent than vinyl.
Can I use Camelback Water Bottles with Vinyl?
Yes you can, we would recommend the smooth side water bottle.
Can I use other types of vinyl to make a new water bottle?
Yes you can. Some types would work and others might not. Cricut Permanent Smart Vinyl would be a great option. I wouldn't recommend removable vinyl, it won't hold up to the liquid inside the water bottle or to wash and wear.
You'll want a permanent vinyl for your project – this can be holographic vinyl, sparkle vinyl, even glitter vinyl.
What tools do I need to make a Cricut Water Bottle?
If you already have a Cricut machine you just need a couple of tools to make this project. I recommend a Cricut scraper, weeder tool, and a brayer.
If you have any questions about making a Cricut Water Bottle leave them in the comments and we'll get them answered for you. Don't forget to join our Cricut Help & Inspiration Facebook Group. We are here to help you with all your Cricut questions and projects!

Other Cricut posts you should check out!

Why you need to update your Design Space!
How to use Print then Cut with your Cricut
- Bringing Home Baby Chicks - March 11, 2025
- Is RootsTech for Moms? - February 23, 2024
- How to Get Oil Stains Out of Clothes - May 5, 2023