This post may contain affiliate links. If you purchase something through any link, we may receive a small commission at no extra charge to you. Supplies used may be given to us free of charge, all projects and opinions are my own.
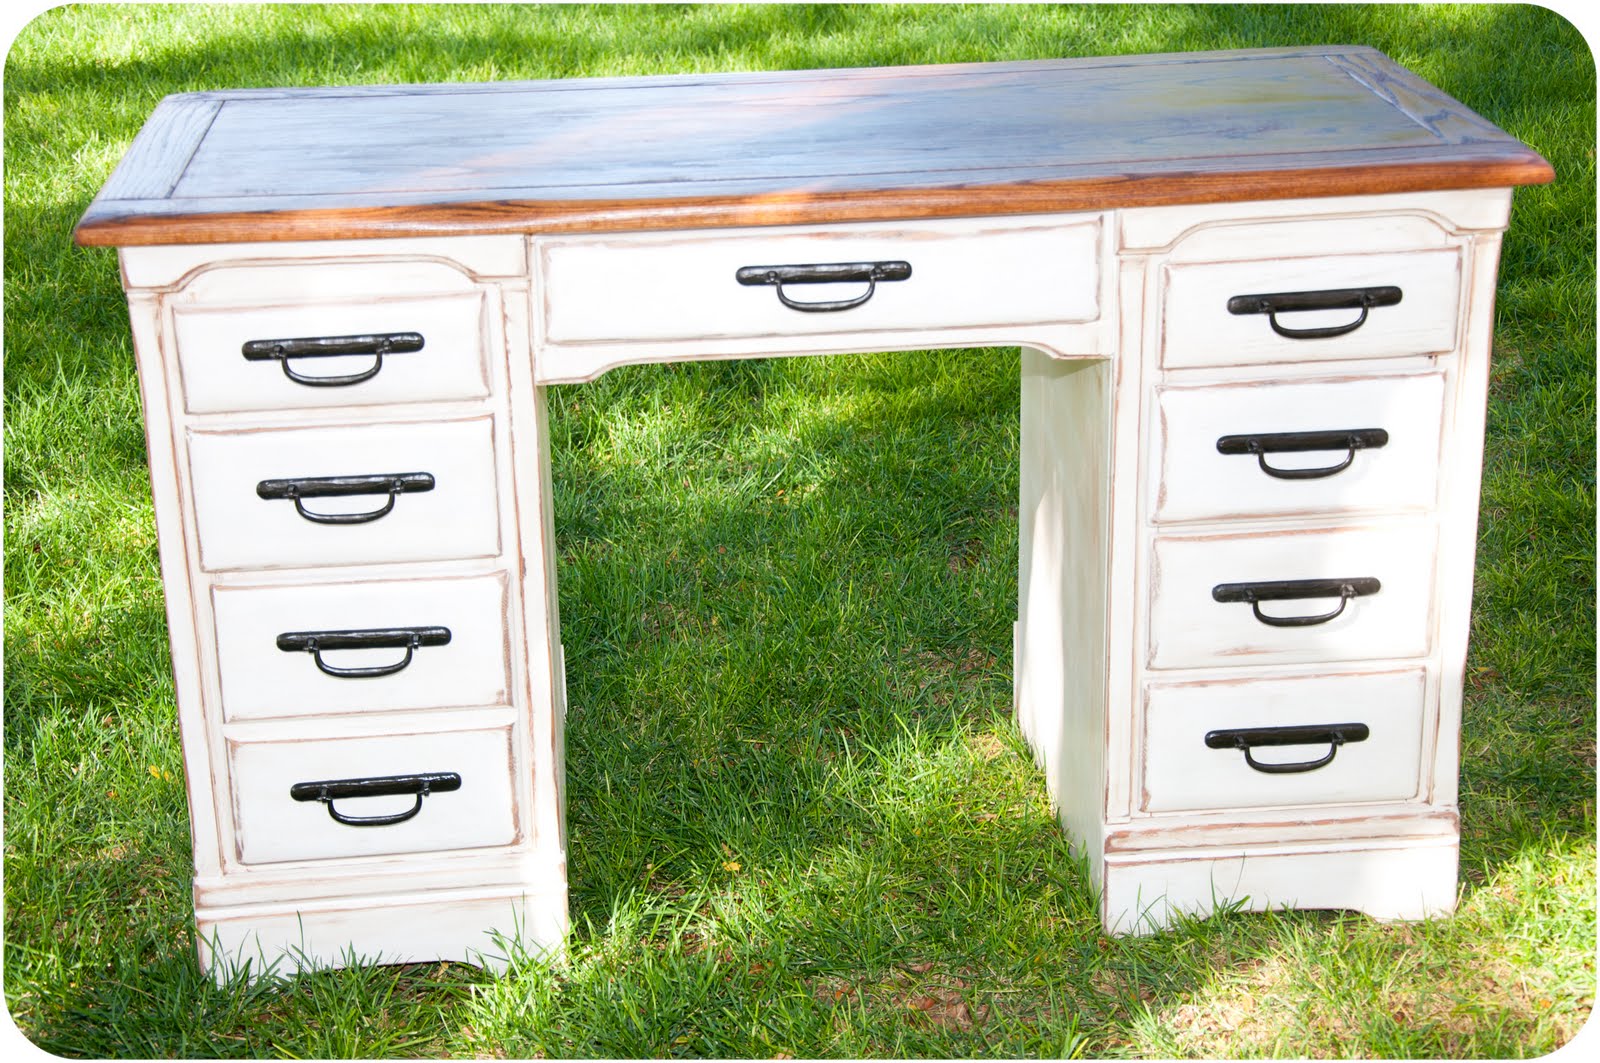
Today I'm going to quickly show you how I gave new life to an old desk for my son's room. This old desk makeover is still one of my favorite furniture makeovers I've ever done.
You can see more of the projects I've done for their bedroom including their dressers and bunk beds.
How to Select the Right Piece of Furniture
I knew this desk was going to be in a room for young boys. Because of this I wanted the entire desk to be made of real wood.
I visited my local thrift store, Facebook Marketplace, yard sales, and the local classifieds website.
Other than knowing I wanted something large and solid wood I didn't have a lot of requirements. I wasn't shopping for a new desk. Because I wanted to paint the desk to match the other furniture I was making over for their bedroom.
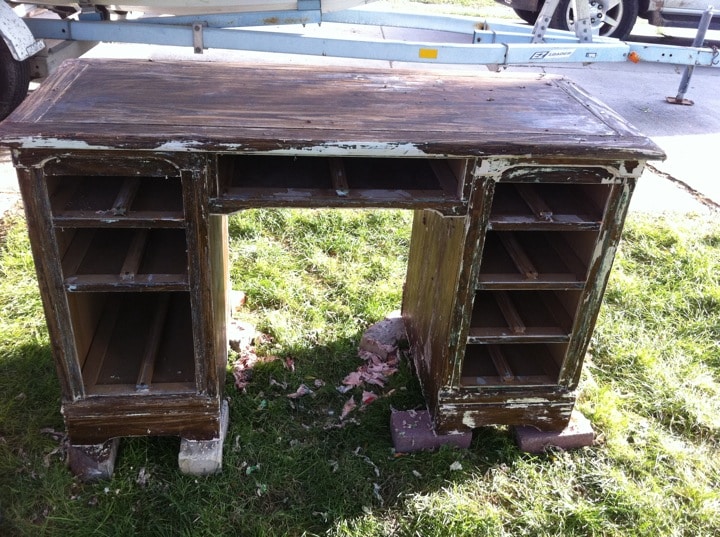
I found a desk on the classifieds website and it was not pretty. It did check my requirements though. It was solid wood and large. The desk also had a lot of drawers which gave the boys more storage which was great for their needs.
How to Prepare Painted Furniture for Makeover
Since this was one of my first furniture projects when I started this process I wasn't totally sure what my plan was.
I wasn't sure if what I thought would work for this desk makeover, would work. Unfortunately, I didn't take photos from the very beginning.
I knew the desk was wood, and it was in very good condition besides being covered in paint. The first step was removing the paint to reveal the natural wood and see what I would be working with.
How to Remove Paint from Wood Furniture
I used Citristrip to remove the paint. I love this stuff. It works really well and the smell is actually pleasant. Use a paint brush and broad brush strokes to coat the Citristrip onto the entire piece.
Because this desk had many layers of paint I did have to use the Citristrip quite a few times. After applying the Citristrip to the first coat of paint, let it sit for a while. Then use a scraper tool to remove everything that lifts off easily.
One type of paint I came across in the process that appeared to be acrylic paint took longer to remove so depending on the types of paint on your furniture you may need it to sit longer.
The first layer that was removed was a drippy yellow clear coat. This layer was so thick that although it had obviously been on there for a long time and was still tacky.
Layers 2 and 3 appeared to be regular white paint and were removed pretty easily.
After removing the white paint things in this desk makeover got very interesting. I'm not sure how many layers of paint I removed after that but I do know I found yellow, blue, red, pink, and green. There were different colors in different areas of the desk which left me wishing I could see what the desk looked like at that point.
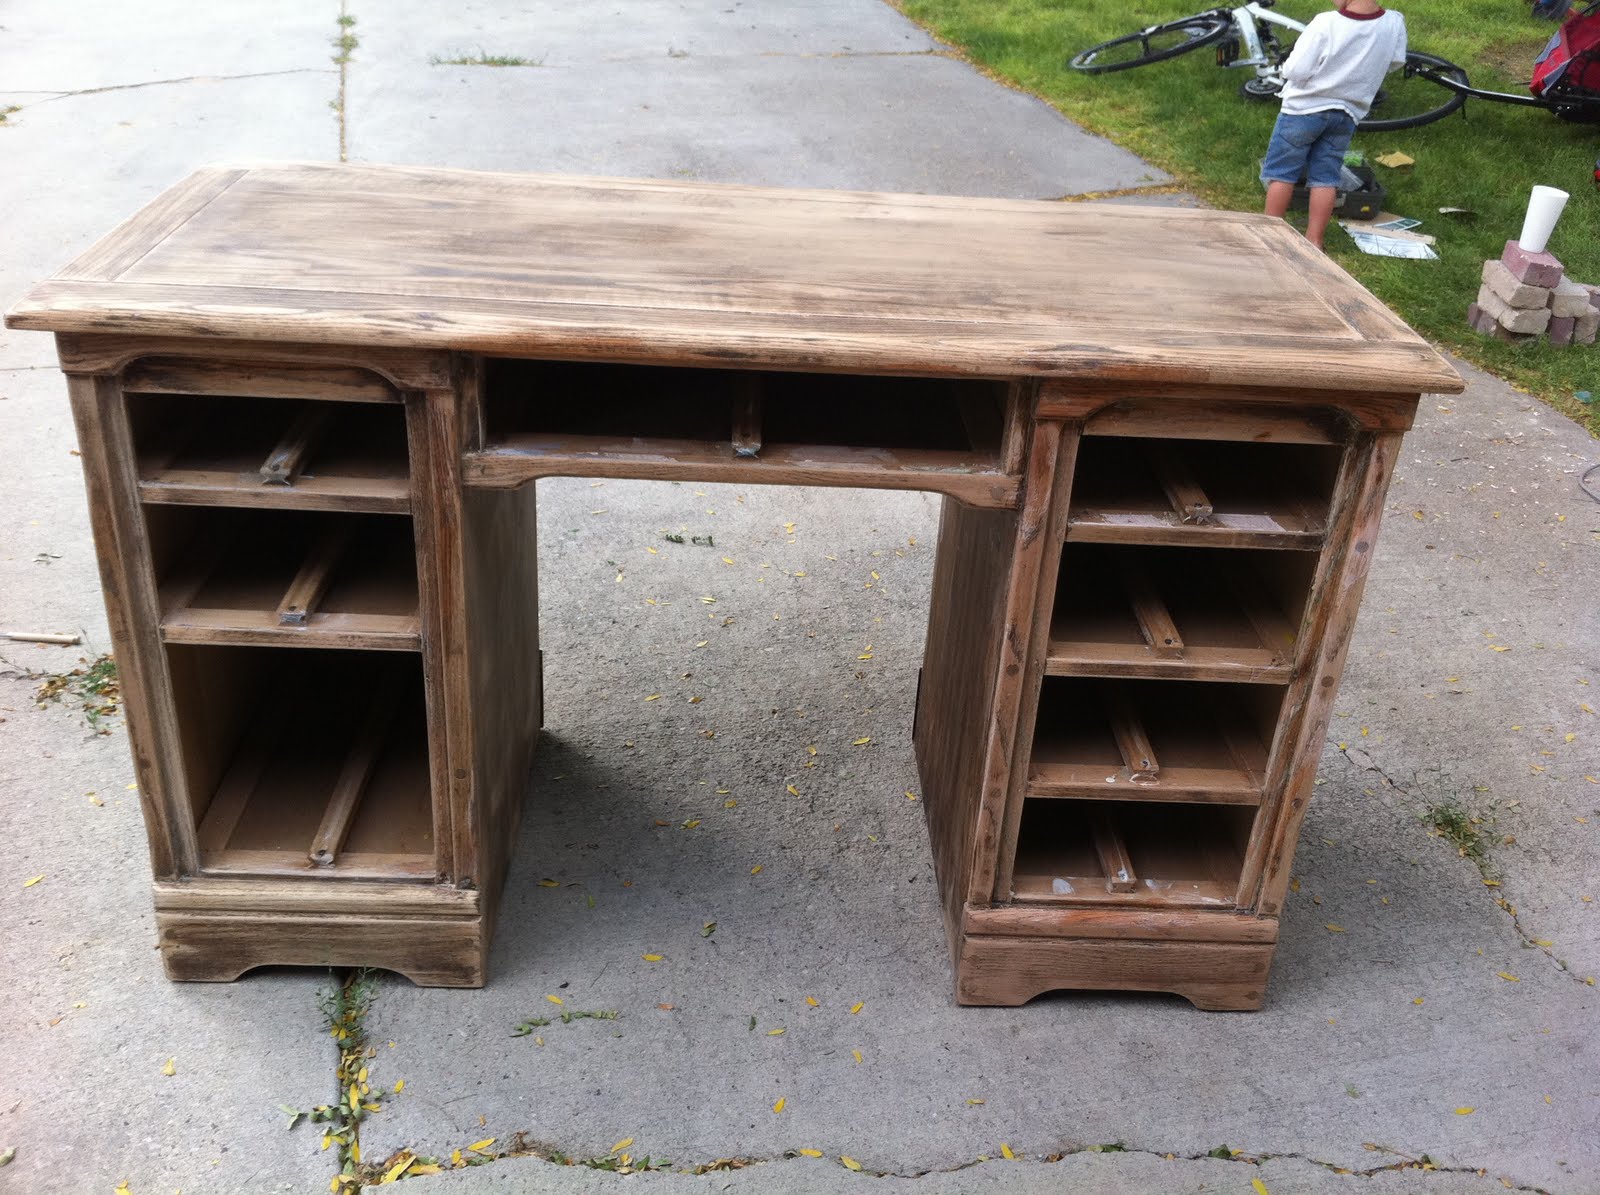
In the photo below you can see what the body of the desk looks like with most of the paint removed using Citristrip.
I also stripped the drawer fronts, sides, and insides to make sure that all the paint was removed as much as it could be.
Sand with Orbital Sander or Sandpaper
Once the Citristrip seemed to stop working it was time to break out the sandpaper.
To begin, I used an orbital sander with heavy grit sandpaper and gave it a good sanding to remove all the paint.
When the paint was all removed I changed to a fine grit sandpaper to get a nice smooth wood surface.
Under all of that paint was a beautiful desk. There was so much paint that before I started I didn't even know there was a groove in the top of the desk.
Initially, I had intended to paint the entire desk but the raw wood was so beautiful I changed my mind. I taped off the entire desk top and then painted the bottom of the desk.
Prep Desk for Paint
Before you do any painting, staining, or priming fill any dents or holes with a paintable/stainable wood filler and allow to dry.
You may need to sand those areas again because they can expand as they dry.
Next, use a lint-free cloth and give the whole thing a good cleaning to remove all dust, dirt, and other debris.
The prep work will be helpful in getting great results in your finished product.
Prime Wood Surface First
I have found that using a good primer really helps your paint look good regardless of the kind of paint you're using. I'm a big fan of Kilz spray primer. I did a light coat on the entire bottom of the desk and the drawer fronts.
If you're using a chalk paint like Country Chic Paint or Annie Sloan Chalk Paint using a primer isn't necessary. Those paint types weren't readily available in my area so I proceeded with the type of paints I had used before.
Painting Furniture
Once those steps are complete it's time to paint.
I used a white spray paint by Krylon. I'm a fan of their nozzle and it worked really well with the Kilz spray primer. If you don't want to use spray paint I would use a high-quality paint brush or foam roller to prevent getting streaks in your paint.
I did light coats and allowed it to dry the recommendations for my paint between coats. If you're using spray paint make sure you pay attention to the weather because spray paint requires certain temperatures to use.
I knew I did not want the finished product to be a bright, pure white paint. So once I was done painting and the paint was dry it was time to do a little distressing.
How to Distress Painted Furniture
To distress painted furniture you want to have an idea of how much distressing you want. If you want very light distressing I would not use a sander.
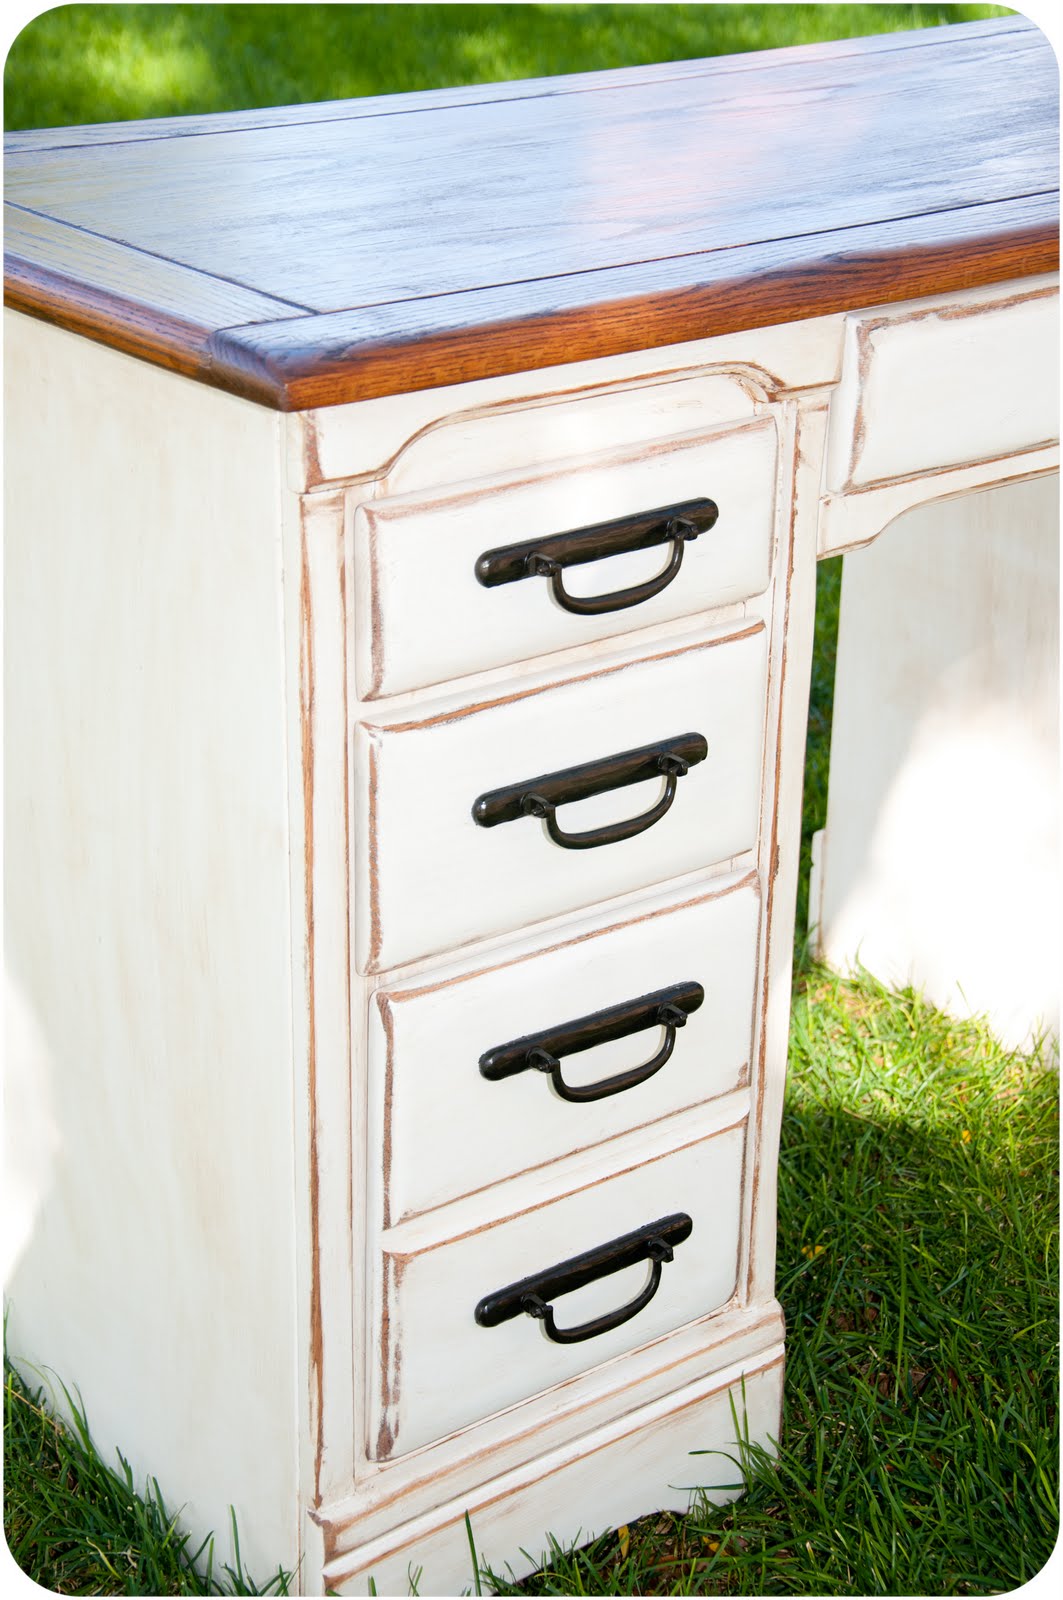
I wanted a medium distressing on the entire desk so I hit the sides of the drawers and other touch points with a sander using fine grit sandpaper. One of the reasons I like this look is because now I don't have to worry about the boys scuffing or nicking the paint.
Another reason to love distressing is because you can do as much or as little as you want.
How to Stain the Desk Top
The staining process was actually really easy. I used Minwax Early American stain and an old t-shirt to apply it.
Simply dip the cloth into the stain and rub it onto the entire desk top surface. I like to apply stain to the entire surface and then use a piece of cloth without stain and wipe the whole thing down to remove excess stain.
If it isn't as dark as you want the first time you can repeat the process as many times as you want. You can always go darker but you can't really lighten it up so I like to do multiple quick coats vs. one long coat.
How to Stain Distressed Areas
I like to take a cloth that has stain on it and wipe it over those areas. I don't apply a lot and it doesn't always require wiping back off.
How to Stain Other Areas of Furniture
As I mentioned above I did not want my finished desk to be bright white. To get the finished look I desired I used a cloth that had stain on it that was mostly dry and wiped the drawer fronts and sides of the desk.
Immediately after wiping the stain on I wiped it off with a clean cloth. I did not want the whole painted area stained just little pops of stain here and there.
How to Finish Your DIY Desk Makeover
There are a few different ways you can finish your newly painted desk. The first step is to allow the paint to dry. Depending on where your furniture will be used you may want to add a clear coat to protect the wood.
This desk will not be used anywhere near food or water so I am not worried about the desk top since it is stained and not painted.
I used a clear spray sealer for the painted area of the desk including all the drawer fronts and the rest of the whole furniture piece.
Another option is to add drawer liners to protect the inside of the drawers. My boys really like to drop toys into the drawers so if they were painted I would add a vinyl liner to the inside to protect that paint.
Add Hardware
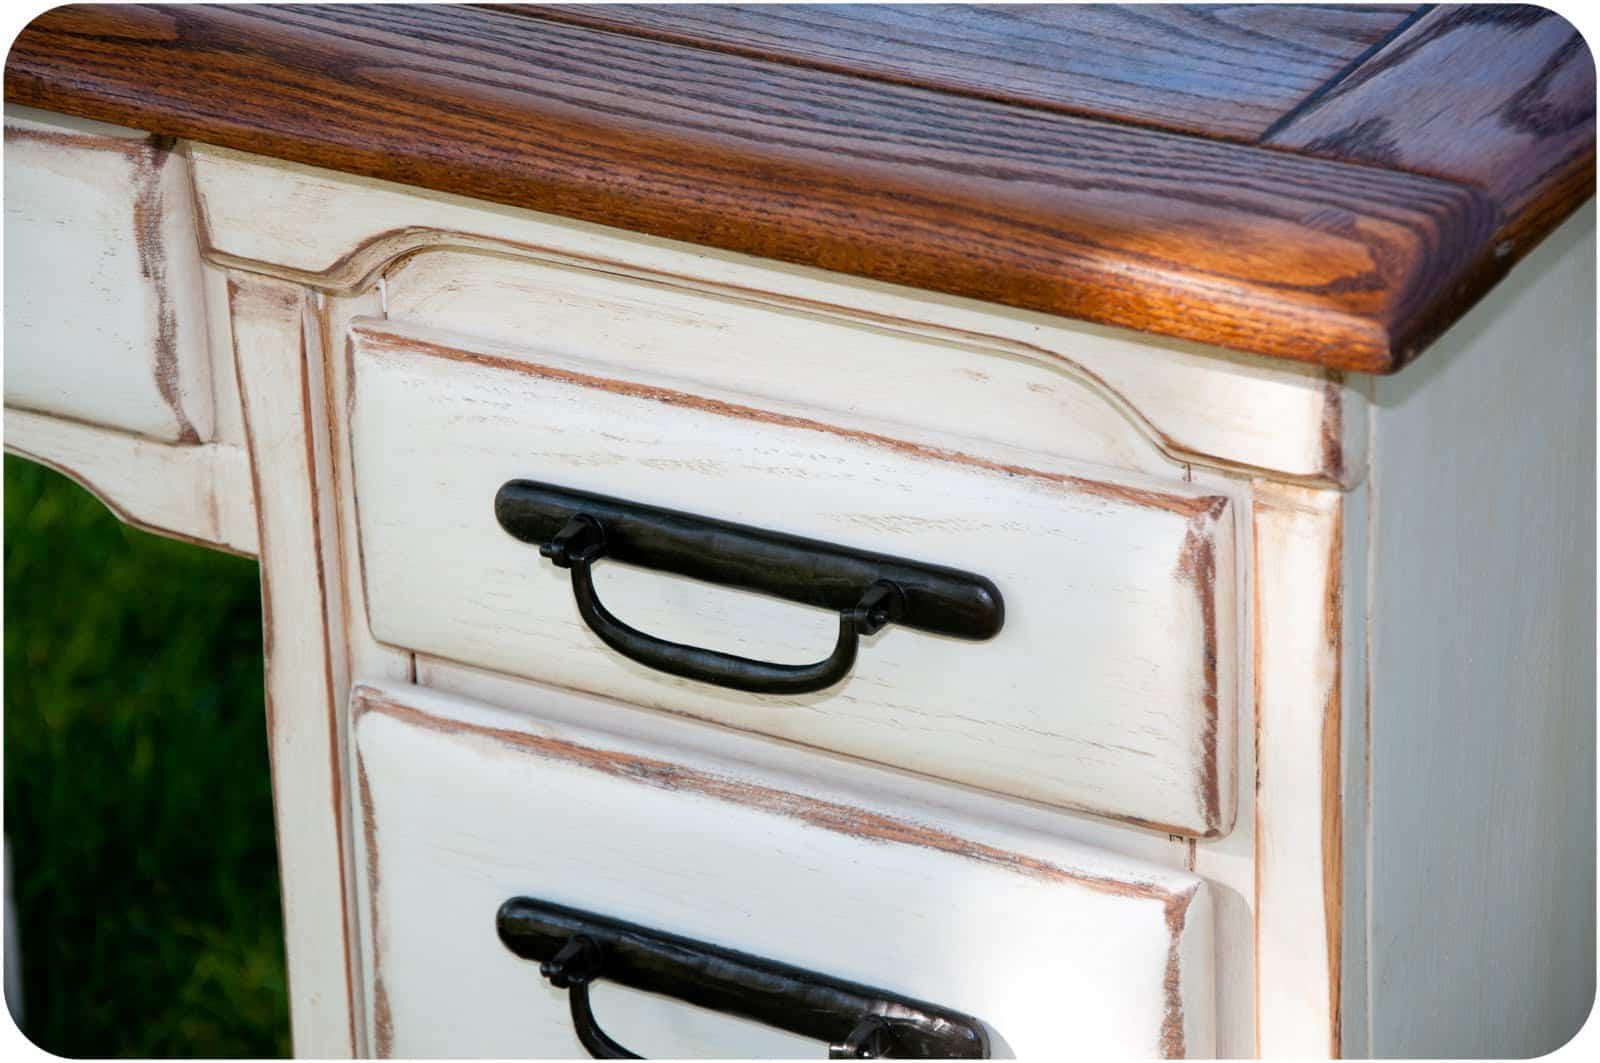
I was really lucky and was able to reuse all of the original hardware that came with the desk. I did add a fresh coat of paint to make them look good with the new paint job.
If you are using new hardware you need to make sure they either line up with the current holes or, before painting add wood filler to the holes and sand to get a smooth finish.
Next, you would drill holes for the new hardware. The plus of using old hardware is not having to fill and drill holes.
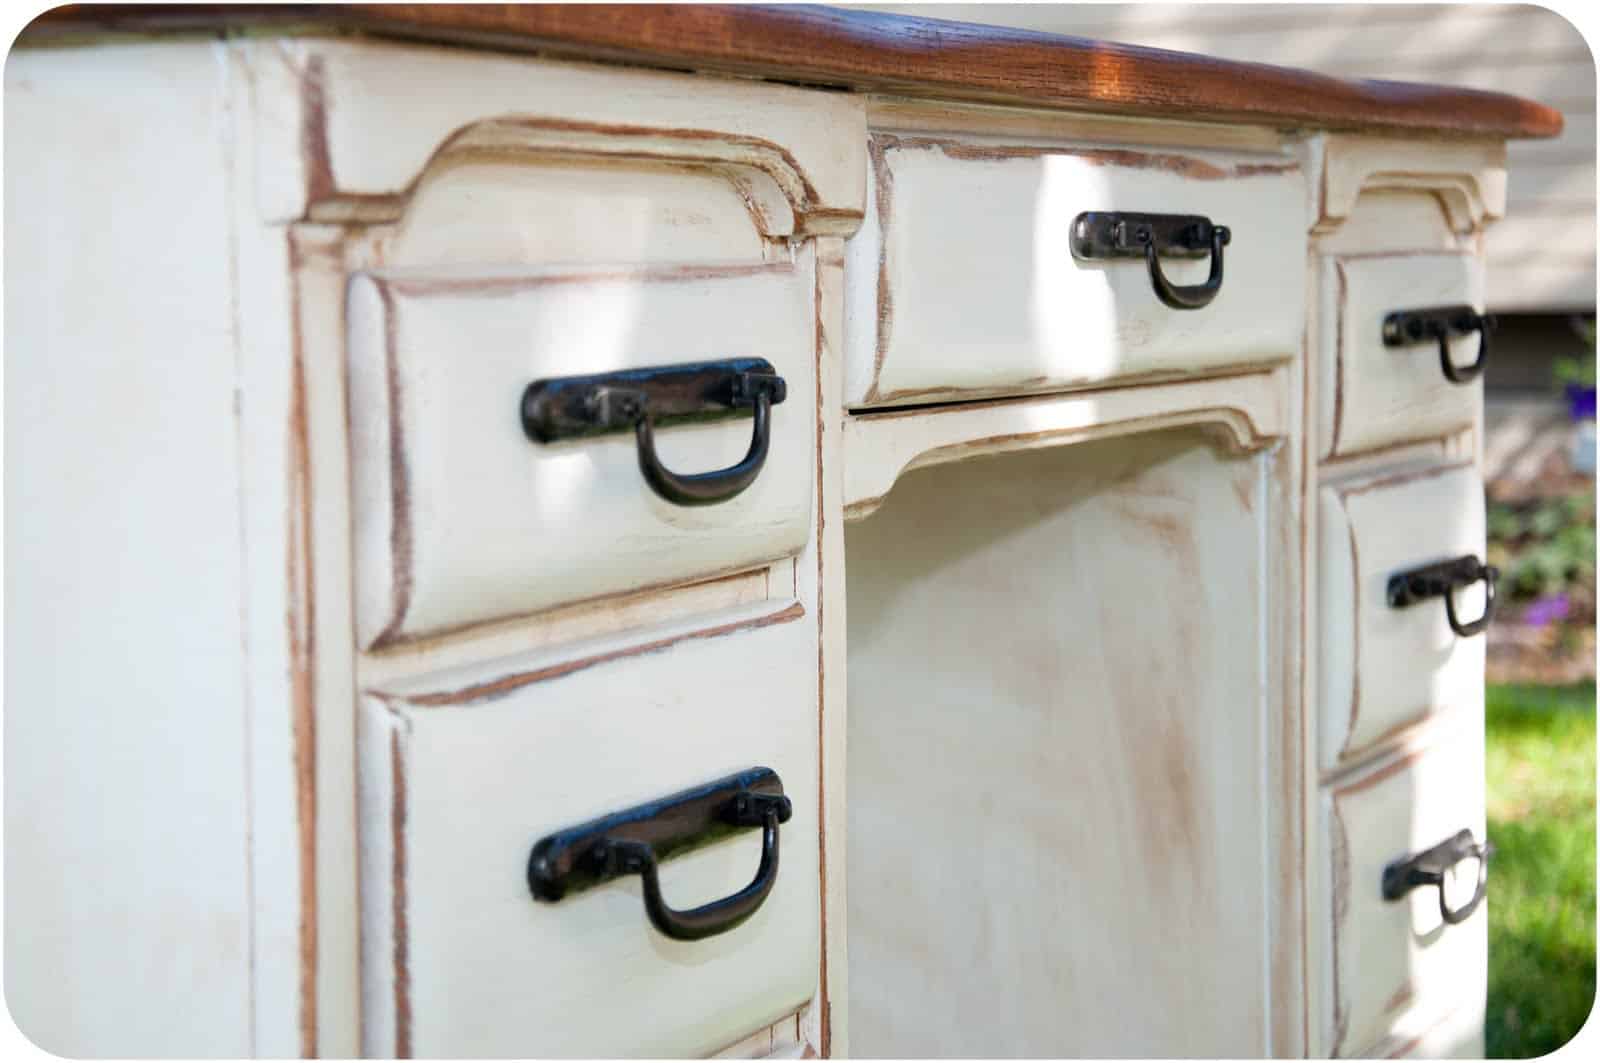
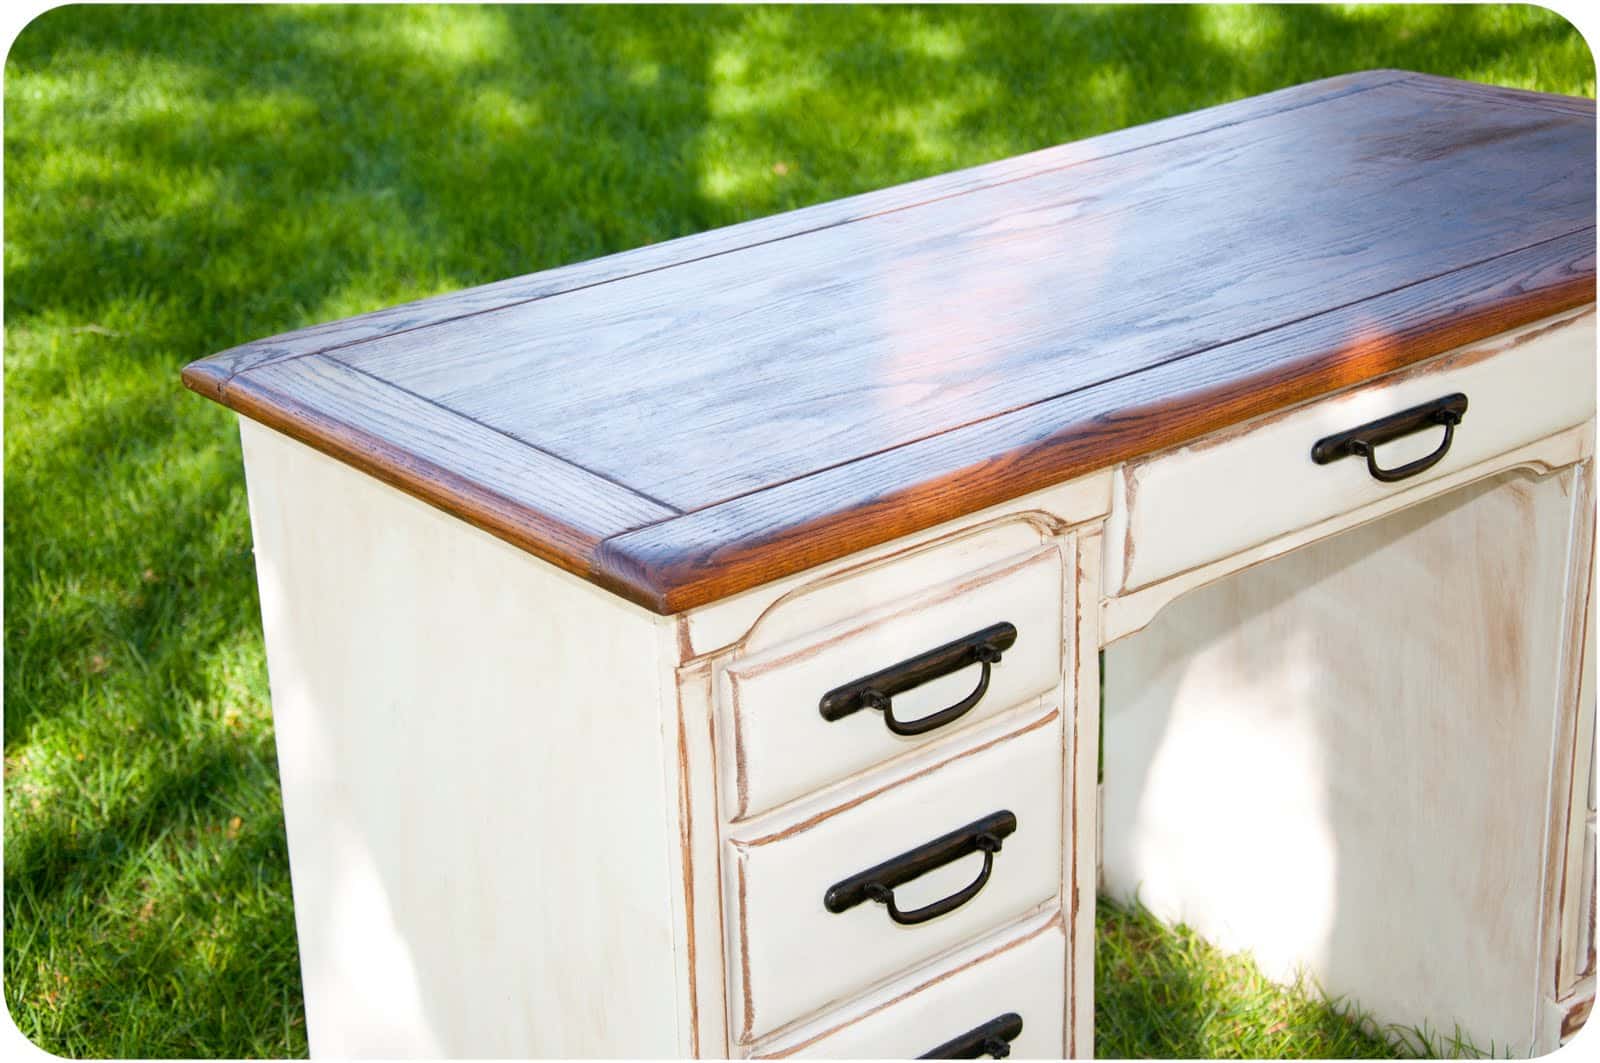
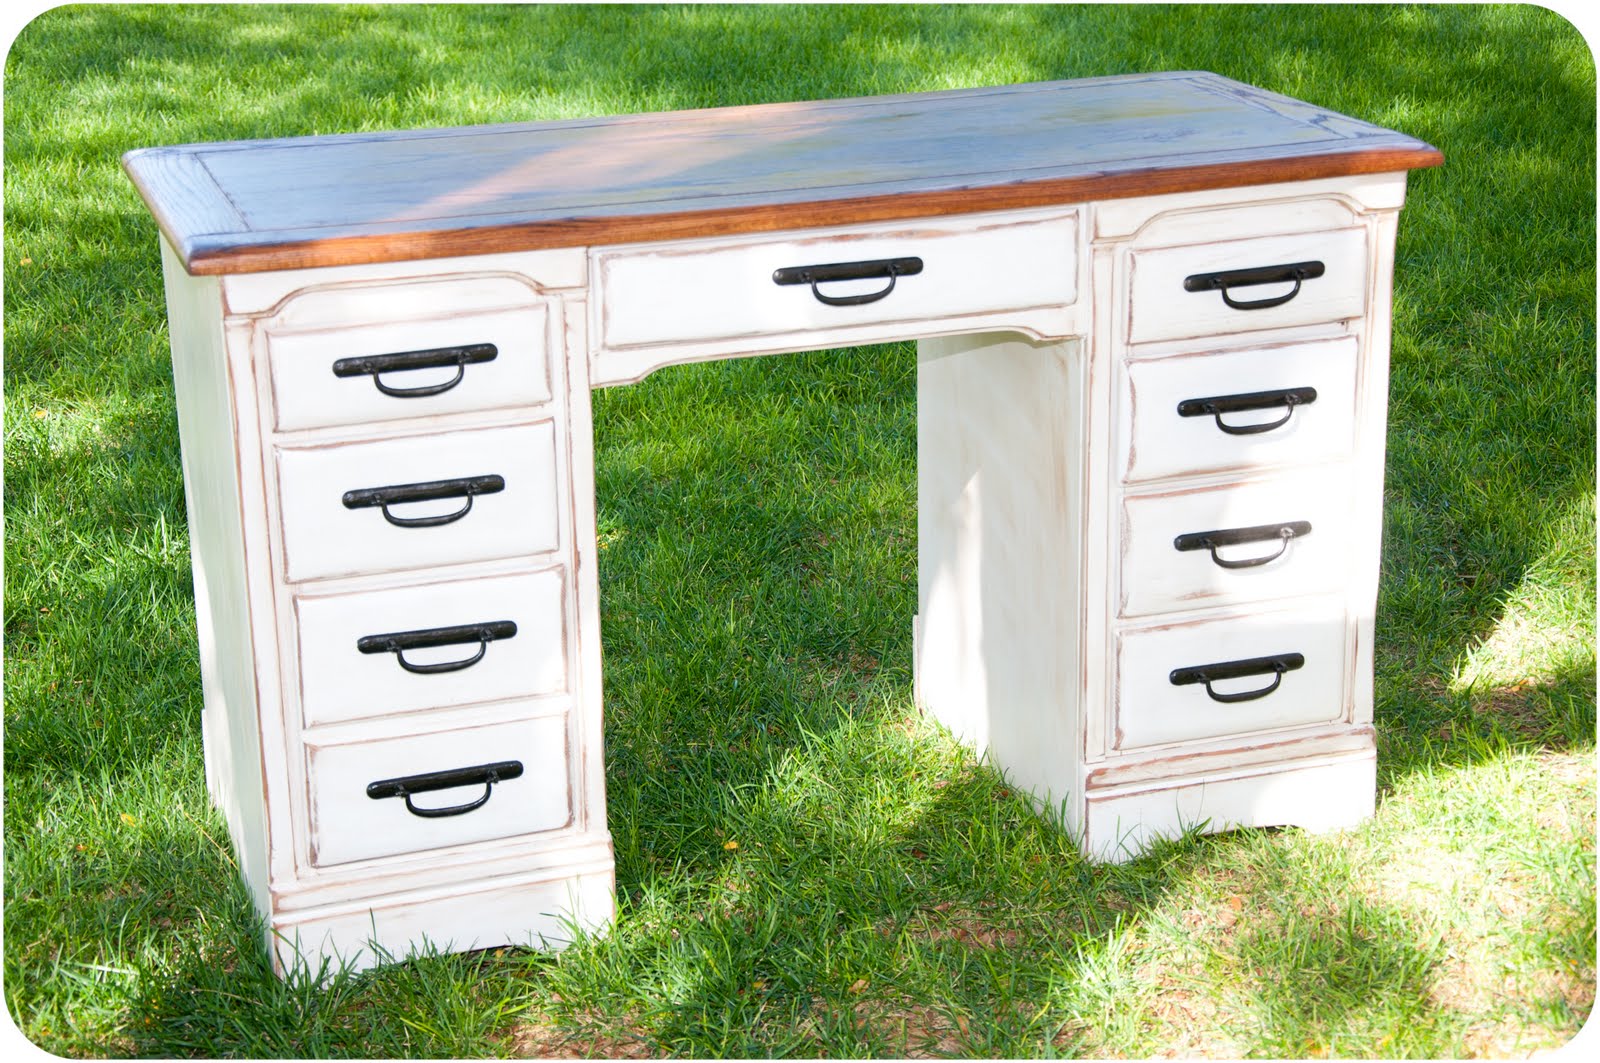
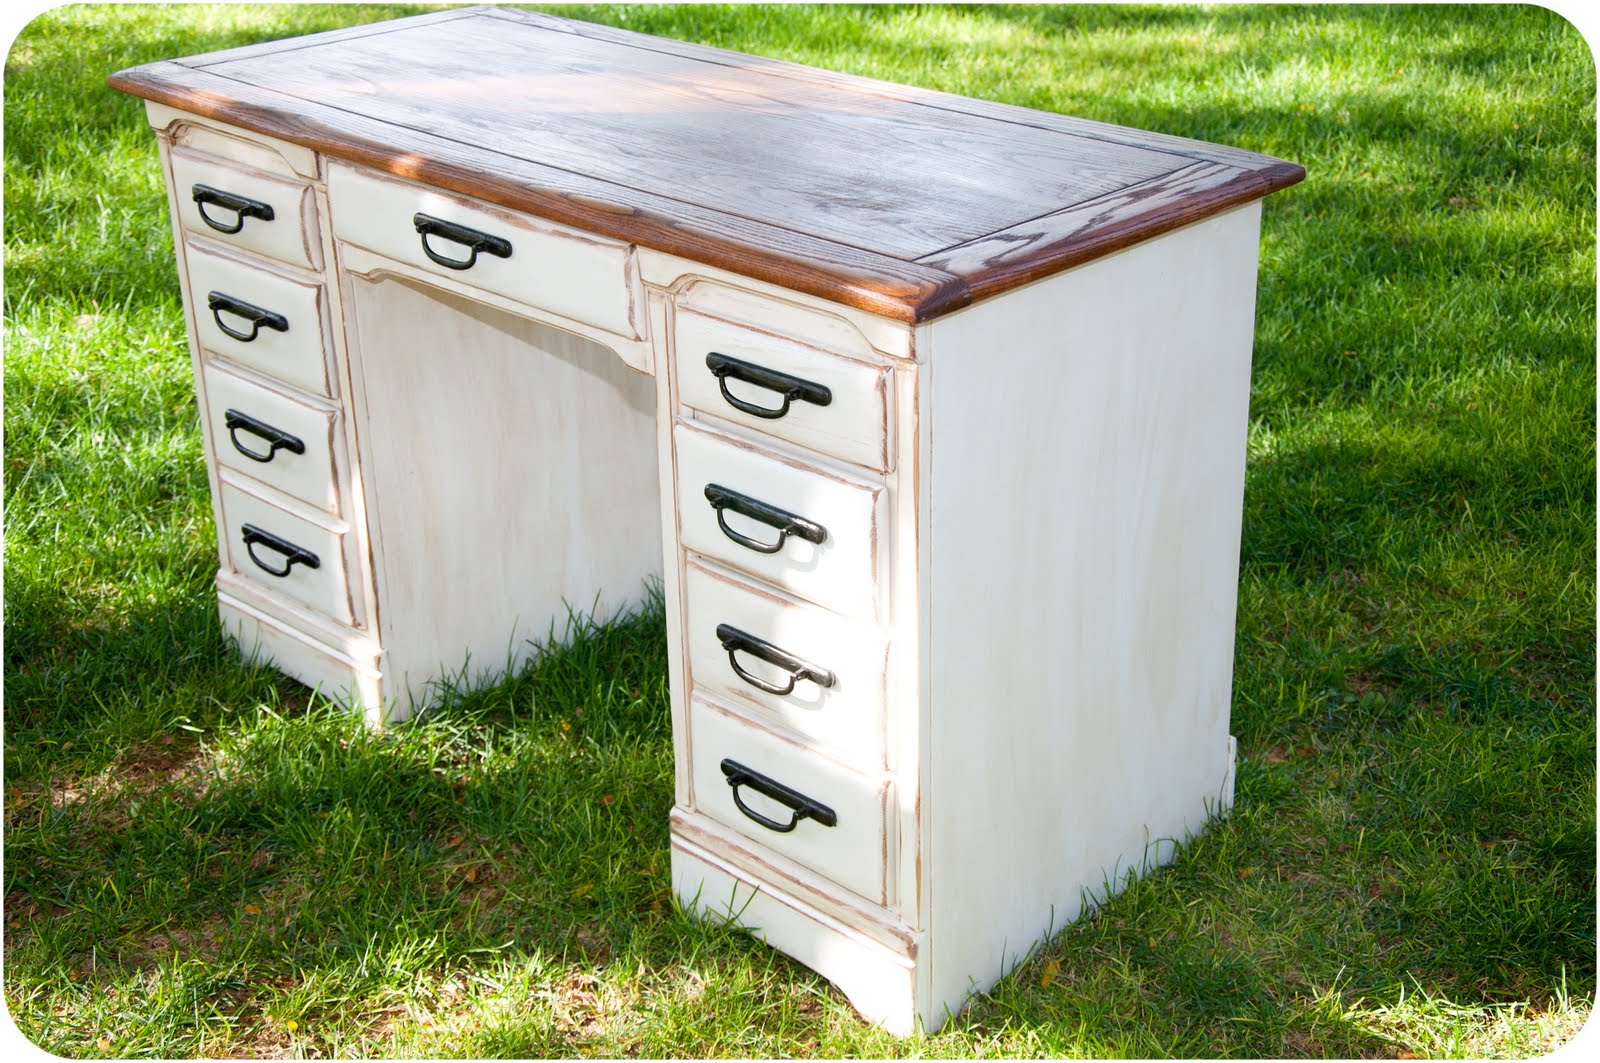
Close Up of Finished Desk Makeover
I want to show you a close-up of the top of the desk.
I really can't believe the wood looks so good after having all of those layers of paint on it. You can see the grooves in the desk top and that the pieces are dove-tailed together.
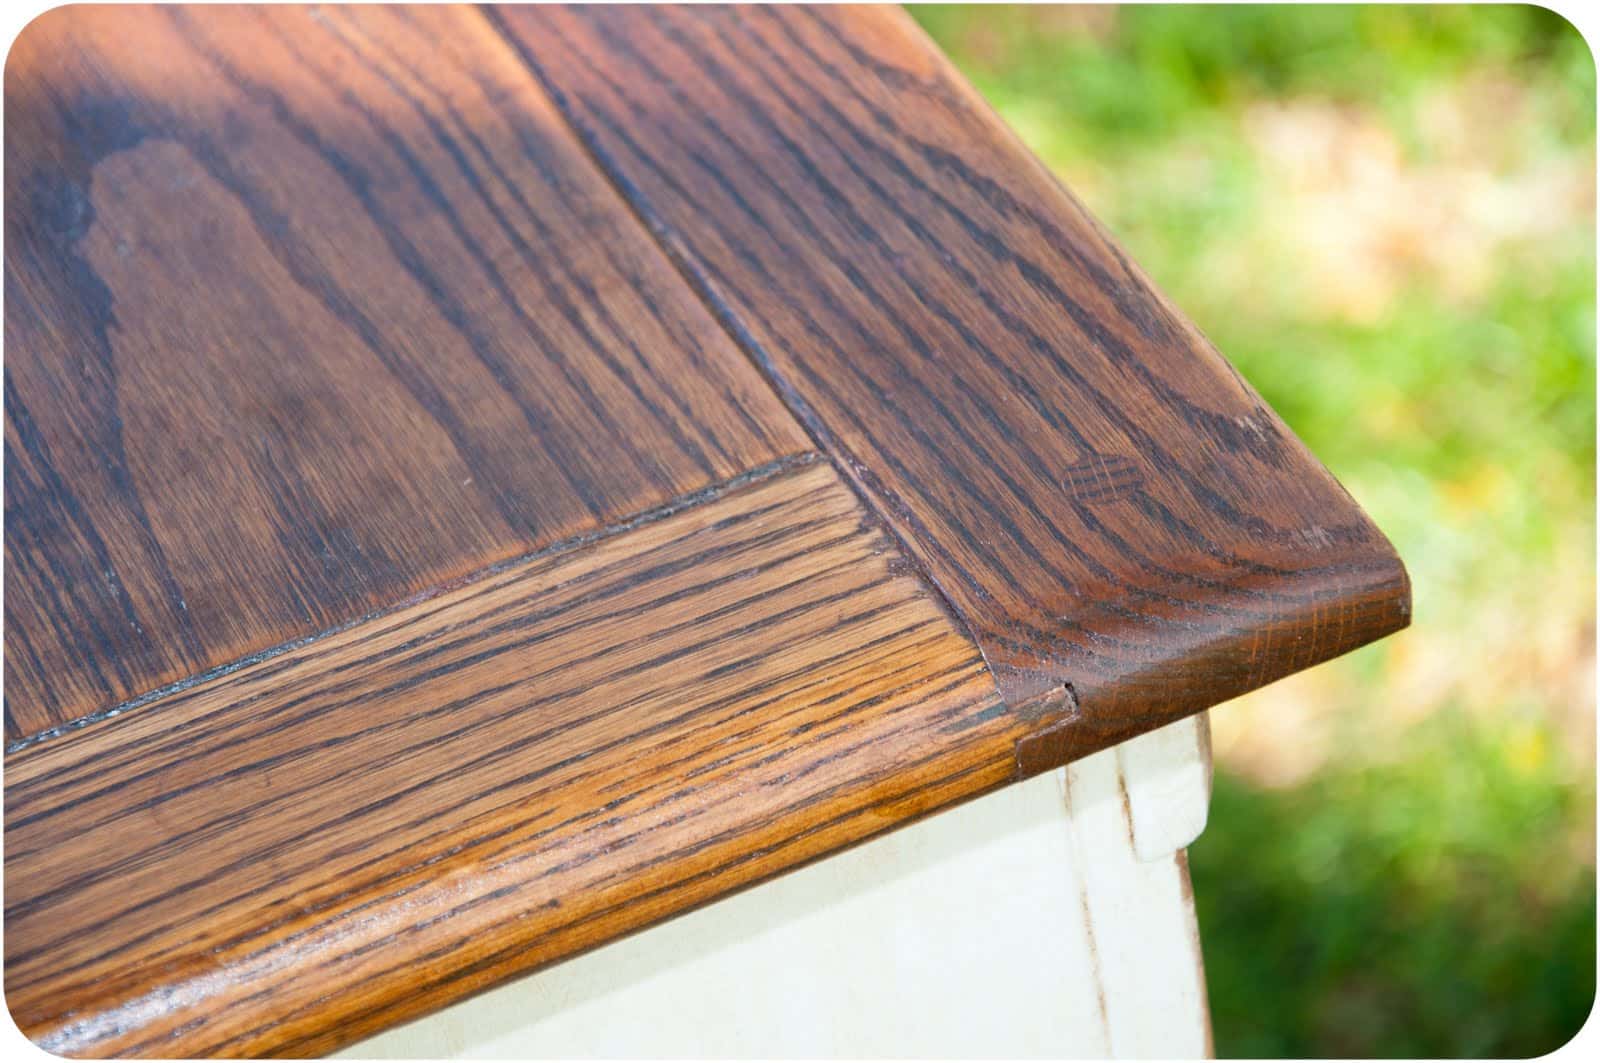
I feel like the stain really brings out the wood grain and compliments the whole look beautifully.
I really can't believe what a little TLC did for this desk. In fact, the finished product caused a bit of a disagreement in our home. Nate was convinced that the desk was now too nice for the little boys' bedroom and thought we should put it somewhere else.
I'm happy to report I got my way and the desk that was made for the boys ended up down in their bedroom as the perfect addition. It is getting lots of use between lego building and homework and so far they're doing a great job keeping the top cleaned off so they can use it when they need it.
I know this isn't a full step by step tutorial with photos, I apologize for that. If you have any questions about the desk makeover process feel free to leave them in the comments and I'm happy to answer them for you.
I'd love to hear about your desk makeover project, so tell me about that too!
- Bringing Home Baby Chicks - March 11, 2025
- Is RootsTech for Moms? - February 23, 2024
- How to Get Oil Stains Out of Clothes - May 5, 2023


That desk is beautiful!!
Love the distressing!
I hate stripping paint… but it usually is worth all the effort. This turned out gorgeous!
where did you get the hardware? I love it.
Thank you all so much 🙂 Cynthia, I agree, the stripping is awful (well, the 1st pass is kind of rewarding because you see so much come off but after that UGH!) but in this case it made such a difference.. Thanks again!
Elizabeth, it is actually the original hardware. I wasn’t sure I loved it and so I pulled it all off and even filled in all the holes for the screws and then I discovered Krylon’s oil rubbed bronze spray paint – I painted them and then loved them again so I got to re-drill the holes and put them back on 🙂 Thank you!
It looks great! I just did a dresser too, and know the work it is! (and I bought ORB paint to do the hardware too, just haven’t done it 🙂
http://craftingintherain.blogspot.com/2011/09/dressed-up-dresser.html
I just went and looked. Your dresser is awesome. This desk has a tall dresser, long dresser and 2 nightstands that I just refinished all of – am waiting for the drawer pulls before I post them!
What an amazing transformation! I’d love for you to link this up with my blog recreation party! http://notsosimplehousewife.blogspot.com/2011/09/recreate-into-something-new-6.html
Hope to see you at my place soon!
Kaitlin-The Not So Simple Housewife
http://notsosimplehousewife.blogspot.com
Thank you Kaitlin, I linked up at your blog 🙂
Oh wow, it turned out great! I can so relate to your experience with your desk, having gone through something similar. The detail on my desk surprised me too once stripped. Please stop by and see for yourself. http://www.thediyspot.com/2011/09/desk-love/ Love the two toned and distressed combo. And your blog name is just too funny! LOL
Joselyn, thank you. I went and saw your desk! It’s gorgeous, I can’t wait to see what you do with it. If I had something like that I’d be tempted to make it really pretty and add a mirror above it and turn it into a vanity! Good luck.
Love it- it turned out gorgeous!! I host a link party on the weekends if you would like to come share sometime! 🙂
Courtney, Thank you. I will be sure to come visit your link party!
Love the title of your blog…..when will ladies be staring on Bravo? Anyhow the desk transformation is just great I love the distressing especially, it’s neatly done along the edges just great!
Thank you 🙂 I don’t think you’ll be seeing us on TV anytime soon – we’re a little to un-dramatic I would guess. Thank you so much. I am really happy with how it turned out 🙂
What a labor of love! I bet you heard the desk take a deep breath after all those heavy layers were sanded off! 🙂 It looks fabulous! Came over from 30 Days Pity party.
Wow! What a beauty she turned out to be!! I’m sure you are glad that this project is done! Looks lovely now! Found you via My Repurposed Life. Toodles, Kathryn http://thededicatedhouse.blogspot.com/2011/09/voice-studio.html
That’s a beauty! Definitely worth the trouble.
fran @ http://www.eleven-o-one.blogspot.com
FABULOUS…the grain on the top is so very beautiful!
That’s such an amazing transformation. It’s beautiful. THanks for linking to the party.
Thank you all so much for your kind comments. I have been loving reading them 🙂 they’re giving me a boost to keep working on some of the other projects. Deborah, the grain and detail on the top is for sure my favorite of the whole thing.
I forgot to tell you I featured this on my blog today. Have a great day.
This turned out beautiful! This is a perfect example of why we love to refurbish things. Who couldn’t love the satisfaction of these results?!
Thank you Leanne.
Michelle, you’re 100% right. It’s like a natural (and healthy) high to have something turn out so well 😀 Thanks!
Great job on this makeover! Thanks for linking up at MoMomma! 🙂
Thanks so much Amy.
Thanks for responding to my invite! This is so great! I love it! Thanks for sharing it with {Re}creation Into Something New Wednesdays at Not So Simple Housewife! Hope to see more from you this upcoming Wednesday!
Kaitlin-The Not So Simple Housewife
http://notsosimplehousewife.blogspot.com/
I want this desk!!! It’s amazing! Well done!
Thank you. All these comments make me feel awesome!
What a brilliant makeover! What a difference!
Thanks for linking to a Round Tuit! Remember the voting is now open – if you want to head over and vote for your project! The most voted link will get a full post feature/promotion next week!
Hope you have a great week!
Jill @ Creating my way to Success
Round Tuit 67 voting
You did an amazing job. That desk is beautiful! thank you so much for linking up to my party Show and Share! hope to see you again this week!
A mommy’s life…with a touch of YELLOW
tyandwhitneyulrich.blogspot.com
amazing redo on this desk! I love the color combination of stain and white. I recently did a kitchen table this way.
thanks for linking up, catching you this week.
gail
Thank you all. I love this project and appreciate so much all the kind comments.
This desk came out GREAT! Thanks for linking to Success U @ TheStuffOfSuccess.com
What a job but the final results are wonderful! Thanks for sharing this makeover at the Open House Party.
Hugs,
Sherry
I completely feel your stripping pain. Spent the last two days hanging out w/ Citra Strip. The results on yours, well worth it…look at that wood on top, it is beautiful. Really nicely done! Mine, well we shall see tomorrow…all stripped and now I finally get to paint!
Athena & Sherry thank you! Sue, I hope yours turns out exactly like you want!
It’s absolutely gorgeous! Definately worth the many hours of stripping and hard work! It looks like a Pottery Barn desk!
Katie – what a compliment! Thank you so much 🙂
Love! Those handles are awesome!!! Can’t wait to see the room all done!
Thank you Meg, I am hoping to be able to share sooner than later.
HI!
question for you – what paint style did you use for the bottom part?
thanks!!
Beautiful desk! I saved a desk that was going to be thrown out as it had a missing drawer, which can easily be replaced. They make drawers to size in solid wood of your choice.
Thanks. I love it. I’m glad you were able to save one too!