This post may contain affiliate links. If you purchase something through any link, we may receive a small commission at no extra charge to you. Supplies used may be given to us free of charge, all projects and opinions are my own.
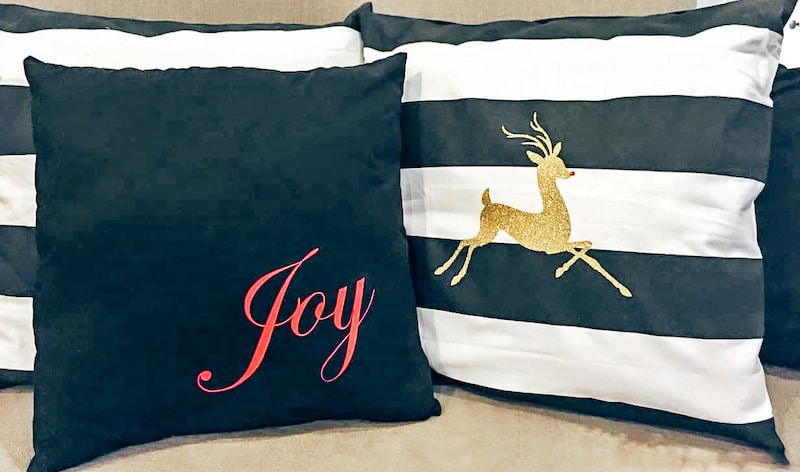
Christmas is just around the corner and I’m ready to break out all the Christmas decor. Years ago I created these easy Cricut Christmas Pillows to add a little holiday cheer to my couch.
Using your Cricut machine to customize pillowcases is easy and inexpensive. After you make your first one you’re going to want to make 20 more!
Looking for another fun Cricut Christmas project? Check out my Christmas tablescape here.
This post was originally shared in 2014 and has been updated to include more information.
How to Make DIY Christmas Pillows with Cricut
These pillows were so easy to make. You’ll probably be shocked at how easy they are. If you’re new to Cricut or HTV this is a great beginner project.
Supplies Needed to Make Easy Cricut Christmas Pillows:
- Cricut Machine
- Glitter Iron-on
- Cricut EasyPress
- EasyPress Mat
- Iron-on
- Black Pillow Case
- Black & White Stripe Pillow Covers
- Pillow Insert
- Cutting Mat
- Weeding Tool
- Cricut Design Space Cut File
What Cricut Machine do I Need to Make Christmas Pillow Covers?
These Cricut Christmas pillows can be made with any Cricut cutting machines. This includes all Cricut Explore and Cricut Maker machines along with Cricut Joy. If you’re using Joy the size of your design will be limited. Since Heat Transfer Vinyl (HTV) is cut with the fine-point blade all machines can be used.
These were actually the very first project I made using the Cricut Explore machine when it first came out. I can’t even believe there have been like 8 machines released since that first Explore machine.
What Pillow Covers Work Best?
I think any pillow cover will work well. Back in 2014 I found my particular pillow cases at Walmart and Ikea. These are no longer available but I found almost exact duplicates on Amazon that have good reviews and linked them above.
When using HTV I like my fabric to have a cotton/poly blend when possible, I feel like the iron-on adheres really well to that fabric combination.
Getting Images in Cricut Design Space
You can use any images in Design Space to create your pillows. If you have Cricut Access you have access to thousands of images you can use without any additional fees.
You can also upload your own images too. There are lots of sites that offer free SVG files that you can upload into Design Space if you wanted a pillow with a design that is different than the ones I share in the link above.
Joy Cricut Christmas Pillow Tutorial
To make the black pillow with Joy applied I used Everyday Iron-on in Red. You can use red or cherry to get that nice bold red look on the black pillow.
Unfortunately, I don’t have any idea what computer font I used to create the SVG when I originally made this project. I did look in Design Space and found an image that is similar.
I linked to the canvas in the list above. There you’ll find the designs for both pillows. If you only want to make the Joy pillow you can either hide or delete the reindeer images.
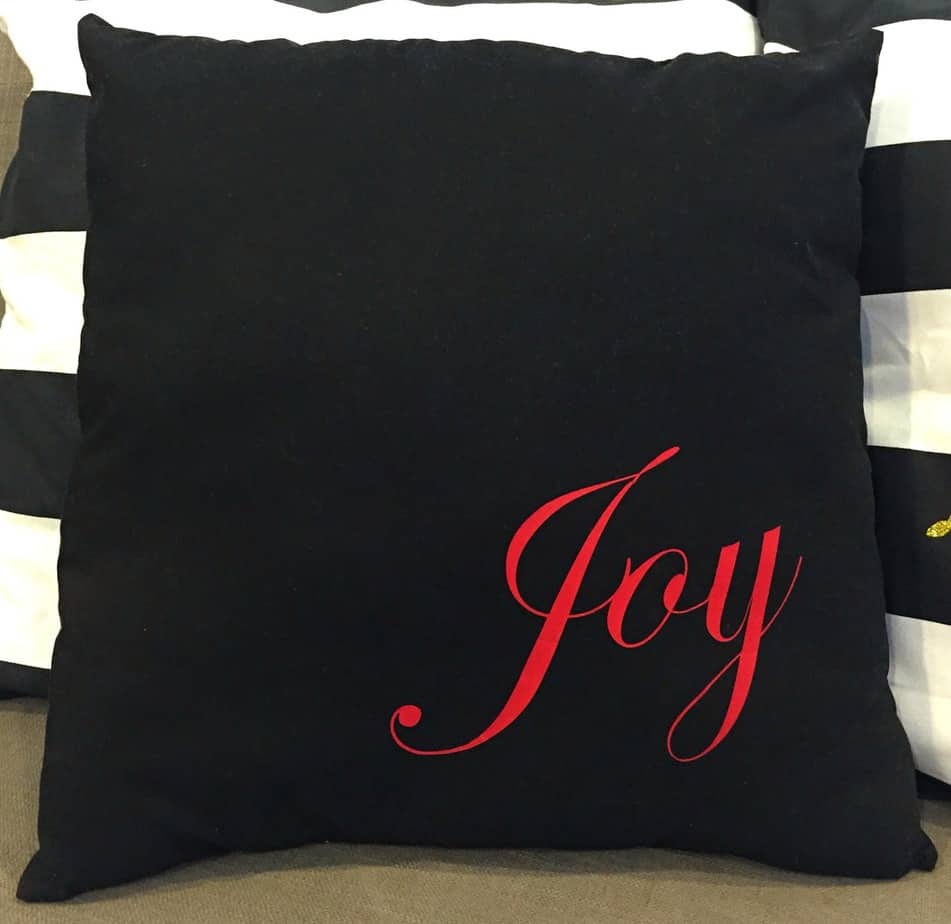
To make the Joy pillow lint roll your cover really well and then preheat for about 5 seconds using the Cricut EasyPress 2. The Cricut Heat Guide is a great reference for time and temperature.
I like to place the EasyPress Mat inside the cover and then press the SVG design for the full-time recommended by the Heat Guide. Everyday Iron-on typically has a pressing temperature of 315 degrees for 30 seconds. You’ll then flip the cover over and press from the back for 15 seconds.
Allow the HTV to cool long enough for the adhesive to adhere to the fabric and then peel back the carrier sheet. After you remove the protective sheet you’ll
Again, these are the typical settings. Follow the actual step-by-step recommendations in the heat guide for the best results.
DIY Gold Iron-on Reindeer Christmas Pillow
Preparation for the reindeer pillow will be similar to the Joy pillow. I decided to place this pattern in the center of the pillow. I think it looks really good that way.
Glitter iron-on has a pressing temperature of 330 degrees for 30 seconds and then flip over and press from the back for 15 seconds.
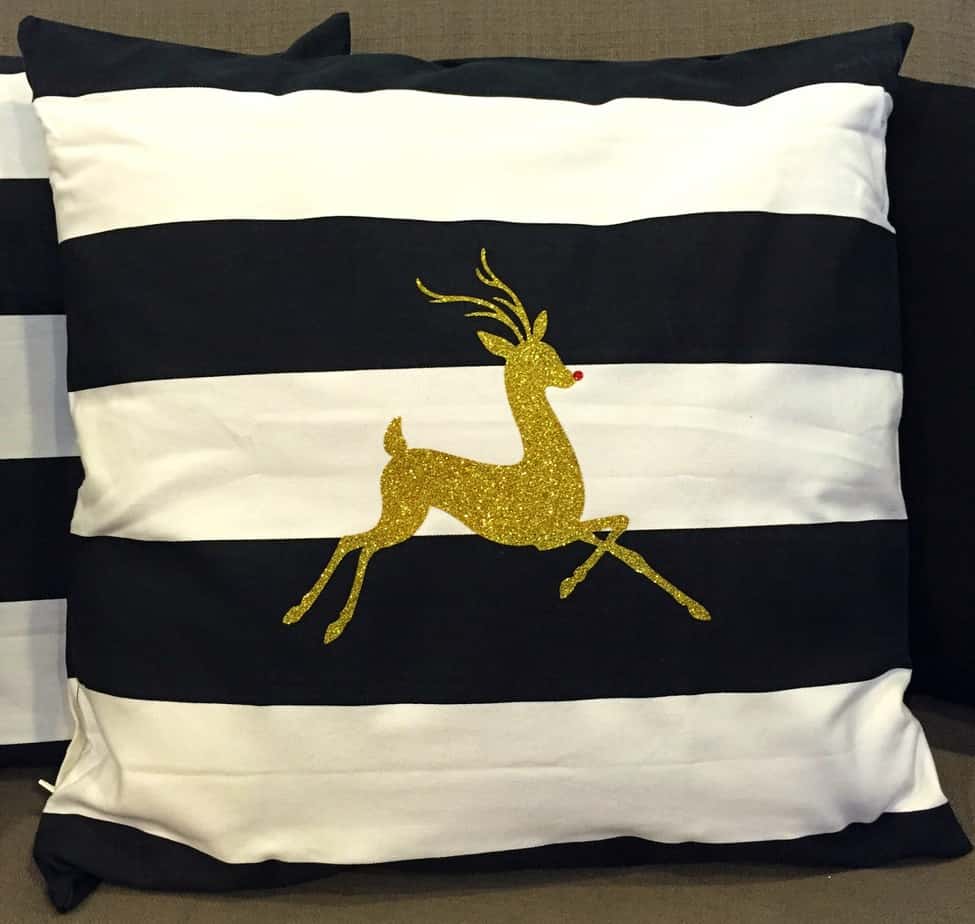
Glitter is a bottom layer only HTV. That means you should not apply any HTV on top of it because it will likely lift in time. Because of that in my image the red nose is sliced out of the gold reindeer.
Press the gold glitter layer first and then press the nose on, making sure it sits next to the gold and not on top of it. Follow the settings for whatever material you decide to use for the nose. I used red Everyday Iron-on.
What Size Covers and Inserts Should I Use?
The size of the cover doesn’t really matter, it’s totally up to you. The ones I linked are 18″ and I recommend getting a pillow insert that is the same size as the cover. I like my pillow cases nice and full.
You can find 20″ x 20″, 12″x12″, or even smaller or larger sizes if you wanted. I would recommend sizing your design to fit your pillow. You don’t want a 20″ or larger pillow case if you can’t make your design much larger than 11.5″, it may look small on the pillow depending on what the design is.
FAQ’s on Easy Cricut Christmas Pillows
Can I wash my customized pillows?
Yes. Cricut does recommend after applying HTV you wait 24 hours before washing. I recommend washing and drying inside out to help prevent any damage to your design.
How Many Throw Pillows Should I Make?
This is a personal choice. I tend to like matching pillows on my couches. Because of this, I made 2 of each for each couch. You could do one of each for each couch or two of each and put the matching pairs on different couches. It’s totally your call.
Can I Use an Iron for My Cricut Christmas Pillow Projects?
If you don’t have an EasyPress or heat press you can use an iron with iron-on vinyl. You’ll need a nice firm surface to press the design on the pillow case. You’ll also want a thin cloth or parchment paper to put between the iron and your HTV.
Depending on the type of material you’re using you’ll have better luck using an iron. Finding the correct temperature and time can be difficult when using an iron but you can find those instructions inside the packaging.
I’m kind of thinking this year it would be fun to make one with a Christmas tree to add to my pillow collection. I also think these would be fun to give as gifts. You don’t have to make holiday pillows, you could use this same tutorial for any season.
If you’re looking for holiday decor that says Merry Christmas when you look at it check out these other Christmas pillows I created. All of these can be made using Cricut Explore Air 2, Air, Maker, 3’s, etc. You can use Joy to do a lot of them as well but you’ll be limited on size.
I hope I’ve answered all the questions you may have about using Cricut to create easy Christmas pillows. If you have any questions or want to share your pillow ideas we’d love for you to leave them in the comments.
Have a great day!!
- Bringing Home Baby Chicks - March 11, 2025
- Is RootsTech for Moms? - February 23, 2024
- How to Get Oil Stains Out of Clothes - May 5, 2023


