This post may contain affiliate links. If you purchase something through any link, we may receive a small commission at no extra charge to you. Supplies used may be given to us free of charge, all projects and opinions are my own.
Oh Christmas Table, Oh Christmas Table…you may be my favorite part of Christmas decorating!!! Are you ready to recreate our Rae Dunn Inspired Christmas tablescape?
Updated 10/2020

I don't think the Rae Dunn popularity is going away any time soon. Do you love it? I love it.
The clean simplicity of the pieces makes me happy. I don't love how hard it is to get my hands on though.
Because I love it so much I created my own Rae Dunn inspired Christmas tablescape. The colors all came together so beautifully.
I know the Christmas tree and the mantle above the fireplace get most of the love this time of year. However, I have an obsession with a pretty Christmas tablescape.
I love having the table set with the colors of the season and personalizing each place setting is definitely an added bonus.
Why a Rae Dunn inspired Christmas tablescape?
I mentioned earlier that Rae Dunn pieces are hard to get your hands on. It was so exciting when I saw people creating their own Rae Dunn inspired pieces.
The personalized ornaments specifically are a favorite. I love the simplicity of them and knew I wanted to create my own.
I decided I didn't want to put them on my tree, I wanted them to be a highlight which is how the tablescape came together.
Let's make a Rae Dunn Inspired Tablescape.
Are you ready to get making? To create your own tablescape you're going to need to gather supplies.
I've linked everything that you can grab online below.
Charger
Plate
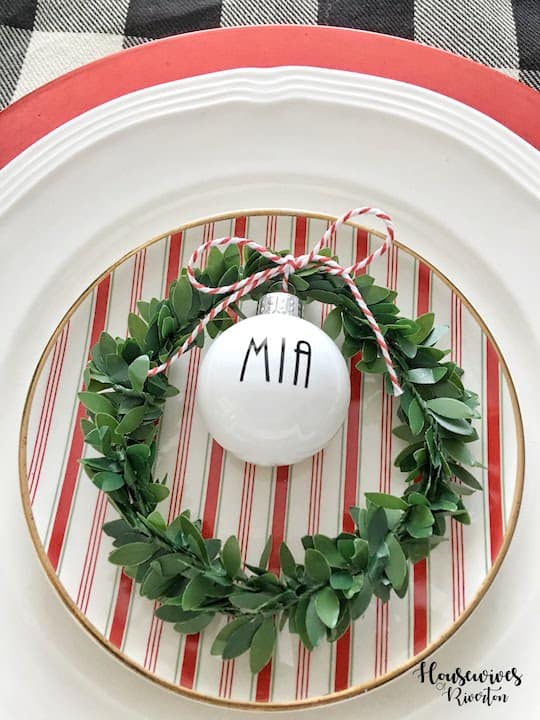
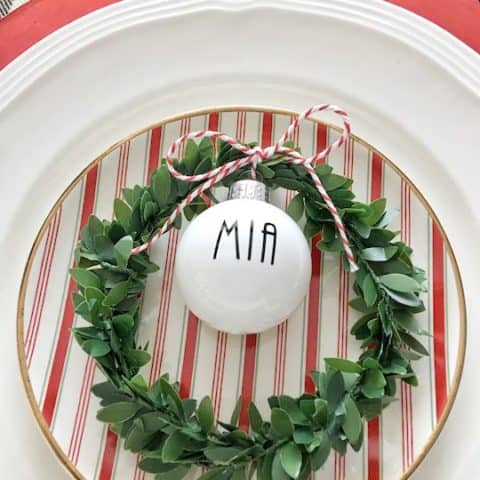
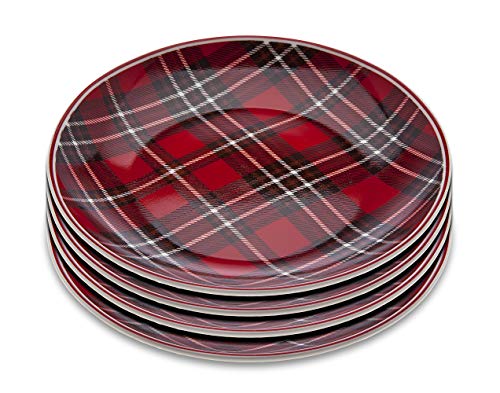
Christmas Plate (I found these in the Target Dollar Spot)
Boxwood Wreath (I made my own from garland I found at the craft store)
White Ball Ornaments
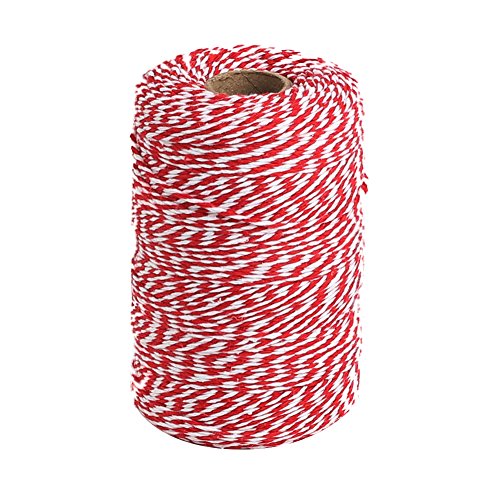
Baker’s Twine
Cricut Explore Air 2 (or Maker)
Black Vinyl
Transfer Tape
Weeding Tool
12×12 Mat
Table Runner
Want to know what’s awesome, with the help of my Cricut Explore Air 2 these ornaments came together in about 5 minutes!
Do you want to make some of these for your table or tree this year? I’ll walk you through the steps and you’ll have a set for yourself in no time!
Keep reading for a step by step tutorial.
Rae Dunn Inspired Christmas Tablescape
A personalized Rae Dunn inspired Christmas tablescape is perfect for this holiday season. Transition them to the tree for years to come.
Materials
- Red Charger
- White Plate
- Christmas Plate
- Boxwood Wreath
- White Ball Ornaments
- Baker’s Twine
- Black Vinyl
- Transfer Tape
- Table Runner
Tools
- Weeding Tool
- 12×12 Mat
- Cricut Explore Air 2 (or Maker)
Instructions
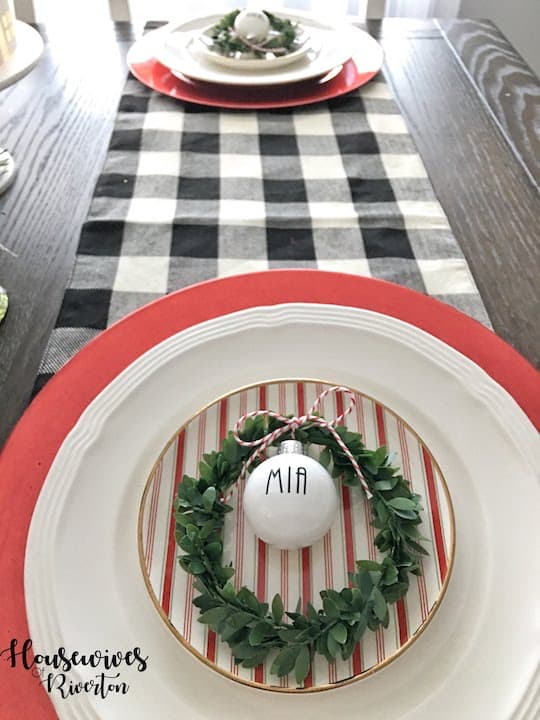
To create your Rae Dunn inspired Christmas tablescape start with a black and white buffalo plaid table runner.
The next item is a red charger. Place a white dinner plate on the red charger.
The salad/dessert plates I used were found a few years ago in the Target dollar spot. Just about any Christmas colored plates would look good. There are a lot of cute options on Amazon.
The final step is where the crafting comes in. You'll need red/white bakers twine, boxwood wreaths, and small white ball ornaments.
Around the holidays you can find small boxwood wreaths in a lot of places. I found wired garlands that I used to make mine. I've seen these garlands in craft stores and even in the Target dollar spot.
To make the garland I decided on the size I wanted and loosely twisted two strands together to get a nice full looking garland in the correct size.
To create the personalized Rae Dunn inspired ornaments that are the center of each place setting I broke out my Cricut Explore Air 2 (this project could also be done with just about any Cricut machine).
You will need white ball ornaments, mine are small because I didn’t want them to overpower the place settings.
Once you have your ornaments you will want to clean them well with rubbing alcohol, this step seems like an easy one to skip but I highly recommend not skipping it, the vinyl seems to adhere so much better when you don’t skip this step.
Once all your ornaments are clean and dry cut your vinyl. I used my Explore Air 2 and Cricut Premium Permanent Vinyl for a permanent result.
I used a font from Cricut Access in Design Space called Avenida Com and sized them based on the ornament size and the length of the name.
I love Cricut Access, there have been very few fonts/images I have had to look elsewhere for very few items because it has pretty much everything I need.
Place your vinyl on your mat and set your dial to the correct material. Since I used the Premium Vinyl I set my Air 2 to Vinyl + and it cut perfectly.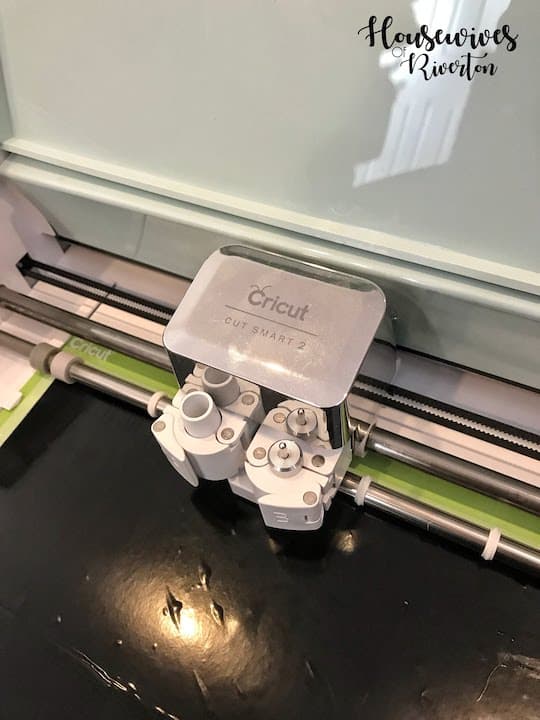
Once your names are cut unload your mat and remove the vinyl from the mat. Using your weeding tool weed all excess vinyl so you only have the name left behind.
Pay extra attention to the inside of each letter making sure you get all those small pieces out, this is a great time to break out your BrightPad if you have one, it makes weeding vinyl so much easier.
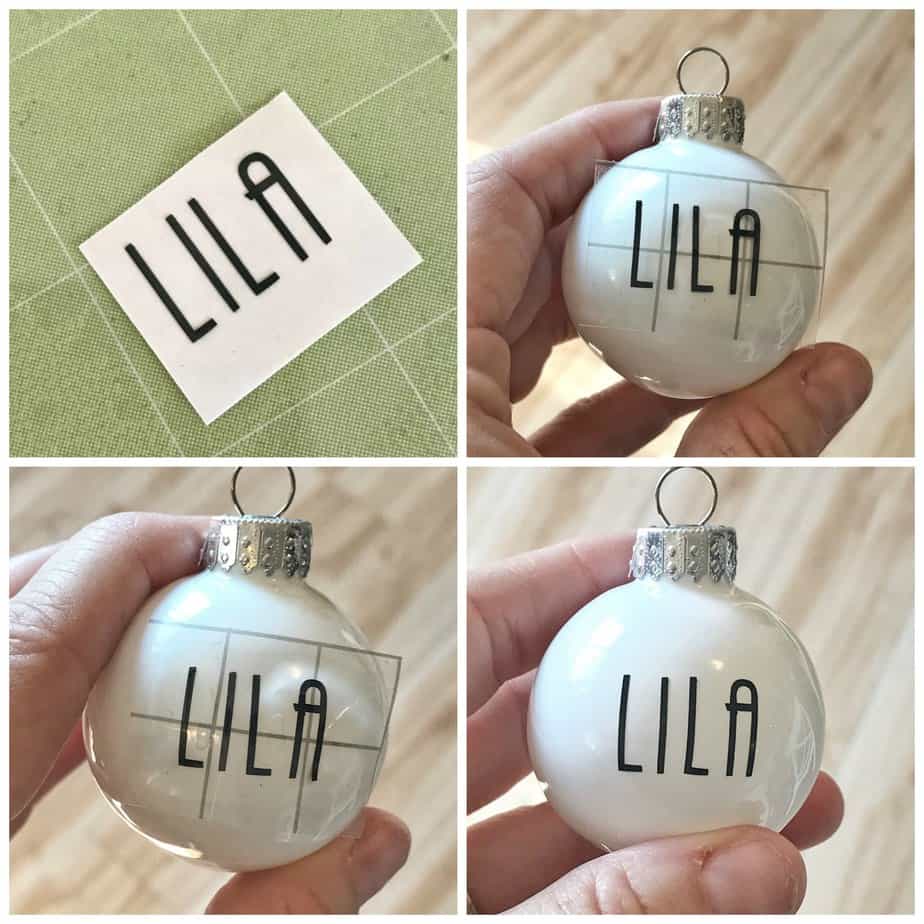
To apply the vinyl to the ornament you will need a piece of transfer tape slightly larger than the name itself.
Place the transfer tape over the vinyl name, then using a scraping tool (or the back of a spoon or a credit card) press the vinyl onto the transfer tape.
You’ll remove the vinyl from the backing and have it on the transfer tape. I love that the transfer tape is clear, it makes seeing exactly where you’re putting your vinyl so easy.
Try to handle the area of the ornament you’re putting the vinyl on as little as possible. Starting in the middle of your name (or word) put the vinyl on the ornament.
Pressing outward from the middle make sure each letter is fully pushed down onto the ornament.
Slowly lift the transfer tape up making sure the letters are stuck to the ornament not the transfer tape.
Pulling from the corner at a 45 degree angle is the best/easiest way to remove the transfer tape.
Now for the really hard part - Premium Vinyl - Permanent needs to sit for 24 hours without being handled for the adhesive to adhere. Tie your ornament onto the boxwood wreath with bakers twine and place on Christmas plate.
You now have a personalized, beautiful, Rae Dunn inspired Christmas tablescape.
Recommended Products
As an Amazon Associate and member of other affiliate programs, I earn from qualifying purchases.
-
 Cricut Vinyl Transfer Tape, 12X48, Standard Grip
 -
 Cricut StandardGrip Adhesive Cutting Mat 12"x12" - For Cricut Explore Air 2/Cricut Maker - 3 Pack
 -
 Cricut Tools, Weeding Kit
 -
 Cricut Premium Vinyl - Permanent, 12” x 180”, Adhesive Decal Bulk Roll - Black
 -
 Cricut Explore Air 2 Mint
 -
 Tenn Well Red and White Twine, 656 Feet 200m Cotton Bakers Twine Perfect for Baking, Butchers, Crafts and Christmas Gift Wrapping
 -
 TreeMendous Christmas Tree Ornament Decorating Refill Kit - Includes 12 Blank Ball Ornaments for DIY Craft Activities
 -
 Tiger Chef 13-inch Red Round Beaded Charger Plates, Set of 2,4,6, 12 or 24 Dinner Chargers (12-Pack)
 -
 Godinger Holiday Plate Vintage Plaid Print - Set of Four - 6 inches

We have a great discount for our crafting friends! Click and use code Housewives for 10% off and free shipping on purchases over $50! *Not valid on machines, Cricut Access memberships, or digital image purchases*
Did you love this project? Check out these other fun Christmas projects!


- Bringing Home Baby Chicks - March 11, 2025
- Is RootsTech for Moms? - February 23, 2024
- How to Get Oil Stains Out of Clothes - May 5, 2023
[…] are a few more Christmas projects for you to check out! A piece of wood Santa and Reindeer Christmas Banner Customized Christmas Card […]