This post may contain affiliate links. If you purchase something through any link, we may receive a small commission at no extra charge to you. Supplies used may be given to us free of charge, all projects and opinions are my own.
While trying to figure out what I wanted to do for my cards for January Cardswap I found myself hanging out on pinterest (of course).
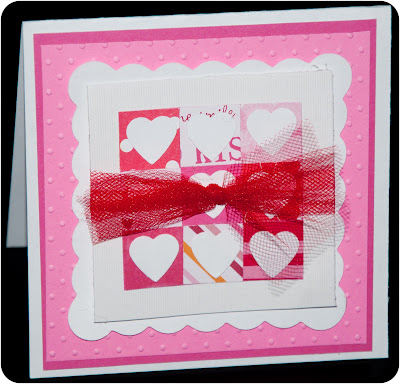
I found this darling card that I thought I had everything to make and so I decided on that card.
Here is a very picture heavy tutorial of the way I put them together.
The card has a base card made out of white cardstock that when folded is a 4 1/2″ square which means I cut my 8 1/2 x 11″ cardstock down to 9″.
Then I cut the 9″x 8.5″ piece down to a 9″x4.5″ piece (which yes does mean I used 1 piece of paper for each card but I was able to use a lot of the scraps so that was nice).
The next step was to pick 9 different patterned papers. Thankfully paper is something I have an abundance of and so I was able to find what I needed without having to go to the store. I used my 3/4″ square punch and punched out my different pieces.
Next, use those scraps of white and punch out your hearts. I don’t know the size of this heart punch, I just know it fit on the squares and I already owned it. (If you’re doing the math so far to make 12 cards I have had to cut out 12 card bases, 108 squares and 108 hearts – at this point my thumbs were dead and so I took a nice long break.)
I started working with the light pink paper next. I cut 12 4″x4″ squares.
When they came out they looked like this. How adorable is that paper now?
For the next step I broke out the cricut. I had my size set to 3.5″ and used the Accent Essentials cartridge to cut out my scallop square. (I was able to use more of my scrap white pieces for this too so in the end I only used those 12 white pieces of cardstock for all the card pieces.)
Now put adhesive on the back of all your little hearts and stick them to your squares.
Then get adhesive on the backs of all the squares (the little xyron really came in handy for all these little pieces).
Next step was to use some of my other scraps from the earlier cutting and make my quilted pattern. I used the corner of the paper to make sure things were lined up nicely and then paid close attention to the corners and lines of each small square to try to keep the overall square nice and straight.
Then trim around each of the little quilted squares so you don’t see the background paper.
This picture doesn’t show the texture of this white paper but I cut these white squares to 3″x 3″.
I centered the quilt looking piece on top of the textured white piece.
I used strips of tulle and tied it around the center to give it just a little more detail.
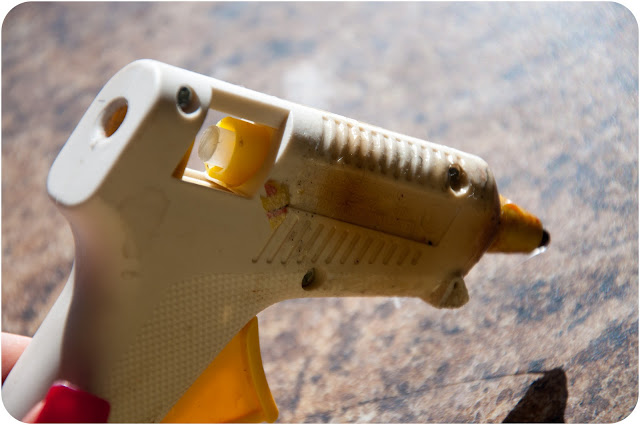
I used pop up glue dots so that the tulle tied piece sat up off the scallop square. I ran out of the glue dots and so I used a little trick I learned a long time ago. Enter GLUE GUN!
If you use a nice glob of glue and let it sit just for a second before you attach it to the other piece of paper it will give it a pop up look like the glue dots do. I always wait til it gets a bit tacky and then with minimal pressure stick it down. Do not push hard or you’ll lose your pop up effect.
See how it sits just up off the other piece?
After that it is just a matter of putting all the pieces together:
Piece 1 – white 4.5″ square card
Piece 2 – dark pink 4.25″ square
Piece 3 – light pink swiss dot embossed 4″ square
Piece 4 – white 3.5″ scallop square
Piece 5 – white 3″ square
Piece 6 – quilted piece
Piece 7 – tulle tied around 3″ white square
Once I had my card finished I realized something unfortunate. I either had HUGE envelopes or my card was 1/4″ too tall for my smaller envelopes. I didn’t want a 5″x7″ envelope for a little 4.5″ square card so I headed to google!
A quick search for “envelope for 4.5″ square card” brought me to this site which had exactly what I needed. I printed out 1 test envelope pattern to make sure that it would fit my card.
Kept the glue gun handy and attached the corners.
- The Best Vinegar Paintbrush Cleaner Method - May 6, 2023
- 10 Fun and Easy St. Patrick’s Day Games - March 1, 2023
- Valentine’s Day Felt Wreath DIY - January 20, 2023


Like the tutorial..you make it easy to follow..I might try it out for Gift Card envelopes.
Thank you for your comment. It was a fun card to make.
Fantastic tutorial. I like your Valentine cards. I need metal business cards & wooden business cards. can you help me?