This post may contain affiliate links. If you purchase something through any link, we may receive a small commission at no extra charge to you. Supplies used may be given to us free of charge, all projects and opinions are my own.
We’ve partnered with Cricut for this post, all thoughts and opinions are our own.
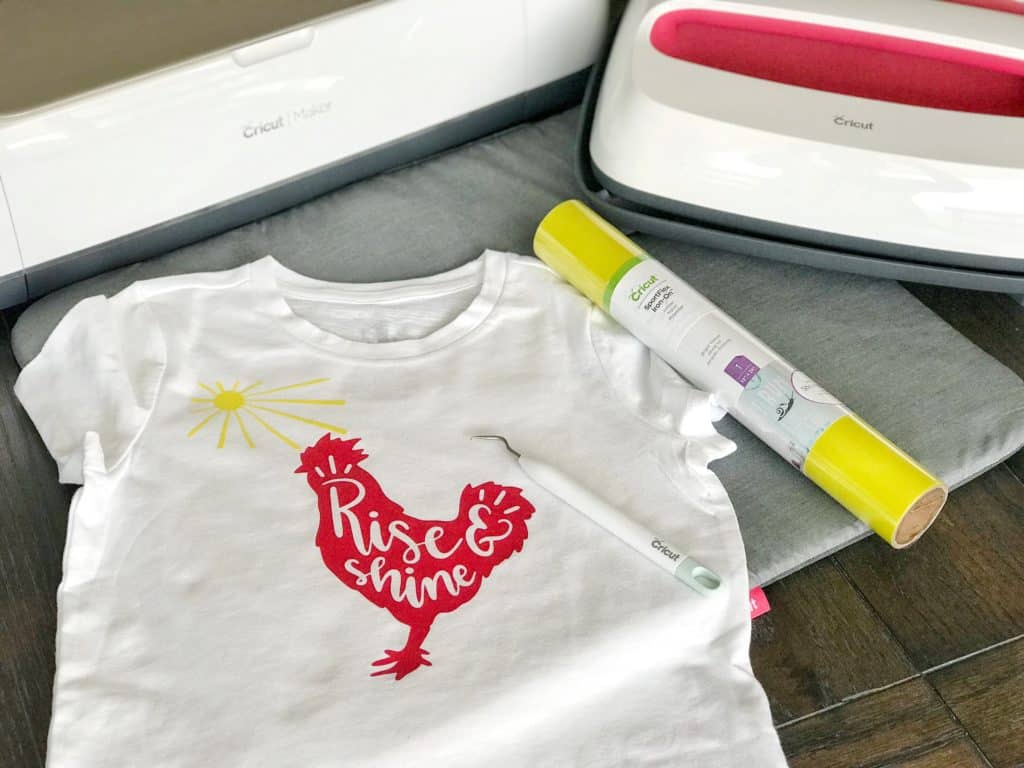
Rise and Shine DIY Tee
 Did you know Cricut has a new EasyPress on the market? The EasyPress 2 comes in the same classic size as the original EasyPress along with 2 new sizes and is a beautiful new raspberry color. We were able to get our hands on the new 12”x 10” EasyPress 2 and we are just loving the larger size!!
Along with the EasyPress 2, Cricut has also released a new to-die-for digital cartridge called Bless This Farm. You guys, I feel like Cricut reached into my brain and pulled out my farmy dreams when they created this cartridge. I’m sure you’ll be seeing a lot more projects here on Housewives featuring this cartridge.
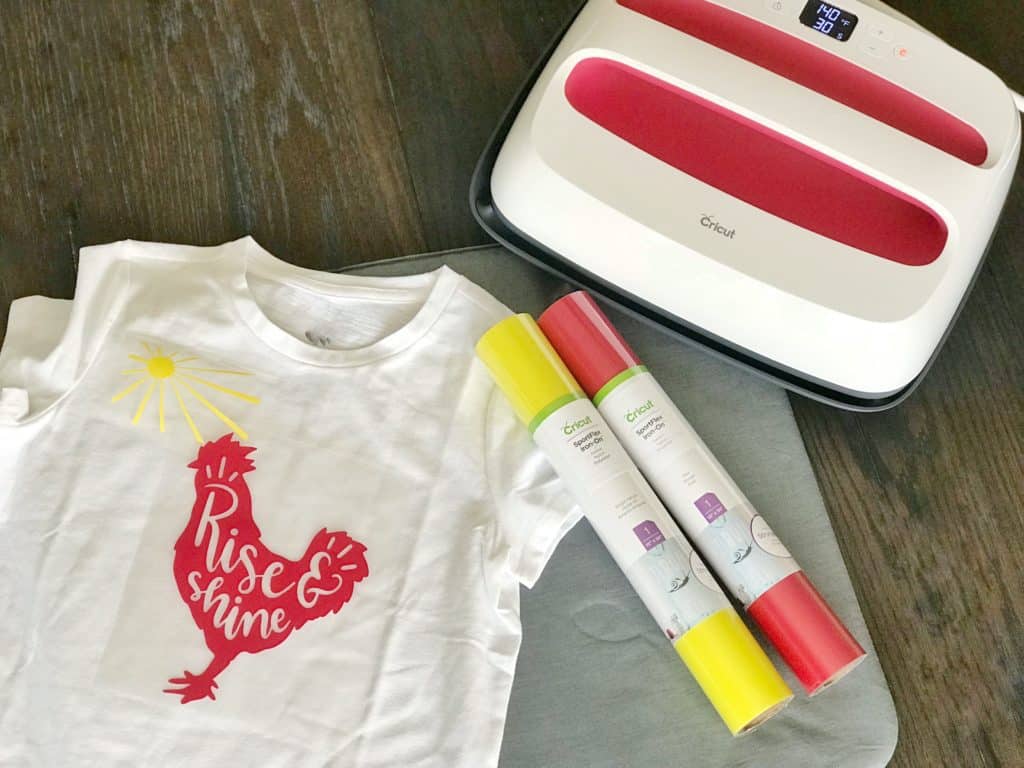
For this fun shirt we used the Rise and Shine image from Bless This Farm and the Sun Overlay from the Photo Fun – Holiday Memories cartridge. If you want to create this exact shirt click here for our canvas. You'll also need red and yellow Cricut Iron-on (we used SportFlex because of the material of our shirt), Cricut machine of your choice (we used the Maker but you could also make this Rise and Shine DIY Tee with any of the Explore machines), EasyPress (we used the new larger EasyPress 2, if you don't have an EasyPress you can also use an iron or heat press), EasyPress Mat (we used the new larger sized mat), and the always handy Cricut Weeding tool.
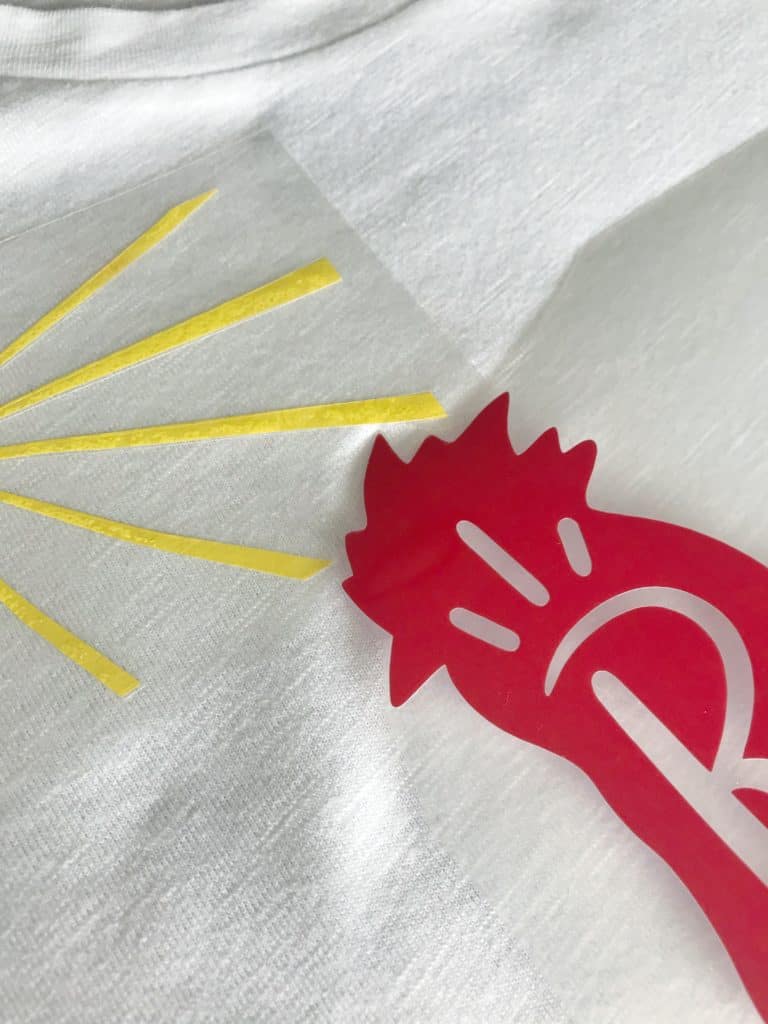
 If you just open the sun image we used you'll notice it has a frame around it. Because we wanted to pair the sun with the chicken we didn't want to have the frame around the sun. To get rid of the frame we used the handy slice tool to remove the frame. If you haven’t used the slice tool you’re going to love it, it gives you the ability to alter a set image. In this instance, I used a thin rectangle shape and duplicated it 4 times (one for each side of the frame) and sliced off the frame one side at a time (see pictures below for more information on this step):
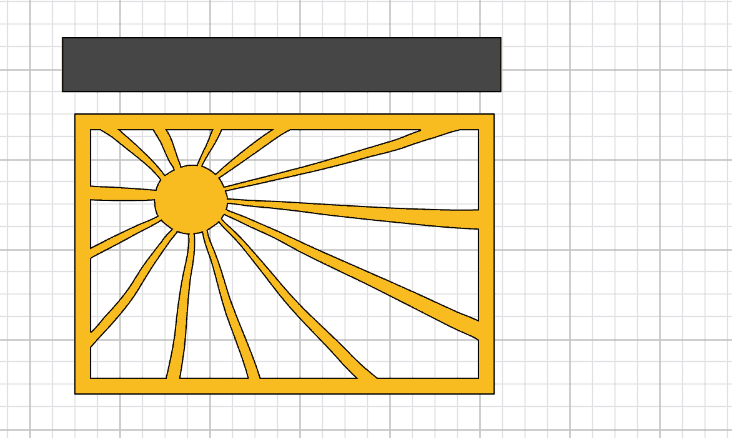
Step 1: Open your image and then open a square shape, unlock the square and create a rectangle the size you need to fit over the frame portion of the sun.

Step 2: Move your rectangle over the frame portion you want to get rid of, select both the rectangle and the sun piece and click “slice” (found at the bottom of the layers panel on the left).
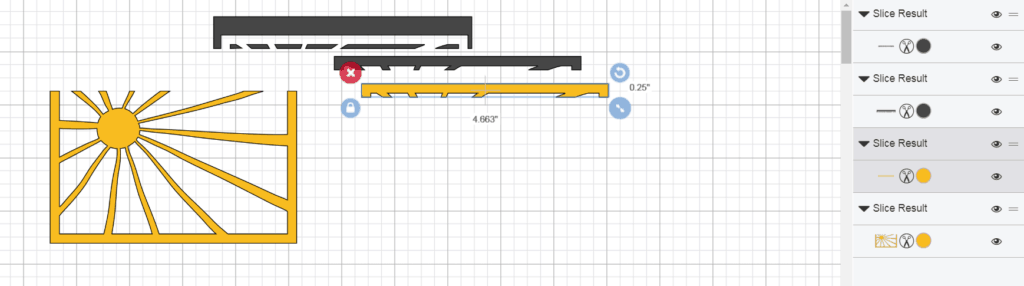
Step 3. After you click slice, you'll see many slice results in the layers panel, delete the pieces you don't want and repeat the process 3 more times for each of the other sides of the frame.
Press larger images in one press with the new larger EasyPress 2!
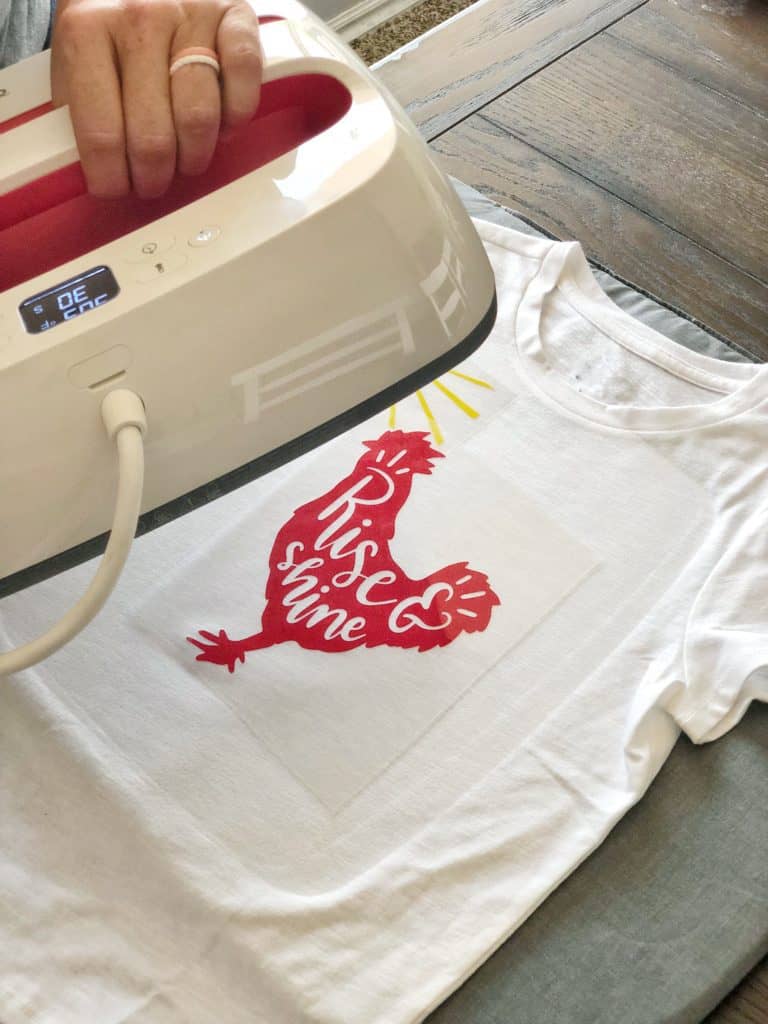 With just a little trimming of the carrier sheet we’re able to press both pieces of iron-on in one quick press with the new larger EasyPress 2!
 EasyPress 2 will be available for purchase fall of this year but if you’re loving that larger EasyPress Mat you can get it now, here!
EasyPress 2 comes in 3 sizes, 6”x 7”, 9”x 9”, and 10”x 12”! From onesies to bags there is now an EasyPress size to fit every project you can dream up. Along with the 3 sizes EasyPress 2 heats to 400° (vs the 350° of the original EasyPress, has an even more consistent temperature across the heat plate, and heats up even faster than the original!) and has a new and improved base to protect both the EasyPress Plate and your working surface. The variety of sizes that EasyPress 2 comes in allows you to complete your projects even faster, 60 seconds or less faster! For our project, our image was about 8” wide and just over 9” tall. This would have required 2 presses with the original sized EasyPress but with the larger sized EasyPress 2, we were done in just one pressing (5 seconds to preheat, 30 seconds to press, and 15 seconds to press the back). Another feature that we love about the new larger size, the additional weight of the larger EasyPress 2 requires little to no pressure from you to get perfect adhesion!! We almost forgot, the new EasyPress 2 also has a USB port which will allow you to update the firmware on your EasyPress 2 anytime new updates come out!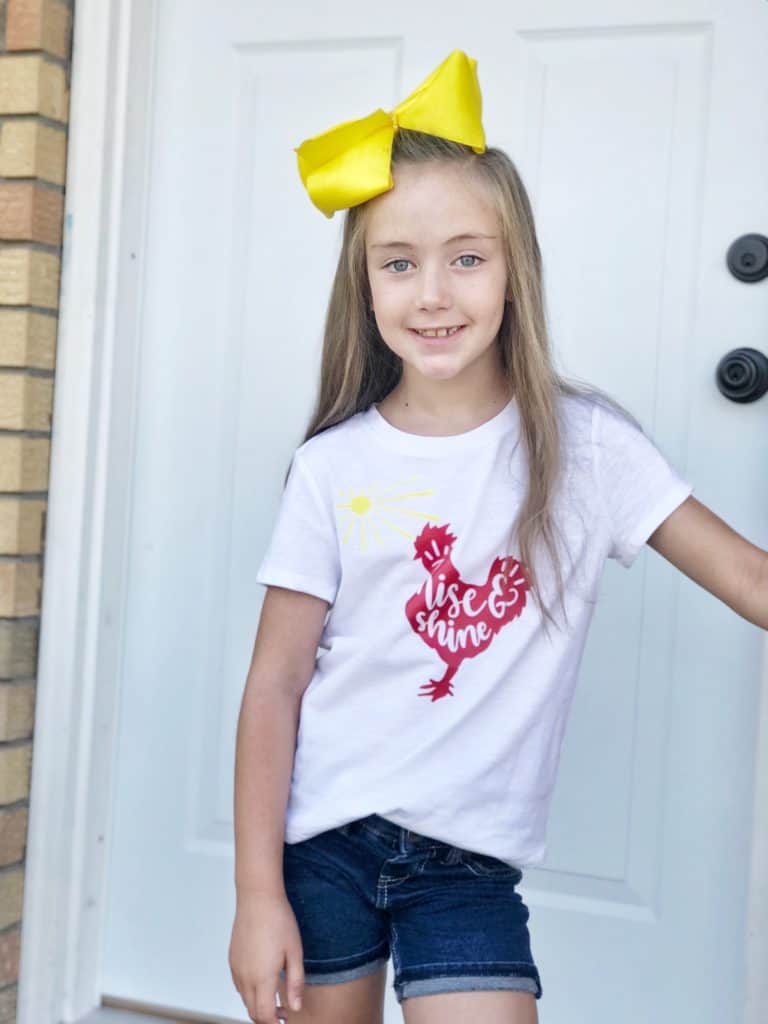 You guys! How cute is this shirt?!! Lila is so in love with it we decided we needed to get the chickens in on the action.
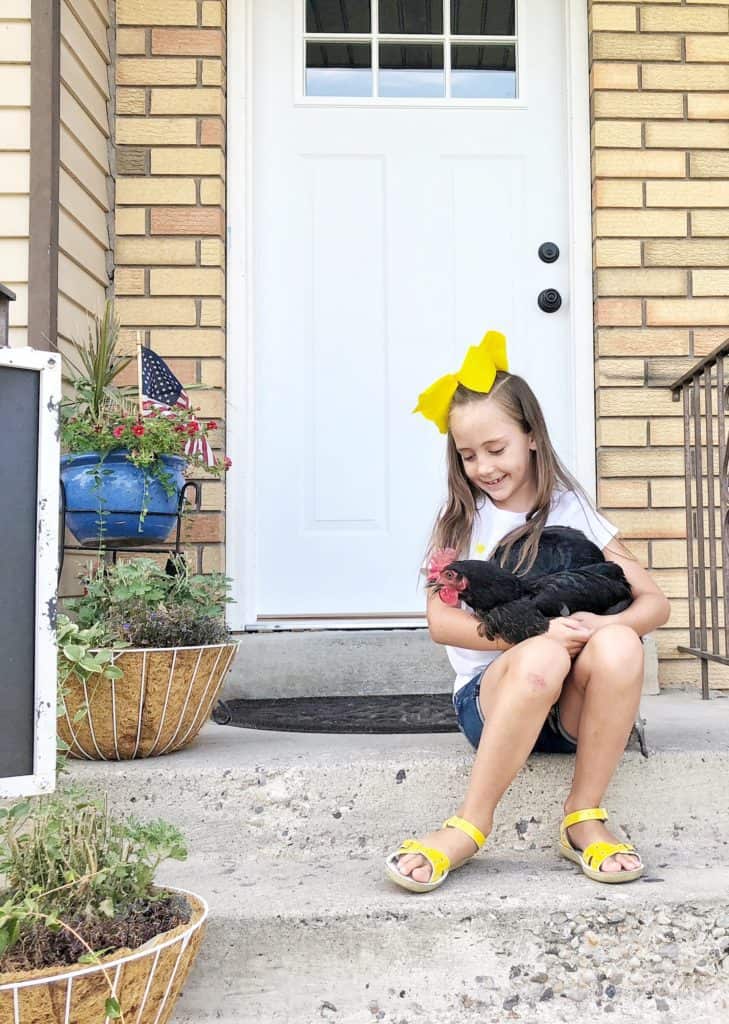

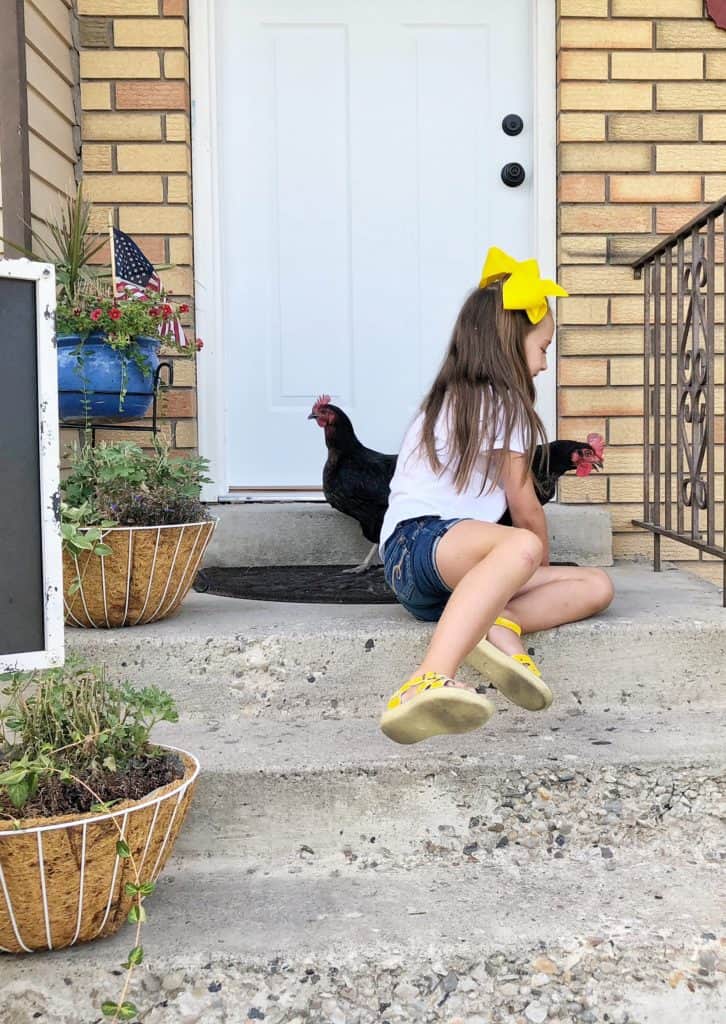 At first the chickens were a little less than cooperative (I seriously laugh so hard every time I see the flying chicken photo) but then they settled right in and let Lila cuddle them a little.
 So now we want to know – who's making this shirt? Would you wear it or are you going to make it for someone else? I was thinking this would also be so cute on a sleep shirt. I can say for sure this Rise and Shine DIY Tee isn't helping to lessen my farm desire at all! Leave us a comment below and tell us if you're living the farm life, dreaming of the farm life like me, or perfectly happy living the city life!

This is a sponsored conversation written by me on behalf of Cricut. The opinions and text are all mine.
- Bringing Home Baby Chicks - March 11, 2025
- Is RootsTech for Moms? - February 23, 2024
- How to Get Oil Stains Out of Clothes - May 5, 2023
[…] Rise and Shine DIY Tee […]