This post may contain affiliate links. If you purchase something through any link, we may receive a small commission at no extra charge to you. Supplies used may be given to us free of charge, all projects and opinions are my own.
We’re so excited to show you how quick and easy it is to create a Welcome sign with Cricut Maker 3. Matless cutting and Smart Materials make creating signs, even 6 feet tall easier than you think.
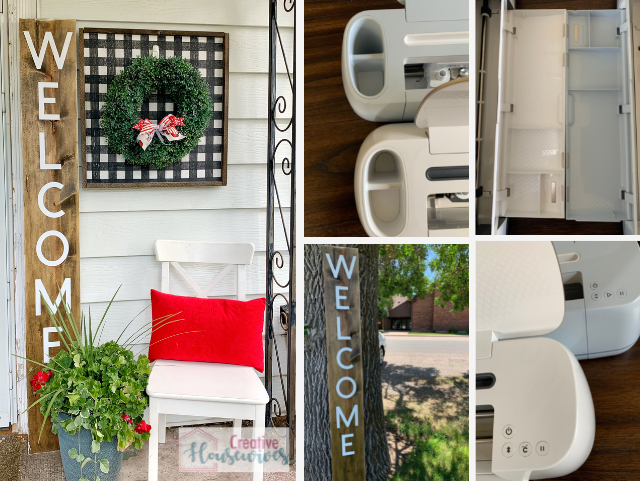
Last year I created a 6′ tall Autumn porch sign using my Cricut machine. I LOVE how it looks on my porch and knew I wanted something that could be on my porch all year. I’m excited to partner with Cricut to show you how awesome Maker 3 is!
When Cricut announced their new Maker 3 and Explore 3 machines with Matless cutting and Smart Materials I knew this was going to be the perfect time to make my new sign.
Why create a large porch sign?
Why do I love these giant porch signs? What’s not to love?! There are a few different reasons why I love them.
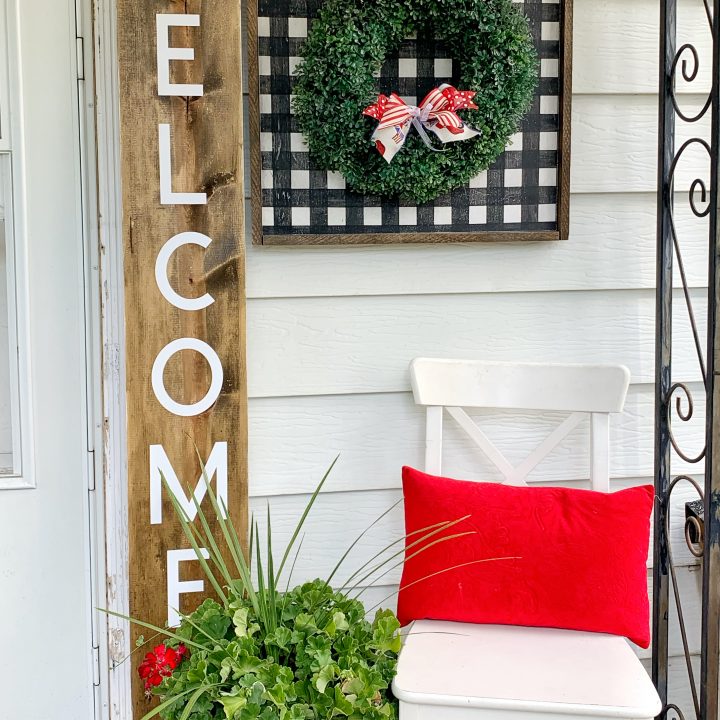
1. They are pretty inexpensive. By looking at the photos of my Welcome porch sign would you guess it’s actually the backside of my Autumn sign? By creating 2 signs out of 1 board the sign is even less expensive.
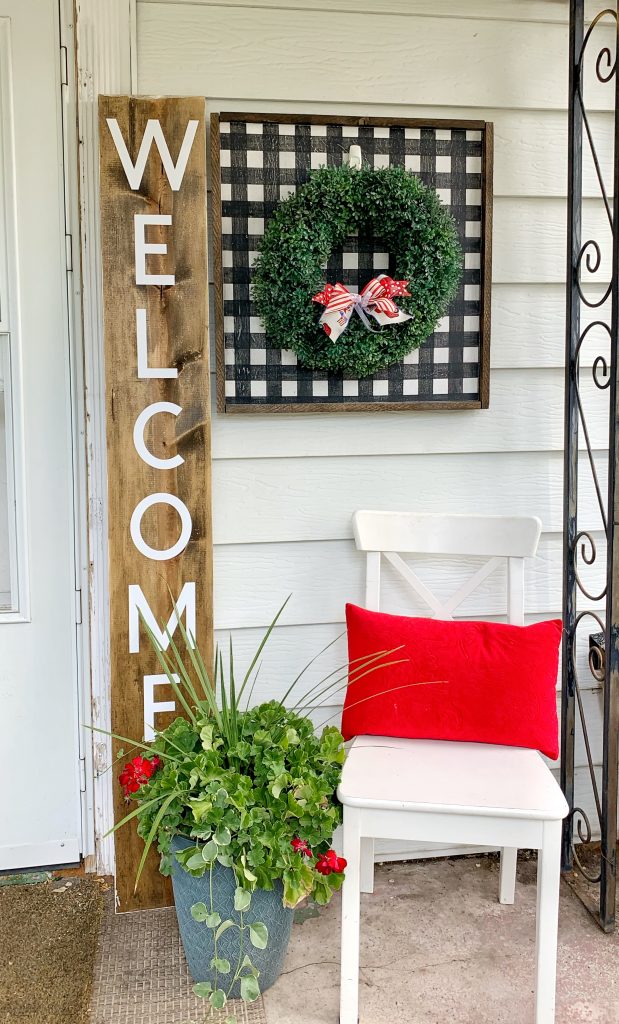
2. They make a statement. They’re not hard to make, especially with the new Smart Materials and they steal the show. I can’t tell you the number of compliments I have received on the Autumn sign. I love how the Welcome sign looks and know people are going to love it too.
3. They’re fun. You could almost say they’re addicting to make. I’ve had to stop myself from creating a sign for every month of the year but I cannot wait to make one for Christmas!
How to make a Welcome Sign with Cricut Maker 3?
The steps for creating a Welcome porch sign are very similar to the Autumn porch sign I made last year. I recommend reviewing that post before starting.
I have some great news for you though. Our Welcome sign with Cricut Maker 3 is even easier than the Autumn sign. Using Smart Materials I was able to cut “Welcome” out in one long cut. It’s over 56″ long!
Here’s where things are different. With the Welcome sign I followed the steps for staining the board and letting it dry. I then applied the Smart Vinyl to the board using Standard Grip Transfer Tape. Using a scraping tool I burnished the vinyl onto the board and then carefully removed the Transfer Tape.
I had originally intended to make my Welcome Porch sign just like the Autumn Porch sign but after I had the vinyl on the board I loved the way it looked.
The bright white vinyl against the Dark Walnut stain looked so good I decided to leave it just like it was.
You can find more step by step instructions at the bottom of the post.
How is Maker 3 different than the original Maker?
We’ve had a lot of people ask what the difference is between the original Maker and the new Maker 3. Here are a few things:
- Maker 3 has the ability to cut matless with Smart Materials. This is the largest difference. Smart Vinyl, Smart Iron-on and even Smart Paper Sticker Cardstock can all be cut with without a mat.
Cutting without a mat with Smart Vinyl allowed me to cut the letters for my Welcome sign in one continuous cut. That meant I didn’t need to worry about the distance between the letters like I had to with the Autumn sign. My welcome word is over 56″ long, that wouldn’t be possible with the original Maker. - Smart Materials cut FAST with the new Maker 3. Maker 3 can cut up to 8″ per second when cutting Smart Materials. If you’ve used fast mode on the original Maker you know that is twice as fast as fast mode. This speed only works with Smart Materials.
- Maker 3 has guides that allow the new Roll Holder to attach right to it. If you’re using bulk Smart Materials (they come in rolls up to 75′ long!) you’re going to want the Roll Holder. It helps Smart Materials feed into the machine perfectly and even includes a trimmer to cut your materials before unloading.
- This isn’t a major change but one to note – the Cricut “C” that you used to push to “go” on the older Cricut machines has changed on the new Maker 3 to a Play button.
- With Smart Materials your cutting width and length have increased. The max width you can cut Smart Materials is 11.75″ and the max length is…wait for it…12 feet!! 12 feet is the max length for Smart Vinyl, 4 feet is the max recommended length for Smart Iron-on.
- Maker 3 is currently only available in one color and that color is a light blue color.
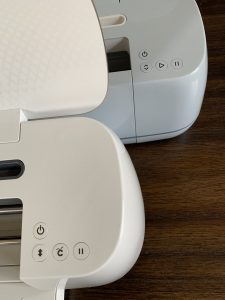
Note the difference between the original Maker and Maker 3 buttons. Maker 3’s buttons are more universal and clean looking.
What is the same between Maker and Maker 3?
There are a lot of similarities between Maker and Maker 3. You’ll be happy to know that everything that Maker could cut/engrave/score/etc. can be cut/engraved/scored/etc. with Maker 3.
Storage is also the same. The cups on the top of the machine and the tool/blade storage in the tray are the same as they were on the original Maker.
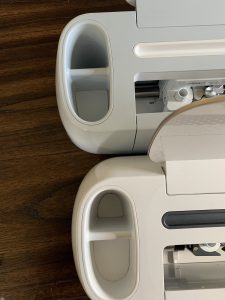
Storage Cups are the same in both Maker 3 and original Maker.
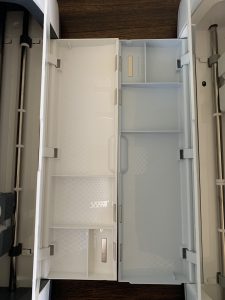
Storage Trays are also the same in both the Maker 3 and original maker.
Do you need to make a Welcome Sign with Maker 3?
Do you need a 6′ tall welcome porch sign? YES! Seriously, you need one. There is just something awesome about a statement piece like a 6′ tall porch sign and with Maker 3 it’s so easy you need to make one today.
Welcome Porch Sign with Cricut Maker 3 Tutorial
Learn how to create a 6' Welcome Porch Sign with your Cricut Maker 3!
Materials
- 10 inch x 1 inch x 6 foot common board
- Dark Walnut Stain
- Lint Free Cloth
- Cricut Smart Vinyl
- Cricut Transfer Tape
Tools
- Cricut Maker 3
- Cricut Tool Holder
- Cricut Scraping Tool
Instructions
- Stain board with Dark Walnut stain. Allow to dry for at least 8 hours.
- Cut out Welcome letters with your Maker 3 and Smart Vinyl. Font is Cricut Sans Font Normal sized 432.27
- Trim Smart Vinyl to the width of your board and weed excess.
- Apply Transfer Tape to Vinyl and burnish front and back to push vinyl to transfer tape.
- Center the image width and using the hinge method tack vinyl to board.
- Slowly remove backer from vinyl and transfer tape and apply to board using a scraping tool to press down and remove any bubbles.
- Once everything is applied to the wood slowly remove transfer tape from vinyl and board.
- Sit back and enjoy your new sign.
Notes
I did not center my "welcome" vertically. It is closer to the top than the bottom because I like to be able to put something in front of the sign (flower pots, other decor) and not have it block half the world.
Recommended Products
As an Amazon Associate and member of other affiliate programs, I earn from qualifying purchases.
We hope you make a Welcome porch sign yourself and share your project on social media and tag us so we can see it. If you have any questions leave them in the comments and we’ll get those answered for you!
We have a great discount for our crafting friends! Click and use code Housewives for 10% off and free shipping on purchases over $50! *Not valid on machines, Cricut Access memberships, or digital image purchases*
Happy Crafting!

- Bringing Home Baby Chicks - March 11, 2025
- Is RootsTech for Moms? - February 23, 2024
- How to Get Oil Stains Out of Clothes - May 5, 2023

