This post may contain affiliate links. If you purchase something through any link, we may receive a small commission at no extra charge to you. Supplies used may be given to us free of charge, all projects and opinions are my own.
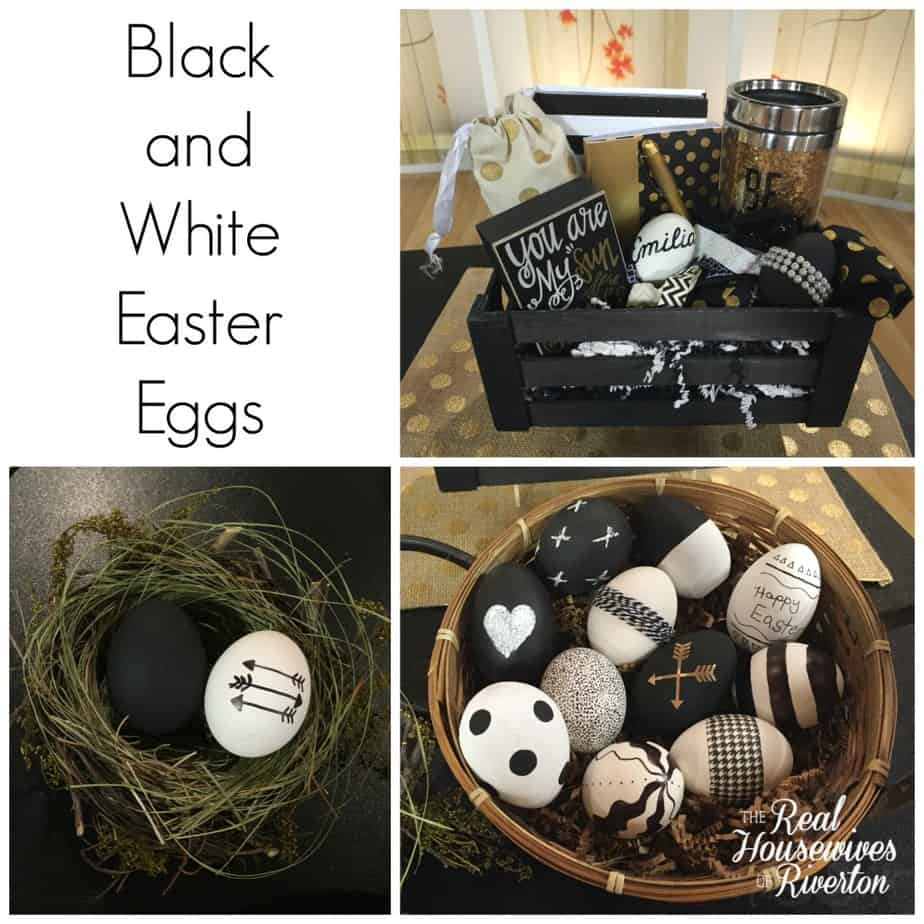 What a fun project these Black and White Easter Eggs are. I had a great time coming up with different ways to decorate eggs keeping with the black and white theme. It wasn't nearly as easy of a project as I expected it to be when I started.
Here is the video of my Black and White Easter Egg segment on Studio 5, in it I share some tips and tricks for what I learned from the different eggs.
I'll go through and share just a little detail on each egg, I think a lot of them are self explanatory but some definitely have a learning curve to them.
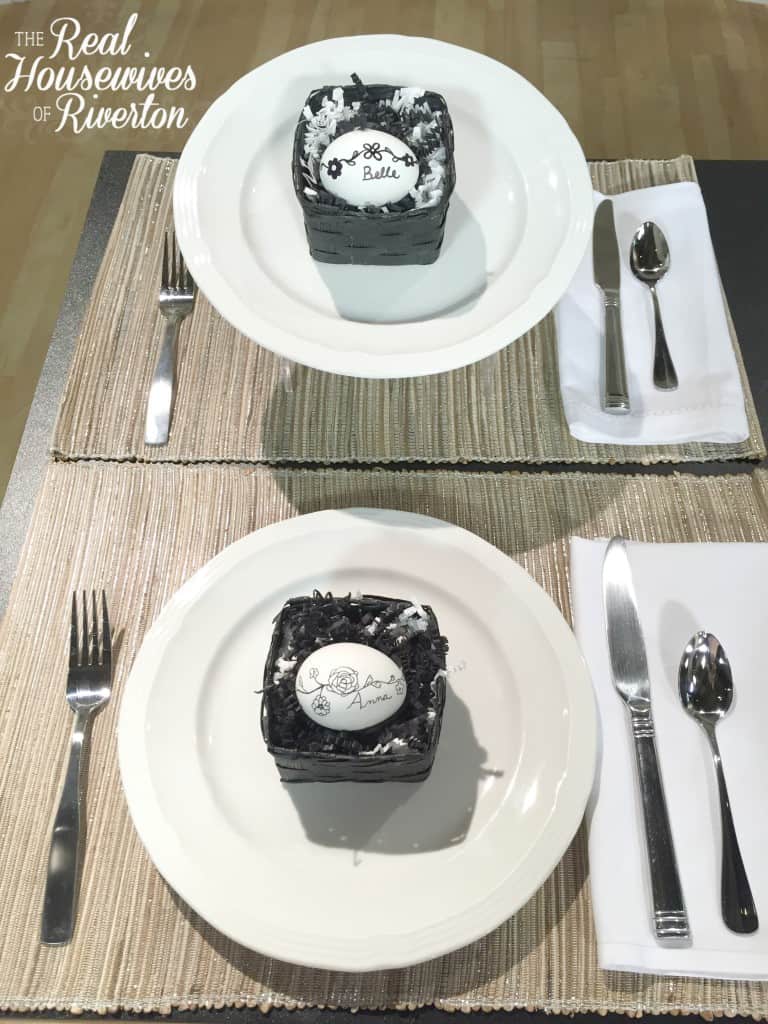 I think these eggs turned out really cute but they were a pain in the bum to do! These two eggs are real hard boiled eggs. As I mentioned in the video hard boiled eggs tend to sweat as they are handled. I found that drying the egg really really well helped as did holding it with a paper towel while I was doing my doodling. It also helped to doodle with a pencil first. The top egg (Belle) was drawn with a normal sharpie, the bottom egg (Anna) was drawn with a fine tip sharpie. In the little basket I think they make a darling name tag for each place setting, I recommend doing this on a fake egg, make your life easier.
Again, as I mentioned in the video, I would recommend doing all of these on fake eggs. I can't think of a reason really to need to do any of this on a real egg, while the idea is fun it just doesn't seem like the best use of time or maybe even the safest thing since while peeling the eggs the sharpie got on my fingers and then on the eggs much like real egg dye does. I did check and the sharpie did not go through the peel at all, it just transferred from fingers to egg while peeling it.
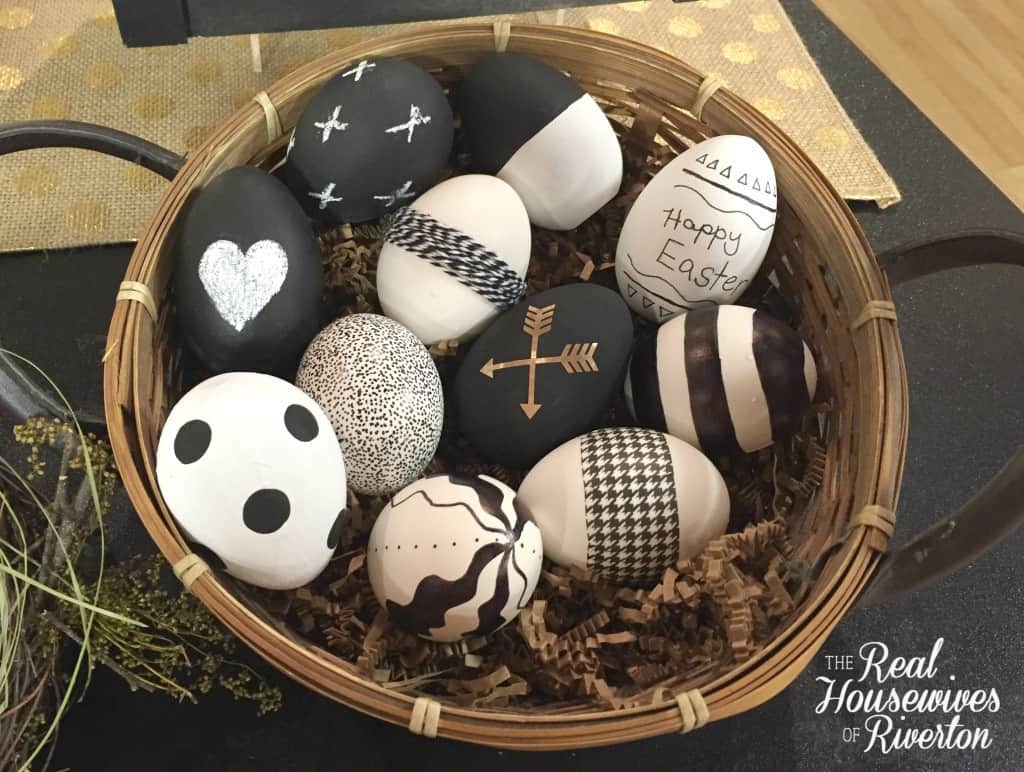 This basket is a collection of real and fake eggs. I'll go through and list the process on each one:
Stripe, tiny dot, squiggle and dot are all real eggs and sharpie same process as I mentioned above.
Herringbone is a real egg with washi tape around it. This was really simple. I would highly recommend using a patterned washi tape to help hide the wrinkles in the tape as you smooth it down.
Black/White bakers twine is a real egg, I just wrapped the twine around it. Again really simple.
Black egg with heart and black egg with x's are both fake eggs, one is wooden the other is paper-mache. Black egg with heart I painted with chalkboard paint, the x egg I just painted black, chalk worked great on both.
Big black dot egg is paper-mache painted white. I used the end of a foam paintbrush dipped in black paint to do the dots. I did one side, let it dry and then did the other side.
The black egg with gold arrows is a wooden egg painted black. I used my Cricut Explore Air to cut out the arrows. I used gold adhesive foil for the arrows and they turned out so perfect, this is one of my favorites.
Happy Easter egg is a wooden egg painted white and then drawn on with a fine tip sharpie.
The half white/half black egg as simple as it looks was my nightmare egg. I don't know the best way to do it but I can tell you the best way NOT to do it. The egg is wooden, go ahead and start by painting your whole egg white. From there I am helpless with what you should do. I did mine by filling a small bowl with black paint and dipped half the egg in the paint. While it worked great for giving me a nice straight line it took about 700 years to dry and I had to hold it the whole time letting it drip back into the bowl and rotating it from time to time to keep it from having a peek anywhere. Don't do it my way, I'l see if I can find a better way to do it!
 These 4 eggs were fun and pretty simple.
Black/White decoupage egg is a paper-mache egg with black/white print tissue paper decoupaged onto it with mod-podge.
Black egg with gold dots is also a paper-mache egg painted black and then I used the end of a foam paint brush dipped in glue to get the dots and then sprinkled with glitter. Once it was dry I used a soft paint brush to dust off excess glitter.
Black egg is just a paper-mache egg painted black.
White egg with arrows is a real egg with sharpie arrows drawn on it.
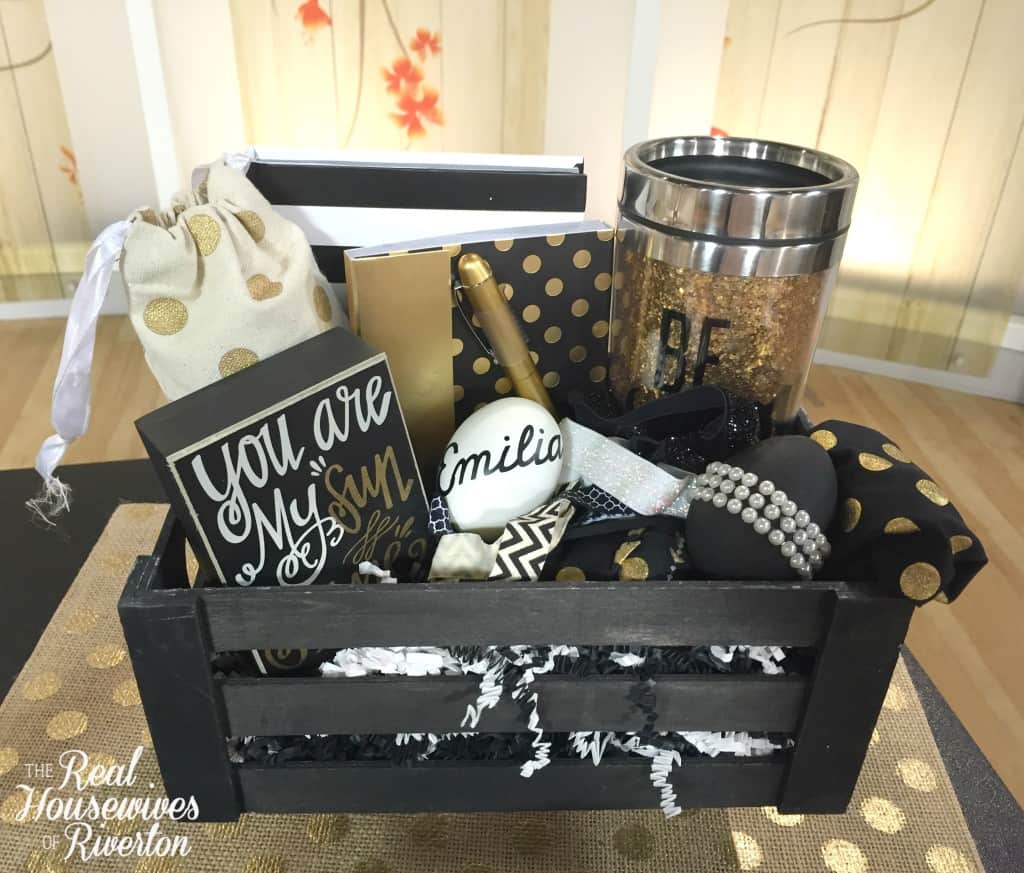 One of the main reasons I think black and white Easter eggs are definitely a more grown up look. I loved the idea of creating an Easter Gift Basket for an older child, maybe one no longer living at home. I put together this basket and think it turned out so cute. Aside from the eggs everything in the basket I found at Hobby Lobby. I included a gold glitter thermos, black/white stripe journal, black/gold note pad and pen, you are my sunshine block, variety of black/white/gold hair accessories, and a gold polka dot bag filled with treats.
The white egg in this basket is real and I again used my Cricut Explore Air to cut the name out in vinyl. If you're going to turn a real egg black/white I highly recommend using vinyl, it was easy and worked so well.
The black egg was also very simple. It is a paper-mache egg painted black and then I used pearl sticker strips to wrap around the egg, I love how elegant it looks.
 It's always great going on Studio 5 and this was a fun project to tackle. I hope you enjoy the Black and White Easter Eggs and if you make some yourself you'll come show them to us!

- Bringing Home Baby Chicks - March 11, 2025
- Is RootsTech for Moms? - February 23, 2024
- How to Get Oil Stains Out of Clothes - May 5, 2023
