This post may contain affiliate links. If you purchase something through any link, we may receive a small commission at no extra charge to you. Supplies used may be given to us free of charge, all projects and opinions are my own.
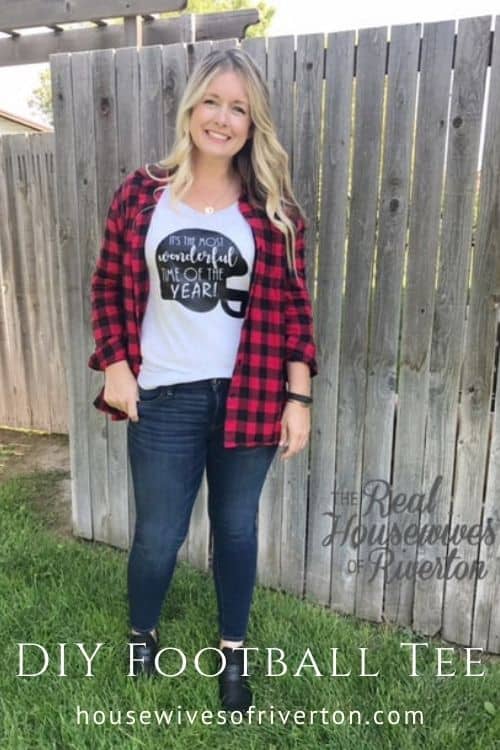
I love how my DIY Football Tee turned out. For me, football season is definitely one of the most wonderful times of the year.
Updated 10/2020 – this post contains affiliate links.
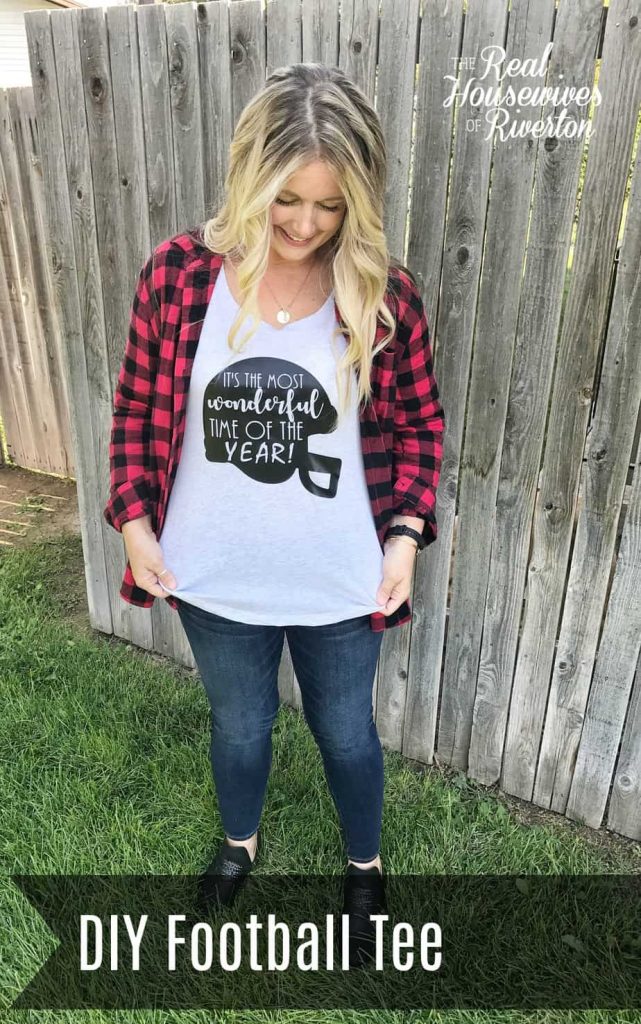
If you love football season you need to make your own DIY Football Tee.
I love football season. We enjoy watching little kids play. I love watching adults play. I'm pretty competitive myself and definitely have my favorite teams.
2020 hasn't given me very much football to enjoy unfortunately. I've managed to catch a couple of my nephews games (which they won). And Last night Anna played in her senior powder puff game (which they won) and that was great to watch.
Good news is it looks like in just a couple weeks Pac12 football is going to be starting! My football tee is hanging and waiting for that first Utah game.
I've collected my fair share of team specific apparel over the years. This year I decided I wanted a t-shirt that just expressed my love for the game.
I saw an image in a promoted photo on Instagram that I loved. When I looked I couldn't find it so I decided to head into Design Space and see what I could come up with.
Let's make a DIY Football Tee
To make your own DIY Football Tee gather the following supplies:
- Cricut machine (any Explore machine or Maker)
- StandardGrip Mat
- Fine Point Blade
- EasyPress
- EasyPress Mat
- Black Iron-on
- DIY Football Tee Cut File
- T-shirt (I used grey)
- Weeding Tool
- BrightPad
Now that your supplies are gathered you're ready to make your t-shirt.
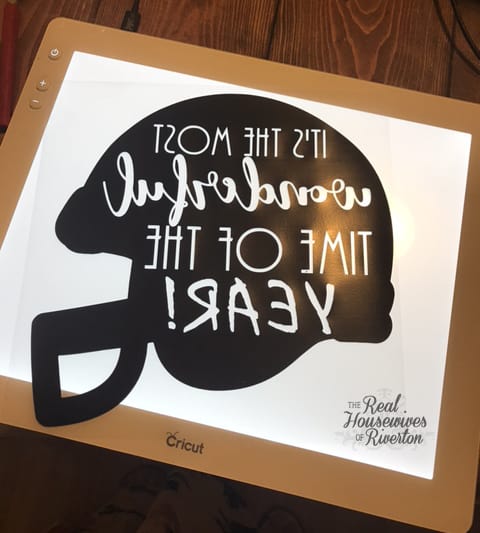
Start by opening this cut file in Design Space.
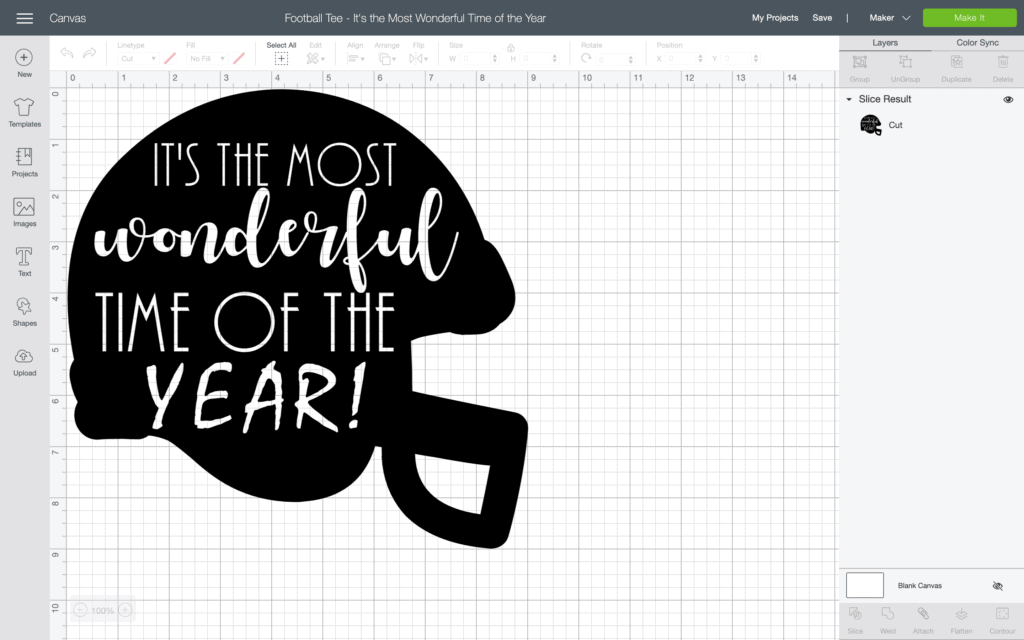
After you have the file open you can resize it to fit your shirt. Mine is sized to be nice and big on a women's size medium shirt.
Place your Black Iron-on shiny side down on your green StandardGrip Mat.
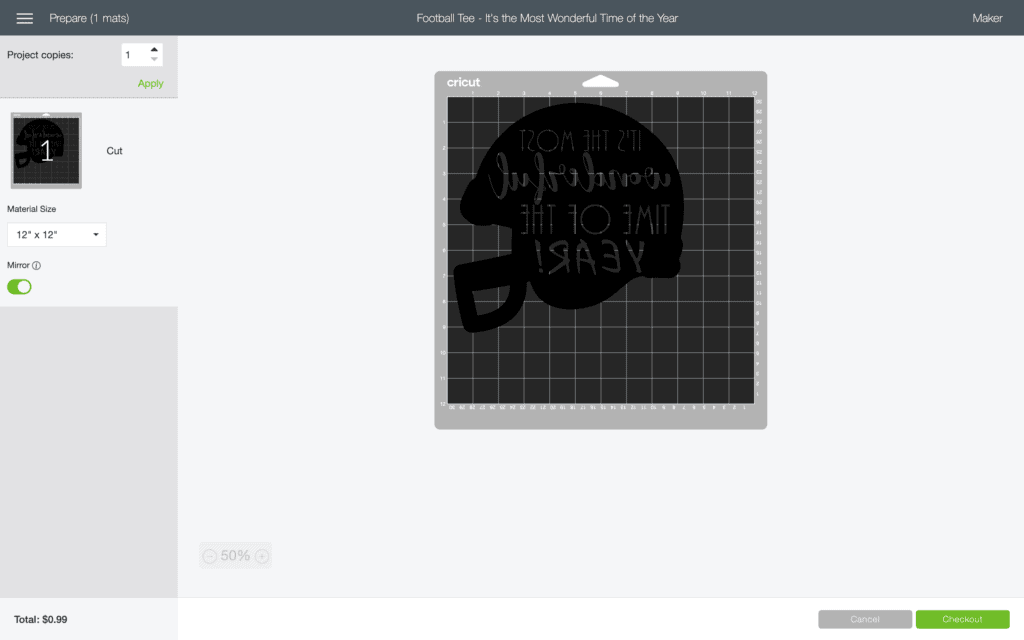
When you're ready to cut make sure you mirror your image. This is important or your image will be cut backward.
After your image is cut use your weeding tool to remove all the letters from your football helmet and the excess Iron-on from the outside. I love using my BrightPad for this step.
After you have everything weeded it's time to make your shirt!
If this is your first time making a shirt with Iron-on or you need a refresher here is a video I did for Cricut teaching how to apply Iron-on. It isn't for this exact shirt but the steps are the same.
Grab your EasyPress and EasyPress Mat and preheat your EasyPress. Use the Cricut Heat Guide to find the correct temperature for your Iron-on and fabric.
Lay your shirt out and then preheat with your EasyPress. Preheating is an important step, it removes any moisture that is in the fabric which will ensure proper adhesion.
Position your Iron-on onto your shirt. When it's in place use your EasyPress to press it.
Follow the Cricut Heat Guide for the temperature and how long you should press. After you're done on the front flip the shirt over and press from the back.
The Cricut Heat Guide will tell you if you should use a warm peel or cool peel. Warm Peel means – WARM – not hot.
Then, even if you have a warm peel Iron-on material you need to let it cool a little before you try to remove the carrier sheet. You need to give the adhesive time to dry and attach to the fabric.
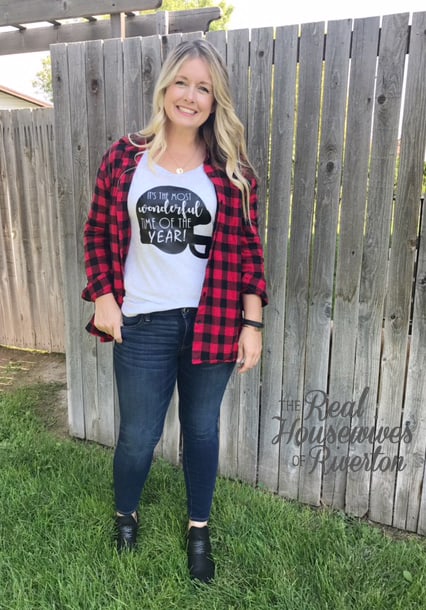
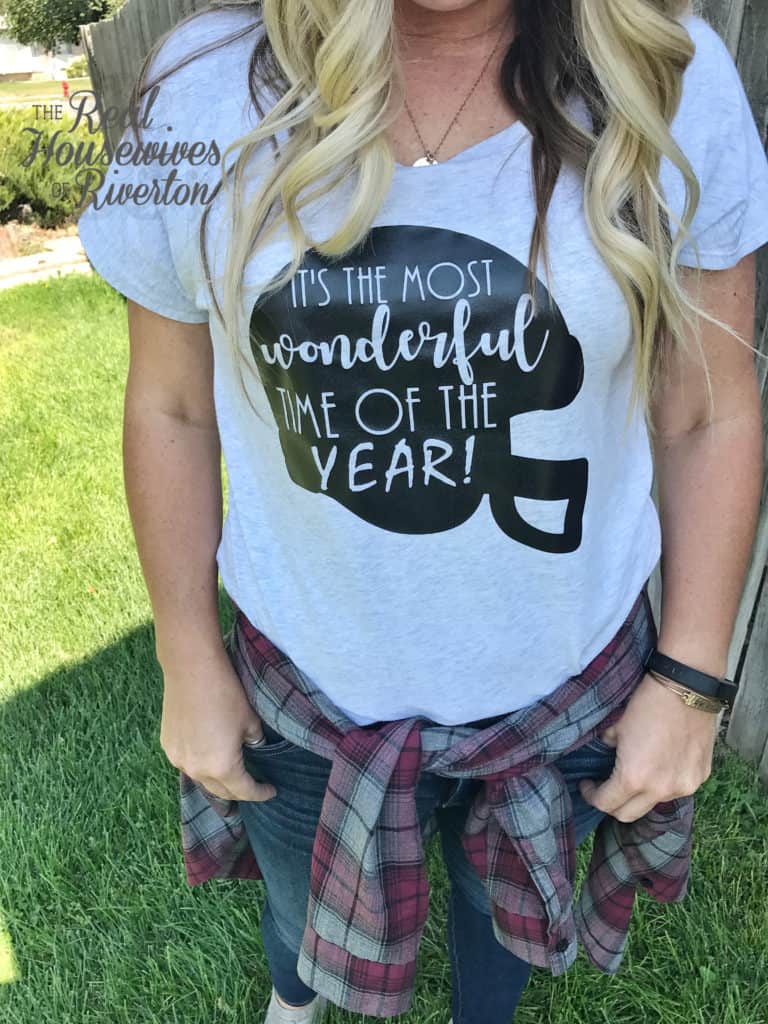
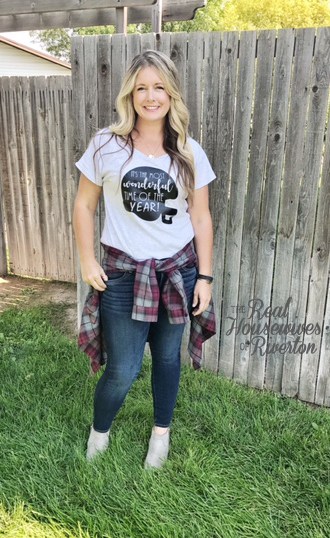
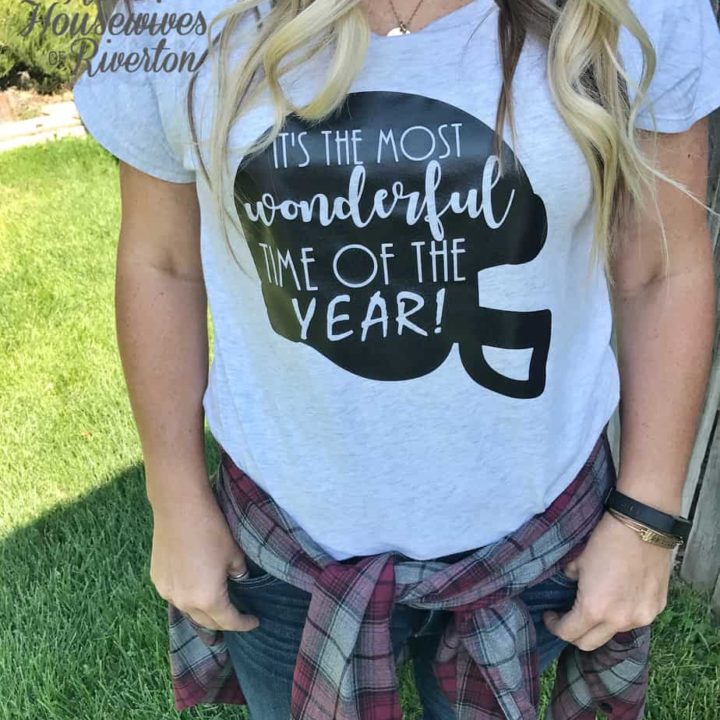
Remove the carrier sheet and your shirt is done! I have worn my shirt many times and get compliments on it every time.
Apparently I'm not the only one who thinks Football is one of of the best times of the year.
You should definitely make your own DIY Football Tee, you'll be really happy that you did. At least I will be happy that you did!
DIY Football Tee
Celebrate our favorite time of year with your own DIY Football Tee.
Materials
- T-shirt
- Iron-on
Tools
- Cricut Machine
- Weeding Tool
- EasyPress
- EasyPress Mat
- Standard Grip Mat
- DIY Football Tee Cut File
Instructions
- Gather your supplies.
- Open the DIY Football Tee cut file in Design Space.
- Size image to correct size for your shirt.
- Mirror image before cutting.
- Cut image out of Iron-on.
- Weed all excess Iron-on from your image.
- Preheat EasyPress to correct setting found in Cricut Heat Guide
- Press image onto shirt following the steps in the heat guide for your Iron-on material and the fabric of your shirt.
- Flip shirt over and press from the back.
- Follow heat guide step for warm peel or cool peel - remove carrier sheet at correct time for your fabric.
- Enjoy your shirt!
Notes
Don't forget to mirror your image.
Follow the settings in the Cricut Heat Guide for best results.
Recommended Products
As an Amazon Associate and member of other affiliate programs, I earn from qualifying purchases.
-
 Bella + Canvas Ladies Slouchy T-Shirt - GREY TRIBLEND - S - (Style # 8816 - Original Label)
 -
 Cricut Tools, Weeding Kit
 -
 Cricut StandardGrip Adhesive Cutting Mat 12"x12" - For Cricut Explore Air 2/Cricut Maker - 3 Pack
 -
![Cricut EasyPress Mat, Protective Heat-Resistant Mat for Heat Press Machines and HTV and Iron On Projects, [12" x 12"]](https://m.media-amazon.com/images/I/41FNKJcKcfL._SL500_.jpg) Cricut EasyPress Mat, Protective Heat-Resistant Mat for Heat Press Machines and HTV and Iron On Projects, [12" x 12"]
Cricut EasyPress Mat, Protective Heat-Resistant Mat for Heat Press Machines and HTV and Iron On Projects, [12" x 12"] -
 Cricut 2005432 Easy Press 2 - Heat Press Machine For T Shirts and HTV Vinyl Projects, Raspberry, 9" x 9"
 -
 Cricut Maker, Lilac
 -
 Cricut SportFlex Iron On Vinyl, DIY Supplies, 11.8” x 24” HTV Roll - Black
I hope you enjoyed this tutorial, if you have any questions don't hesitate to leave them in the comments. We would also love to hear if you make your own football tee.
We have a great discount for our crafting friends! Click and use code Housewives for 10% off and free shipping on purchases over $50! *Not valid on machines, Cricut Access memberships, or digital image purchases*

If you liked this Cricut project make sure and check out some of our other favorite Cricut projects.
- Bringing Home Baby Chicks - March 11, 2025
- Is RootsTech for Moms? - February 23, 2024
- How to Get Oil Stains Out of Clothes - May 5, 2023
[…] DIY Football Tee – Housewives of Riverton […]