This post may contain affiliate links. If you purchase something through any link, we may receive a small commission at no extra charge to you. Supplies used may be given to us free of charge, all projects and opinions are my own.
Get ready for the voting booth with our Election Day Stickers and T-shirt. Grab your Cricut and let's get making.
Are you ready for Election Day?
Is anyone actually ever ready for Election Day? We're here to help bring a little fun to your visit to the polls with our Election Day stickers and t-shirt.

Our cute Anna is having a very eventful Election Day – it's her 18th birthday! She wasn't sure if she would be able to get registered before her 18th birthday so she could vote.
We got everything filled out and back and she's ready to vote on November 3rd. She looks excited in these photos, really she's terrified!
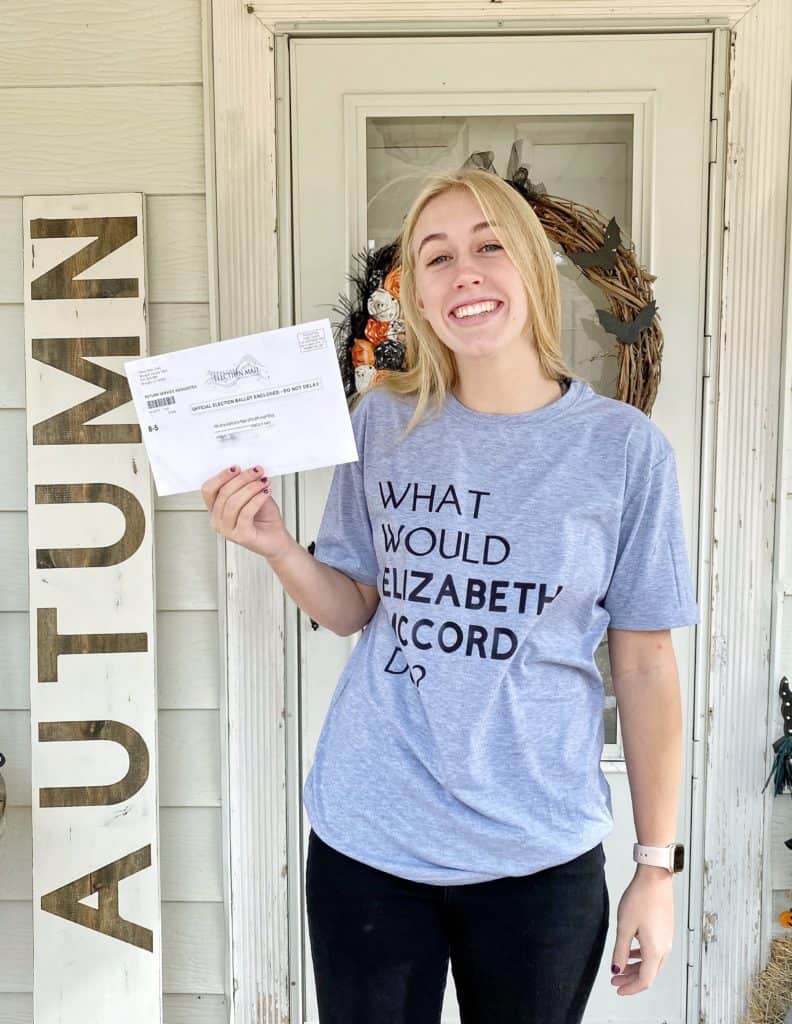
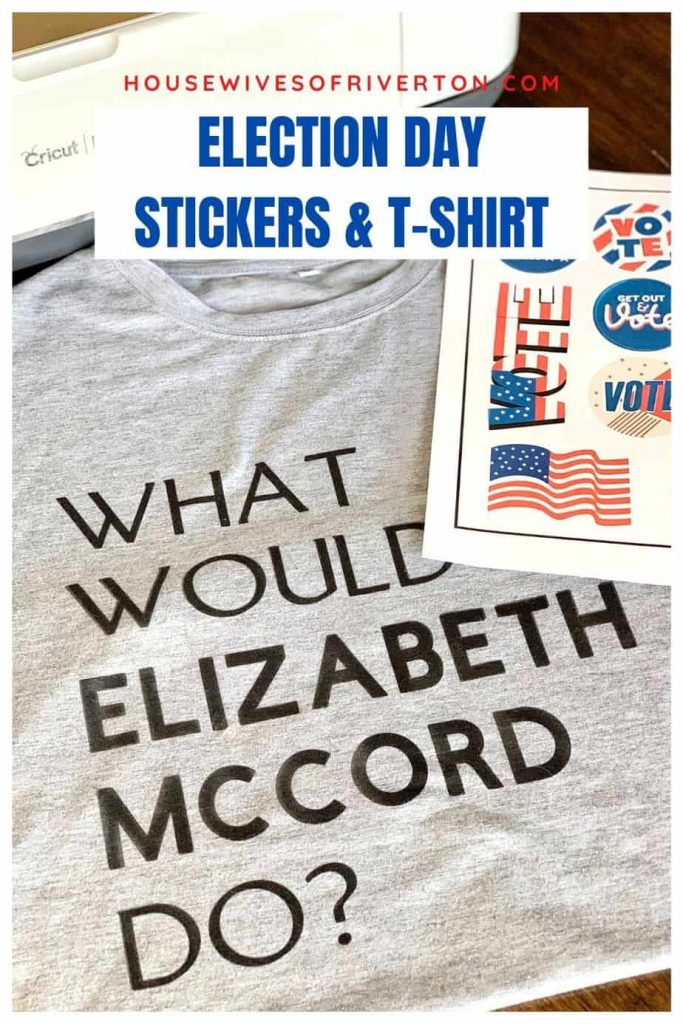
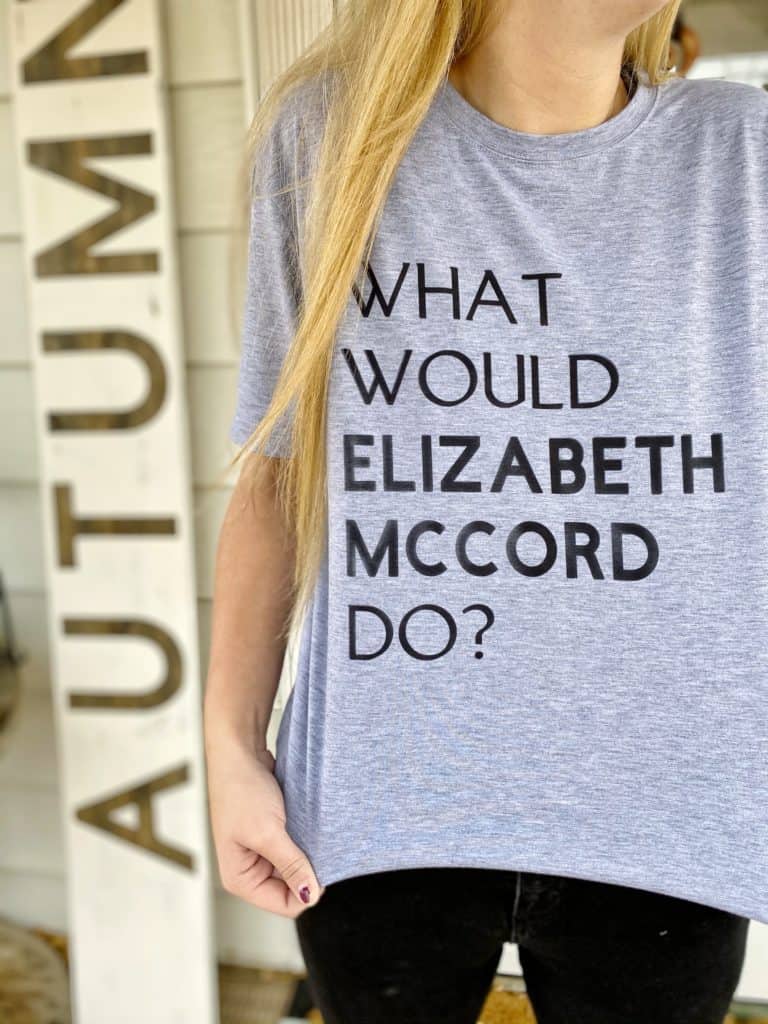
Because we are huge Madam Secretary fans at our house we used our Cricut machine and a sheet of black Infusible Ink and created this t-shirt. Asking ourselves “What would Elizabeth McCord do?” on Election Day seems like the perfect question.
Have you used Infusible Ink yet? We just made the cutest Baby Yoda Infusible Ink shirt and shared how to use Infusible Ink, check it out for step by step instructions.
If you want to make a shirt like ours you'll need the following supplies:
Supplies for Infusible Ink Election Day T-shirt
- Cricut Machine
- Standard Grip Cutting Mat
- Infusible Ink Transfer Sheet – Black
- What Would Elizabeth McCord Do? Cut File
- EasyPress Mat
- EasyPress
- White Cardstock
- Butcher Paper (Butcher Paper comes with Infusible Ink Sheets)
- Infusible Ink Compatible Shirt
For full instructions on cutting and applying Infusible Ink head to our Baby Yoda t-shirt post.
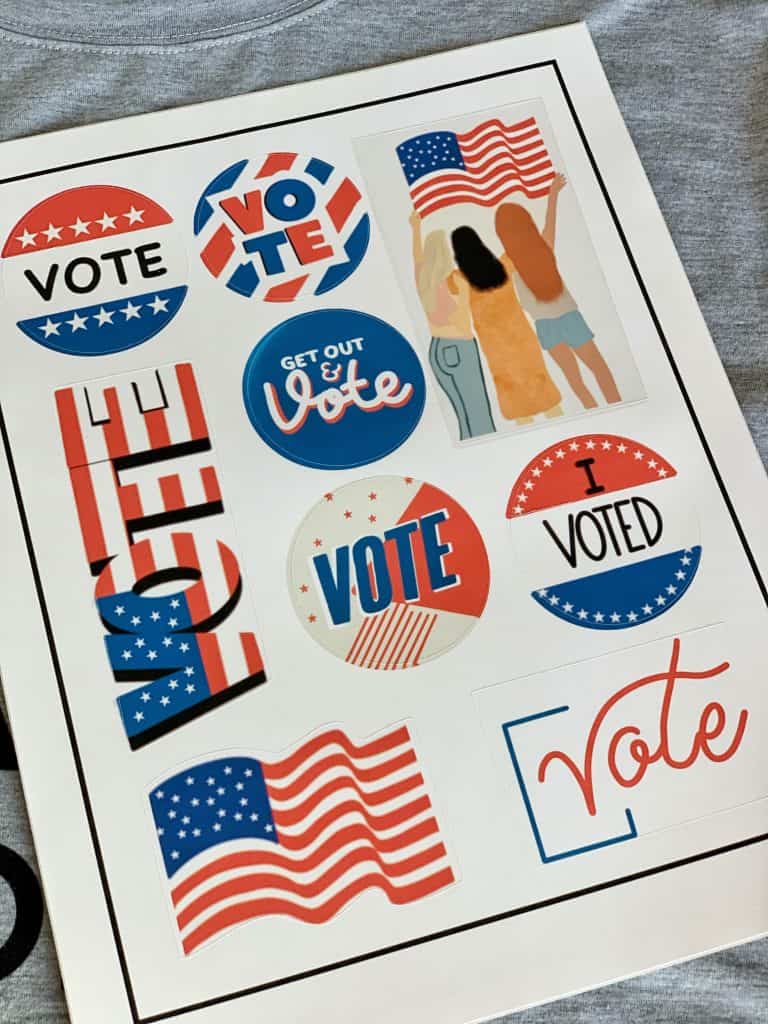
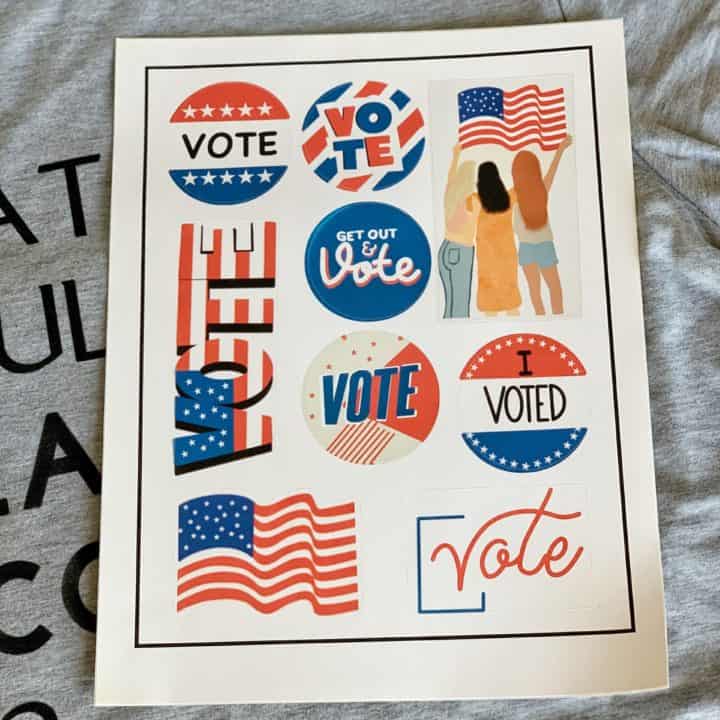
How to make Election Day Stickers
We know so many people are mailing their ballots this year. Some we know received stickers with their ballot. We were not that lucky.
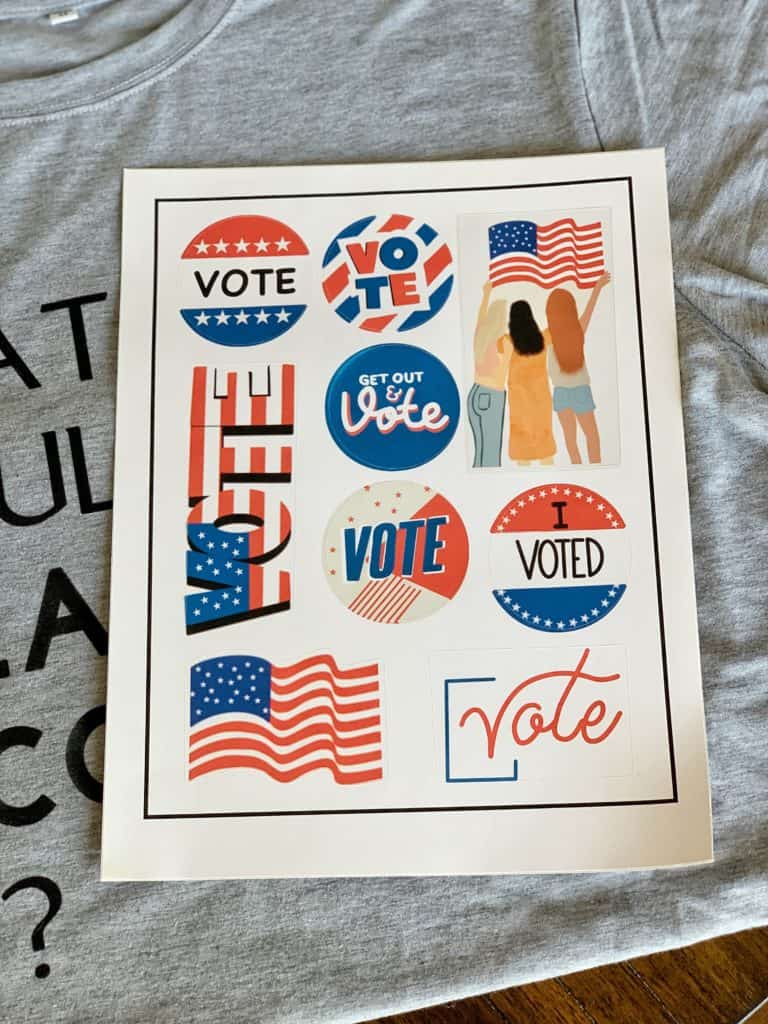
If you are missing your “I Voted” sticker this year we're here for you. We had Taelor Makes create some stickers for us to share with you.
Making our own stickers with our Cricut machine has become our new favorite hobby.
The process is simple. You'll need a few supplies an your Cricut machine and you're ready to go.
Supplies for Election Day Stickers
- Cricut Machine (we used Maker, any explore machine would also work)
- Blue Light Grip Cutting Mat
- Printable Vinyl (we like this better than sticker paper)
- Inkjet Printer (we both use this printer)
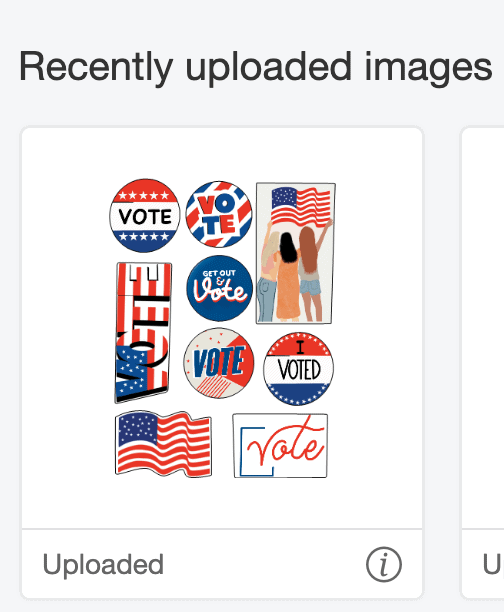
- This Image
How to make Stickers
To make your own stickers you're going to use the Print then Cut feature in Design Space. If you've ever done Print then Cut before you can skip the instructions, Print then Cut is the same for pretty much any image you're wanting to cut as stickers.
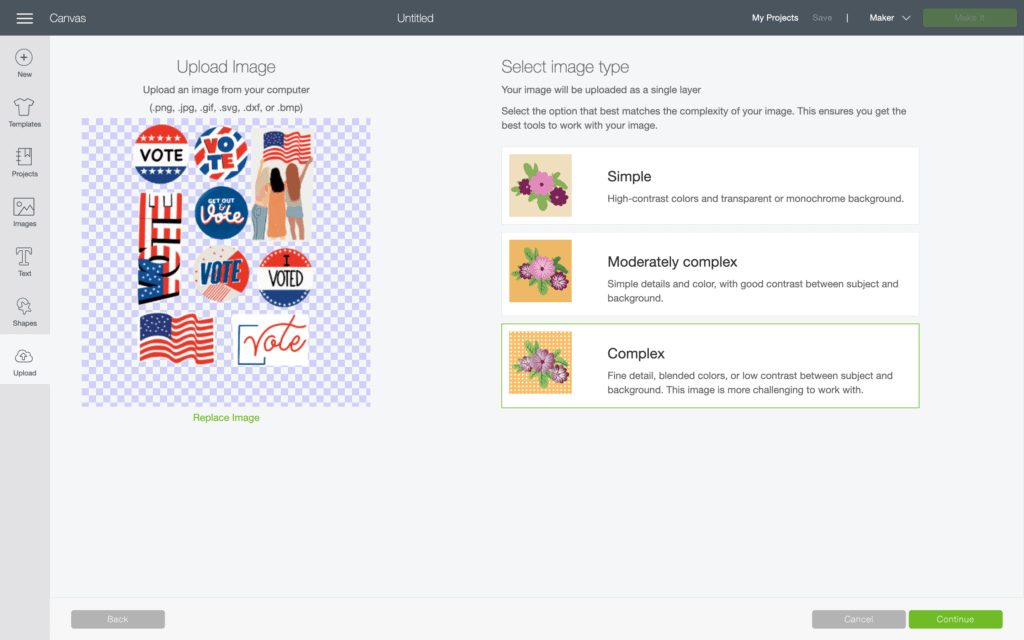
Step 1: Start with a blank canvas in Design Space. On the left side you'll see Upload. Click upload.
Step 2: Find your file (Election Day Stickers)

Step 3: From this screen you will want to select Complex. Our sticker image sheet already has the background removed for you. Selecting Complex allows you to have the highest quality image uploaded.
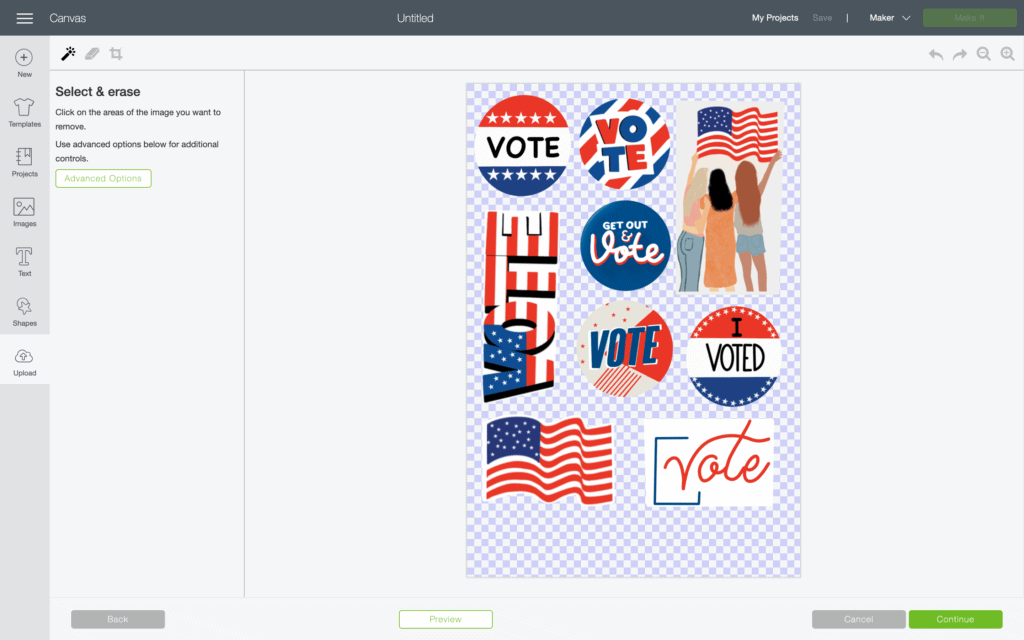
For Step 4: You do not need to erase anything because the background is already invisible.
Step 5: Select “Save as a Print Then Cut image”.
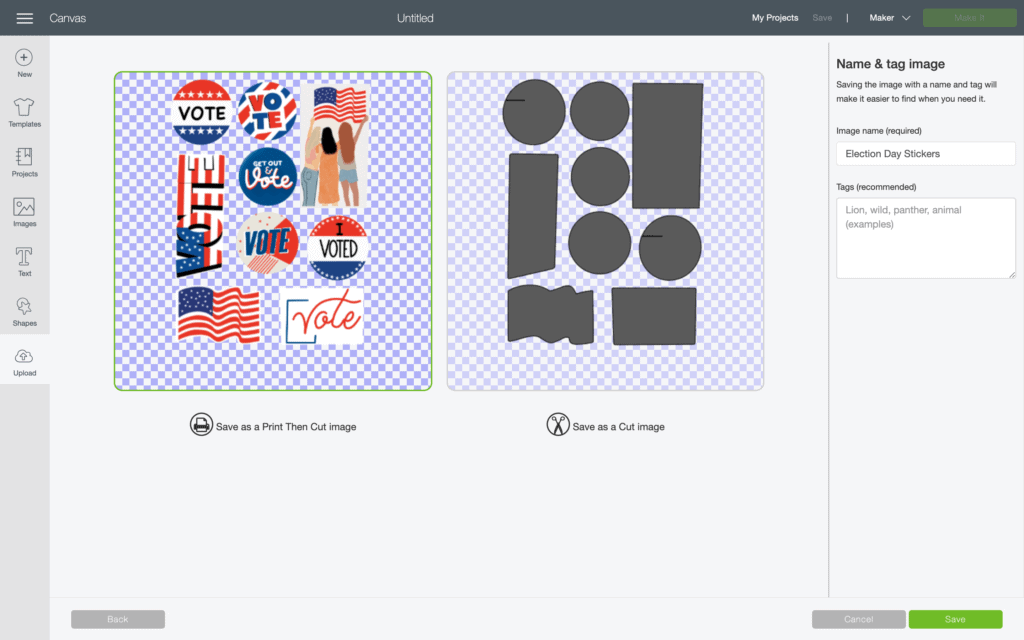
Step 6: You will now see your image in the “Recently uploaded images” area. It will now always live in your “uploads” section of Design Space unless you choose to go in and delete it.
Now the fun part!
Step 7: Add the image to your canvas and then resize. For Print Then Cut your image cannot be larger than 6.75″ wide and 9.25″ tall.

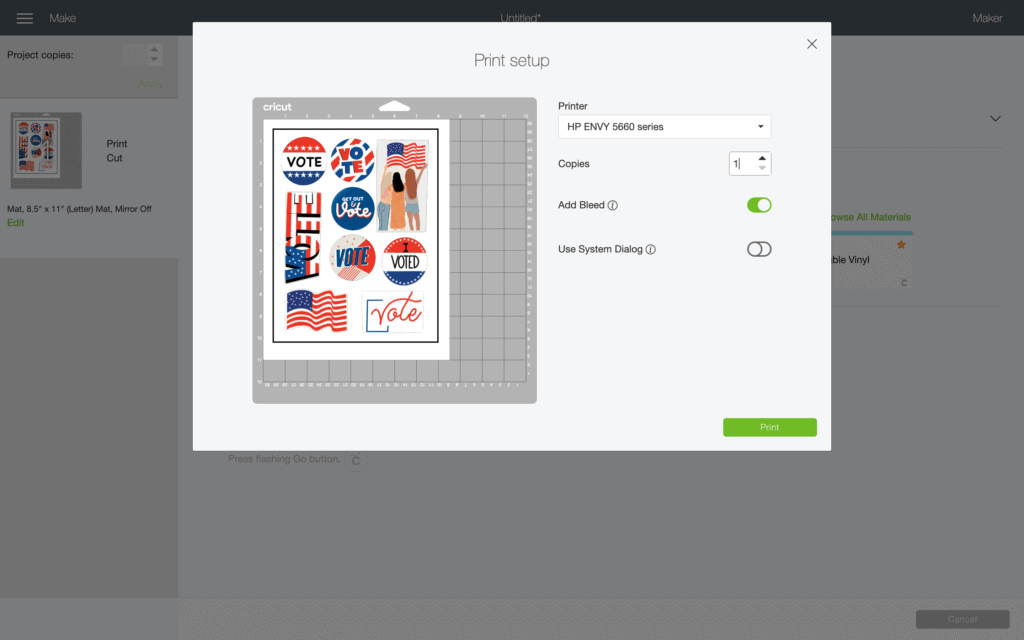
Step 8: Select “Make It” and then you'll be on this screen. Double check that everything is the size you want it to be.

Step 9: Send your image to the printer. You'll find your printer and then select if you want to add bleed or not.
I believe “add bleed” is automatically selected and I think you always want it. If you're cutting out around the image adding bleed makes sure your printed image goes through the cut line so you don't end up with an outline.
Then I like to use the system dialog – I have my default on my printer set to draft and black and white because my kids are always using the printer. Using the system dialog allows me to select a higher quality printing for stickers. This creates a beautiful finished image.
Load your Printable Vinyl into your printer making sure you have it in the right way for your printer.
Print!
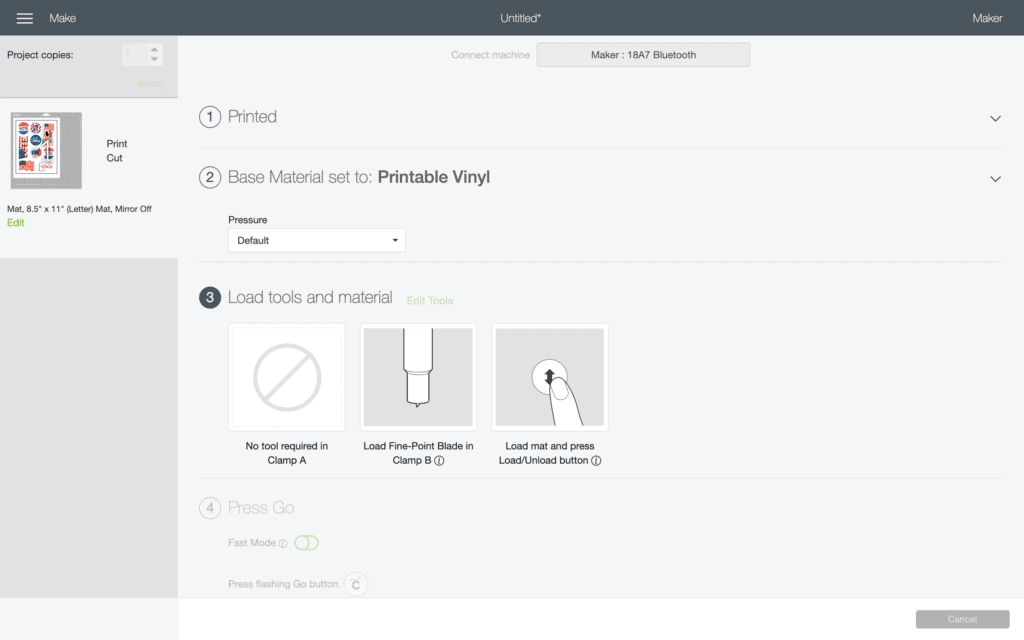
Step 10. Grab your image from the printer and place it image side up on a blue LightGrip cutting mat.
Select Printable Vinyl as your base material and load into machine.
Now select Fast Mode and then press the flashing green C.
Ready to see the finished stickers?
Step 11: 1st your machine will read the registration marks (black box). This takes a moment and will make sure the cuts are right where they need to be for your stickers.
After it reads the registration marks it will immediately cut out the stickers.
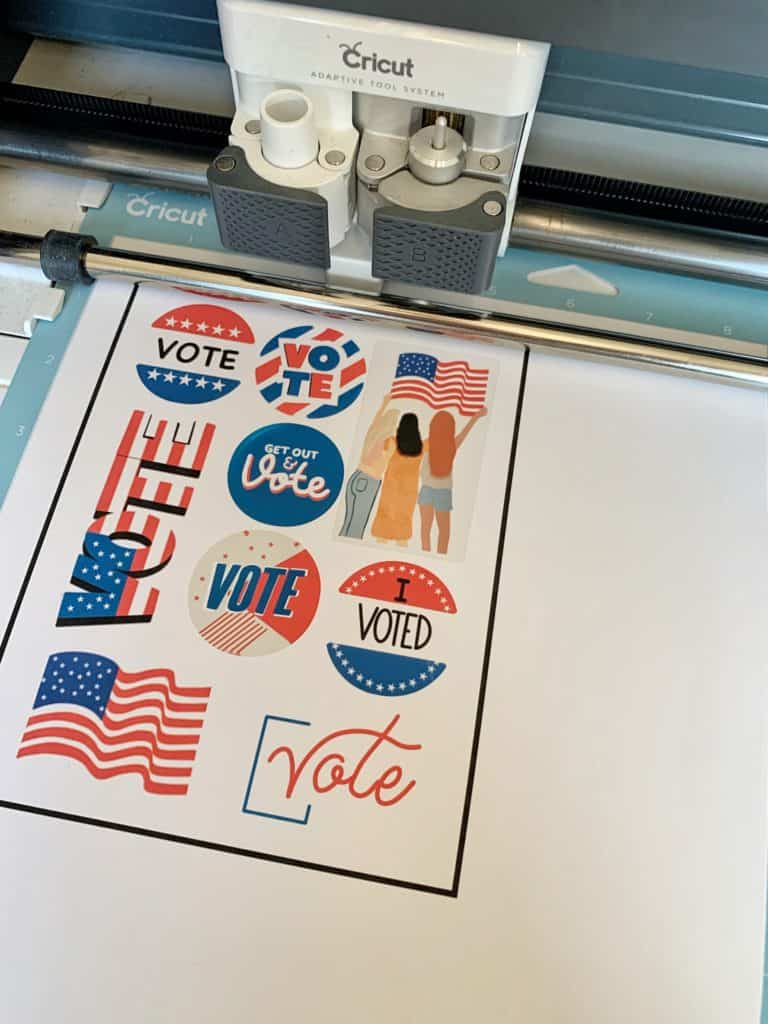
Step 12: Unload mat and gently remove your Printable Vinyl sheet off the mat. Because you're using Printable Vinyl the machine cuts through the vinyl but not through the backer.
Peel off your stickers and enjoy!
Election Day - I Voted Stickers
If you're missing your "I Voted" sticker because you mailed in your ballot make your own at home!
Materials
- Printable Vinyl
Tools
- Cricut Machine
- LightGrip Mat
- Printer
- Election Day Sticker Image
Instructions
- Download I Voted Stickers Image
- Upload image into Design Space
- Save as "Print then Cut" file
- Size to whatever size you want the stickers.
- Send to printer
- Print stickers (we like to print at a high quality setting so we don't have lines)
- Place sticker sheet on Lightgrip mat
- Load mat into machine, the first step the machine will read the black box (register marks) so it cuts in the right place.
- After it reads the register marks it will cut immediately.
- Unload printable vinyl and your stickers are ready to use.
Recommended Products
As an Amazon Associate and member of other affiliate programs, I earn from qualifying purchases.


Please remember this about Election Day!
Yes, voting is important. Yes, it's important to be educated about the candidates. And Yes, there will be people frustrated and upset regardless of how the presidential election turns out.
All of that is true but more important than those things is how we as individuals treat each other. It's more important how we're raising our children to be understanding and accepting – not close minded and hateful. It's more important to be active in our communities, to be an example of good, and to more importantly than anything else LOVE ONE ANOTHER.
We as a people can survive anyone residing in the White House if we focus first on one another.
We have a great discount for our crafting friends! Click and use code Housewives for 10% off and free shipping on purchases over $50! *Not valid on machines, Cricut Access memberships, or digital image purchases*

- Bringing Home Baby Chicks - March 11, 2025
- Is RootsTech for Moms? - February 23, 2024
- How to Get Oil Stains Out of Clothes - May 5, 2023
