This post may contain affiliate links. If you purchase something through any link, we may receive a small commission at no extra charge to you. Supplies used may be given to us free of charge, all projects and opinions are my own.


A while ago I ordered dresses for the 2 younger girls for the 4th of July. Sadly the girl I ordered them from had one nightmare after another with the shipment. She didn't receive any of the size 2/3 dresses and there were issues with all the other sizes. I didn't get the Goose's dress (of course it was a 2/3) and the size 8 I ordered was quite large and the navy blue top was all messed up, the dots were painted on instead of dyed so they were all a little flawed to begin with and then the heat in shipping had them all sticking together making the situation even worse. I paid next to nothing for the dress and we are trying to get things straightened out with the supplier but when I saw it I thought I could still use it for SOMETHING. Then I bought my 1st maxi skirt and I knew exactly what I was going to make.
Here is the original dress:

While the kids and I were watching a movie one night I sat and picked the seam that attached the navy to the chevron.
It then looked like this:
As you can sort of see it has a bit of a gather already. I used that to my advantage.
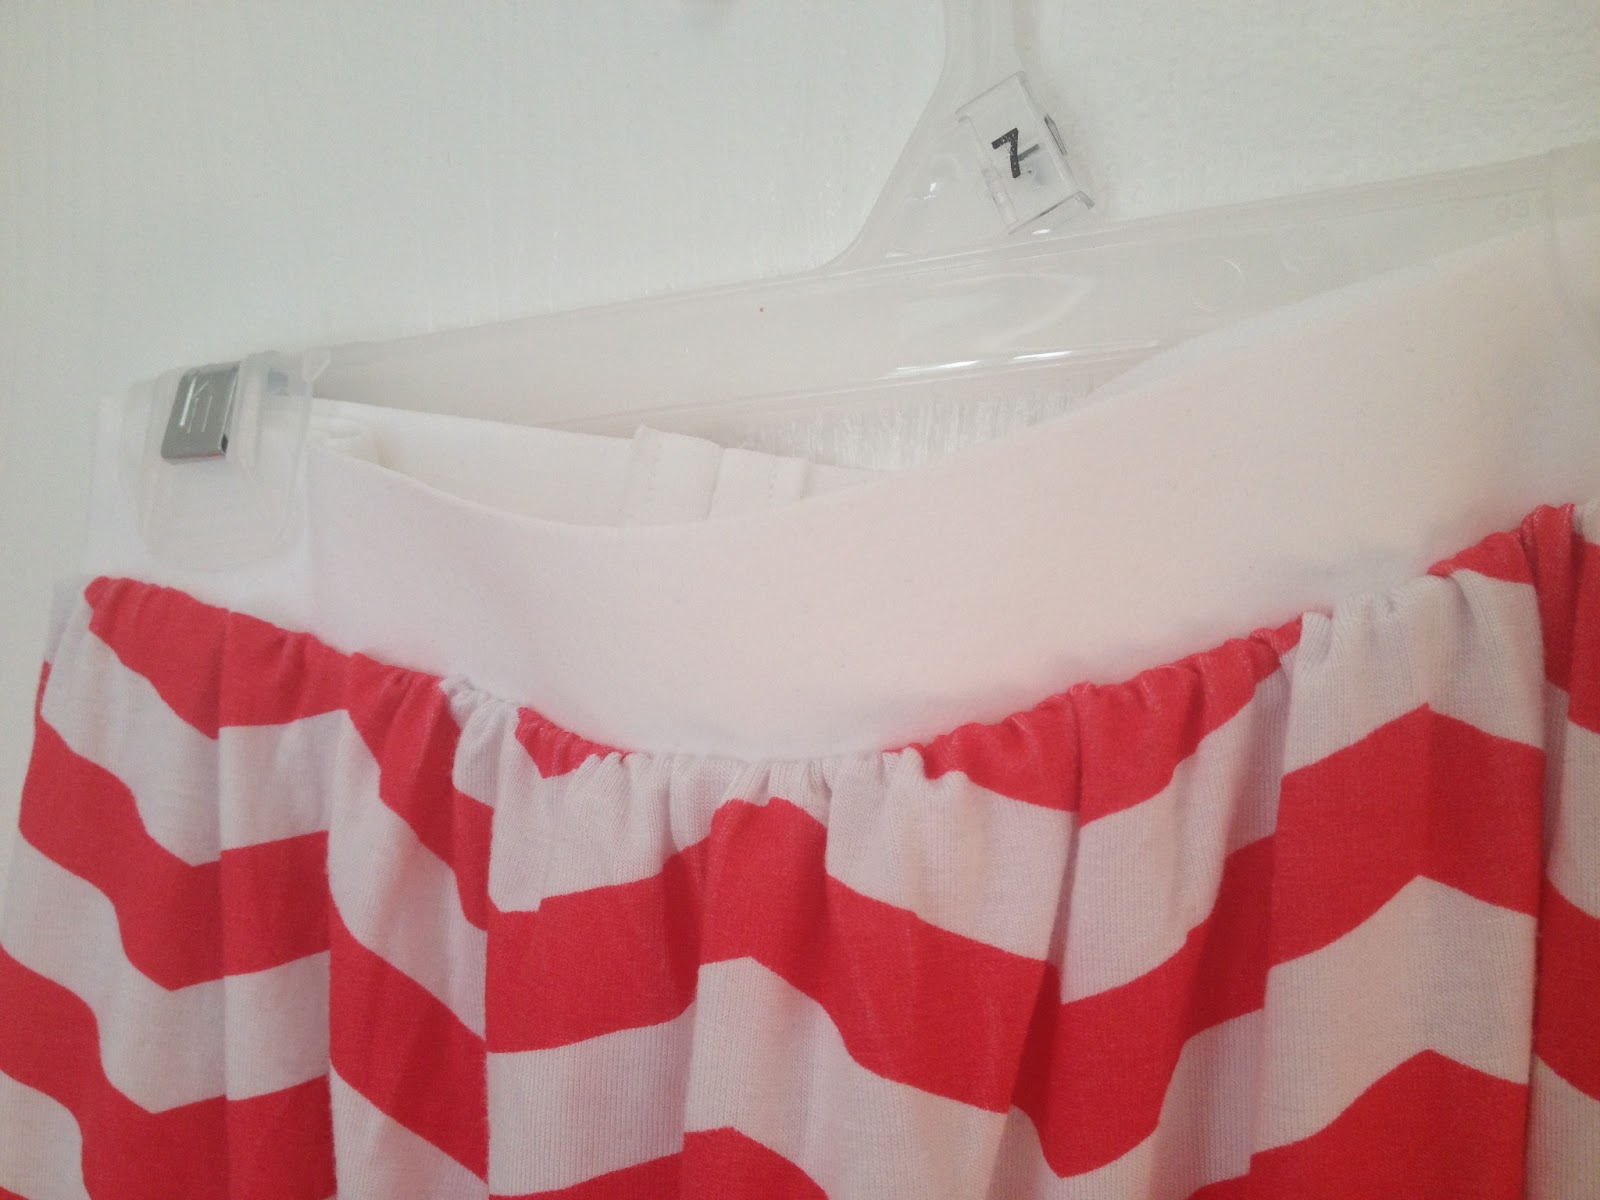
I didn't want to lose any of the length so instead of doing an encased elastic waistband I bought some of the really nice soft wide elastic that is made to be seen and used that. I had never used that type of elastic before but one of my girls has a skirt with exposed elastic so I used theirs as an example for how I wanted mine. I just wrapped the elastic around my waist to see how long I needed it to be and then took about an inch off.

Then I folded it in half and using 1/2″ seam allowance I did a tight straight stitch.

I then opened it up and stitched the 2 sides down flat, it made a nice soft flat waistband.

Once I had my waistband assembled I used the middle back (my seam) to find the center front and the center of both sides. I then found all 4 points on my skirt and matched them up and pinned them together. This worked well for me when it came to sewing the waistband to the skirt. I just stretched the elastic from one point to the next and sewing right sides together with a longer straight stitch attached the skirt to the waistband.

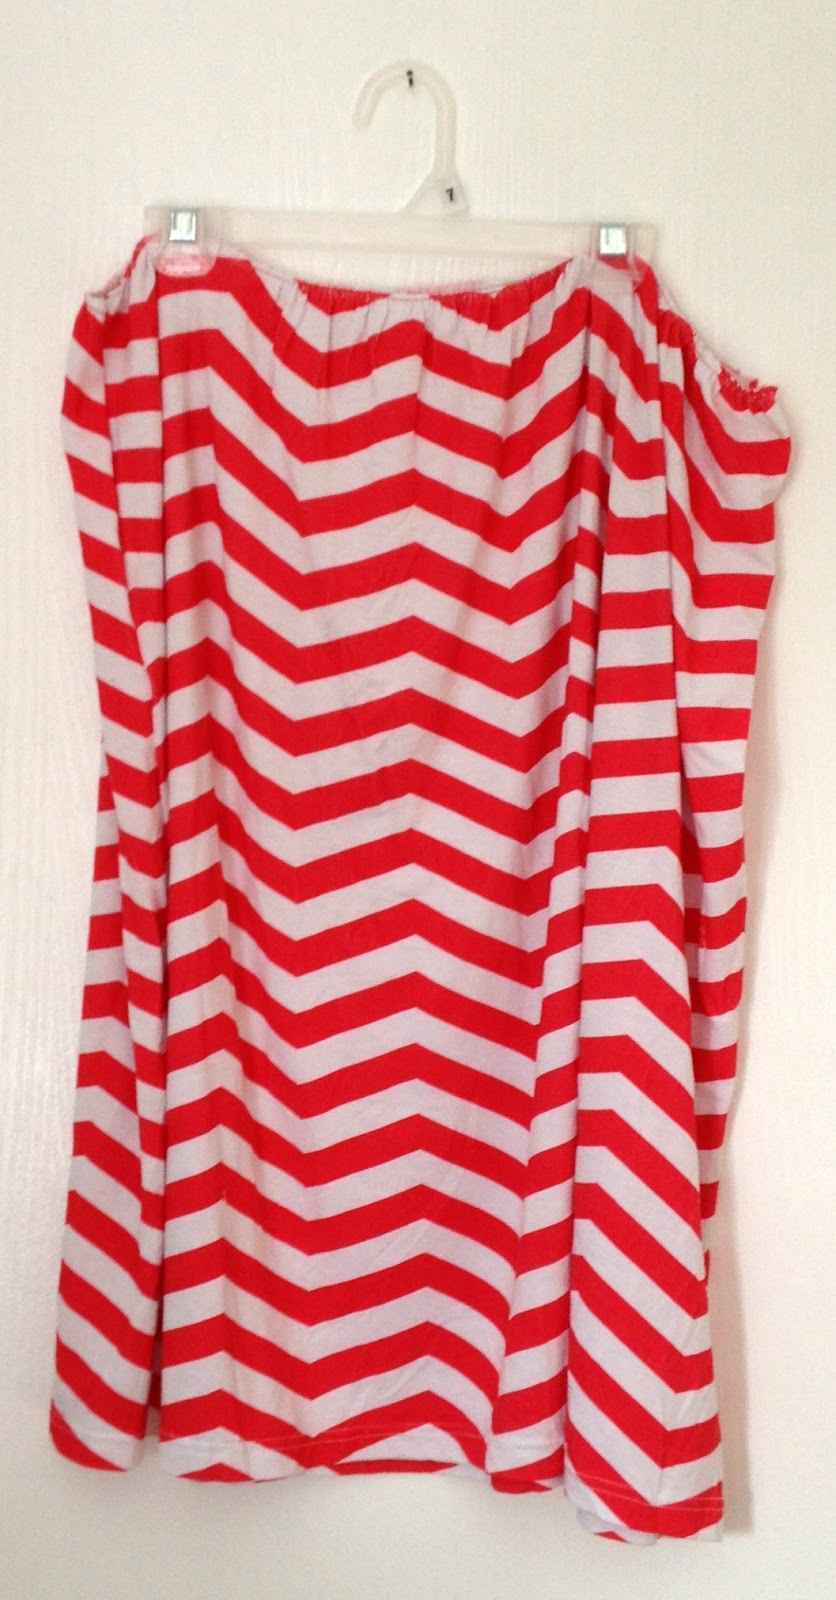
I loved the end product on the hanger:

And was pretty happy with how my outfit turned out for the 4th:

Cardi – Nordstrom Rack
(this is the brand and style but they had more colors in the store)
White T – Downeast
Skirt – by me
Flip Flops – Old Navy
Necklace – Penny & Tillie
As always if you have any questions don't hesitate to ask, I still am pretty awful about these tutorials but maybe it'll help you anyway.
Have a beautiful weekend. We're headed out of town and can't wait to see family!
© The REAL Housewives of Riverton, 2011-2012. Unauthorized use and/or duplication of this material without express and written permission from this blog’s authors and/or owners is strictly prohibited. Excerpts and links may be used, provided that full and clear credit is given to The REAL Housewives of Riverton with appropriate and specific direction to the original content.
Latest posts by Creative Housewives (see all)
- The Best Vinegar Paint Brush Cleaner Method - May 6, 2023
- 10 Fun and Easy St. Patrick's Day Games - March 1, 2023
- Valentine's Day Felt Wreath DIY - January 20, 2023

bravo! Great job and sooo cute.
Thank you so much!
~Jenn
I love your mad sewing skills 🙂 You are so talented!
You’re so sweet Amber. Thank you!
Cute outfit! Great job turning that dress into a skirt!
Thanks so much. I am loving the skirt!
So cute! Love this tutorial, thanks for sharing!
thank you Natalia, I am excited to make more for me and my girls now!
How cute! Sure wish I could sew like that. I don’t know where my daughter got it from, but she’s becoming a passionate little seamstress. I bought her a sewing machine, so maybe one day she’ll teach me a thing or two! 🙂
Thank you Tisha, I love to sew, I wish there were more hours to do it. I highly recommend googling for sewing tutorials, there are so many that are quick and easy and the cost if you really mess it up could be less than $5 so it’s a fun way to try it out!