This post may contain affiliate links. If you purchase something through any link, we may receive a small commission at no extra charge to you. Supplies used may be given to us free of charge, all projects and opinions are my own.
Let everyone know how much you love Halloween with our Sanderson Sisters Broom Co. Porch Sign.
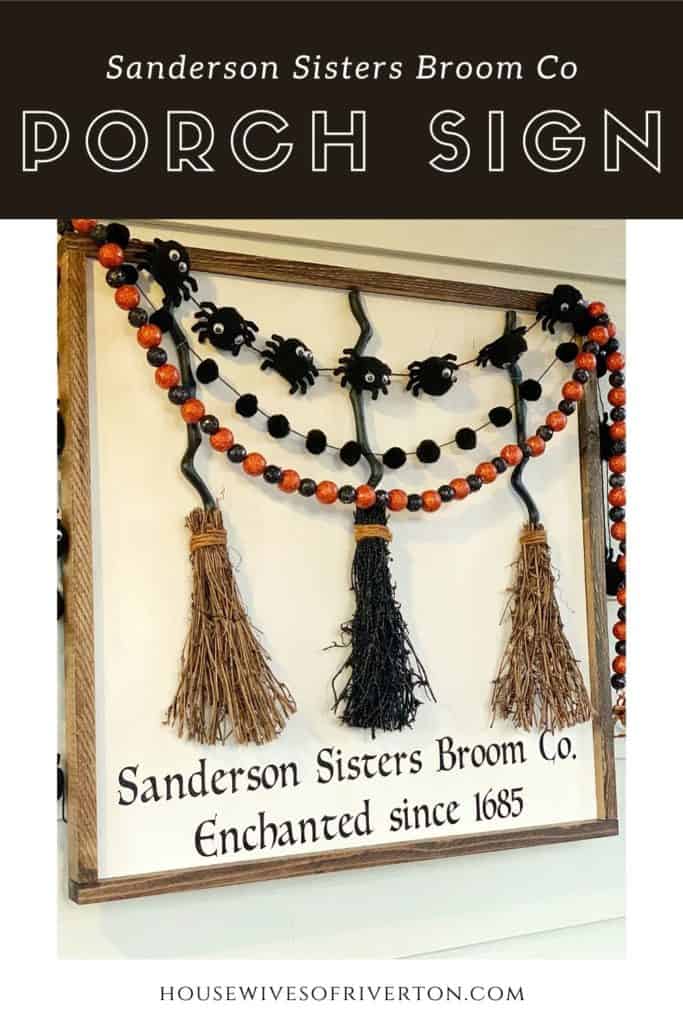
I love Halloween and one of my very favorite Halloween movies is Hocus Pocus. We enjoy it every year, at least a few times and it never fails to make me smile.
How to make your own Sanderson Sisters Broom Co. porch sign.
Supplies needed to create your own Sanderson Sisters Broom Co. porch sign:
- 1/2 plywood cut to size
- 1″x 2″ common board cut to size
- Brad Nailer (or hammer and finishing nails)
- Cricut cutting machine (Explore family of machines or Maker)
- Permanent Vinyl (Black)
- Scraping Tool
- Transfer Tape (standard grip)
- White paint
- Stain (choice of color, we used dark walnut)
- Drill with 1/16 drill bit
- Thin wire
- 3 brooms
- Paint Brush (I really like this one but foam brushes also work well as long as your wood is smooth)
- Dry lint free cloth for applying stain (I usually use a piece of an old t-shirt)
The first thing you’re going to need to do is decide how big you want your sign to be. Mine measures just over 25″ square from the outside of the frames.
I wanted my sign to make a statement which meant making sure it was nice and big. Also, measure where you want to hang the sign so you can be sure it fits.
To make my sign I used my We the People Farmhouse sign tutorial. The only differences I made were:
- Altering the size
- Using one piece of wood instead of two as the base
Before you build your sign base (or purchase it, you can find many farmhouse sign blanks at places like Hobby Lobby, Michael’s, Joann, even Walmart has some. Just remember if you purchase your sign you’ll be more limited on size) you will want to start painting/staining.
It’s a lot easier to paint the sign and stain the frame before assembling all the pieces. You’ll thank me for telling you to do this first.
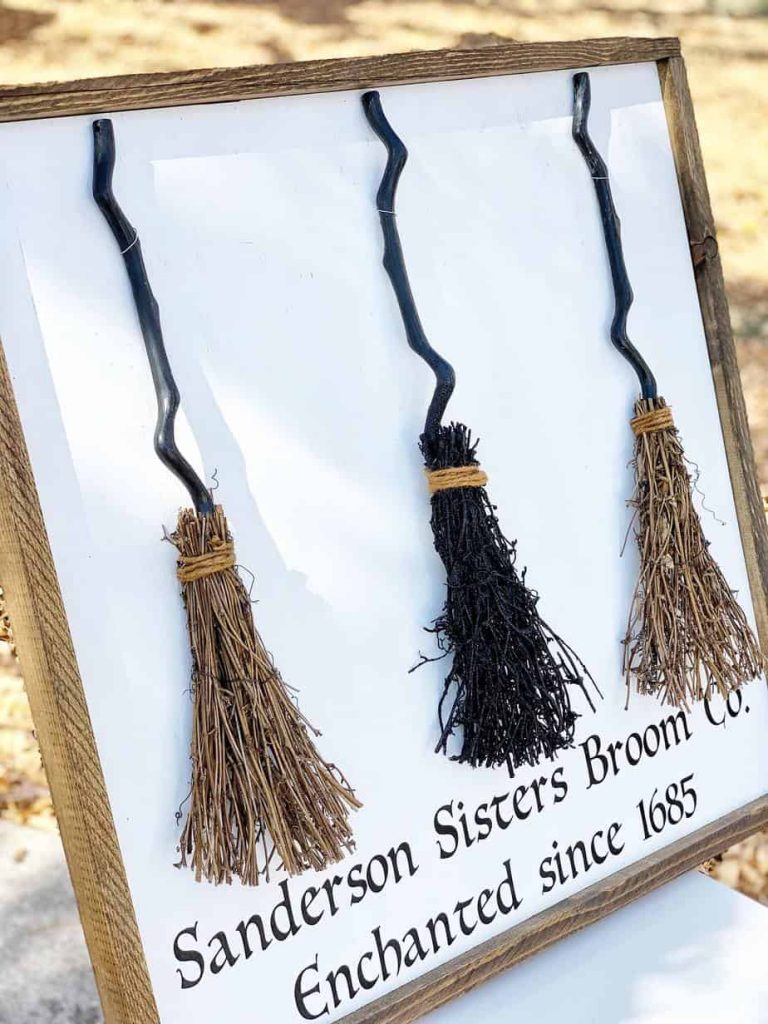
Once your sign is built (make sure you let it dry really well [I suggest 24 hours]) you can work on the next steps.
You’ll need 3 brooms to make this sign. I found mine in the Target Dollar Spot. They’re actually the inspiration for this whole project.
You’ll want to make sure your brooms fit the size of your sign. Our friend Sydney over at Tastefully Frugal has a tutorial on making your own witches broom. They’re larger but you can use her tutorial to make brooms of any size.
You’ll also need our Sanderson Sisters Broom Co. cut file. This was created in Cricut Design Space. Once you have it cut, if you’re unfamiliar on applying vinyl using Transfer Tape we have a full video showing how to do it here.
I applied my words right along the bottom of my sign so I had a lot of room above it for the brooms.
Once the words are all applied line your brooms up where you want them. I centered my middle broom and then spaced the outside brooms where I thought they looked good measuring from the outside frame.
To attach the brooms to the sign I used my drill with a 1/16 drill bit to drill 2 holes behind each broom. I drilled the holes one right above the other so they would be hidden behind the broom handle.
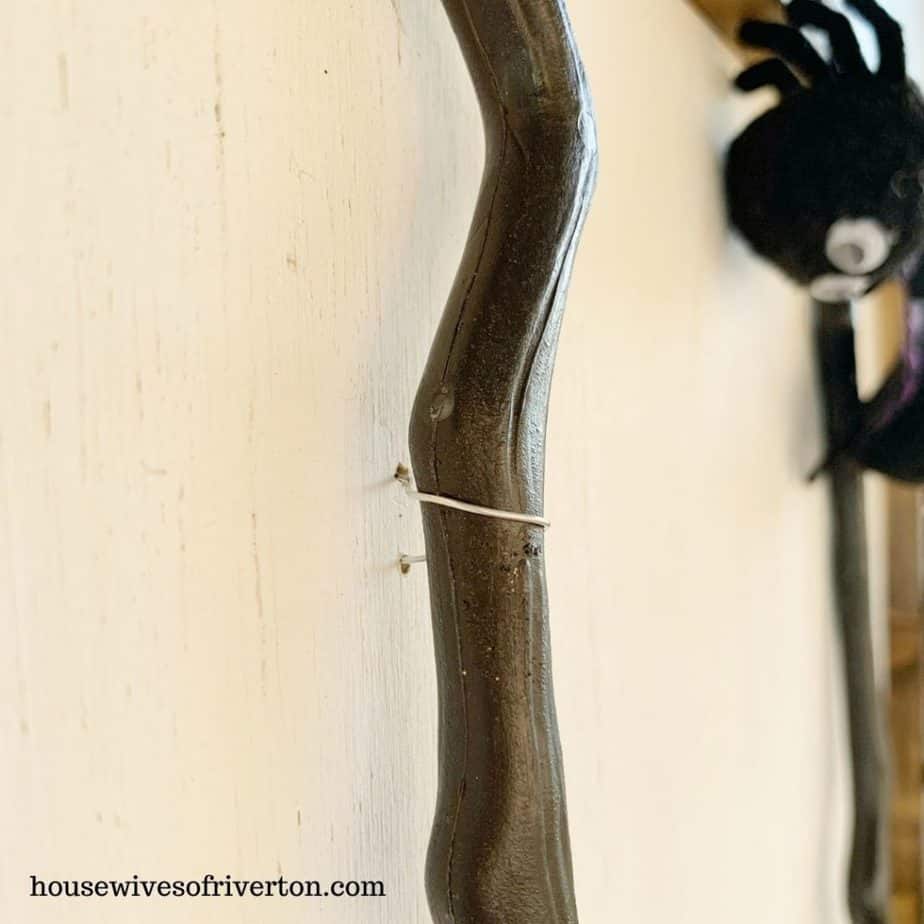
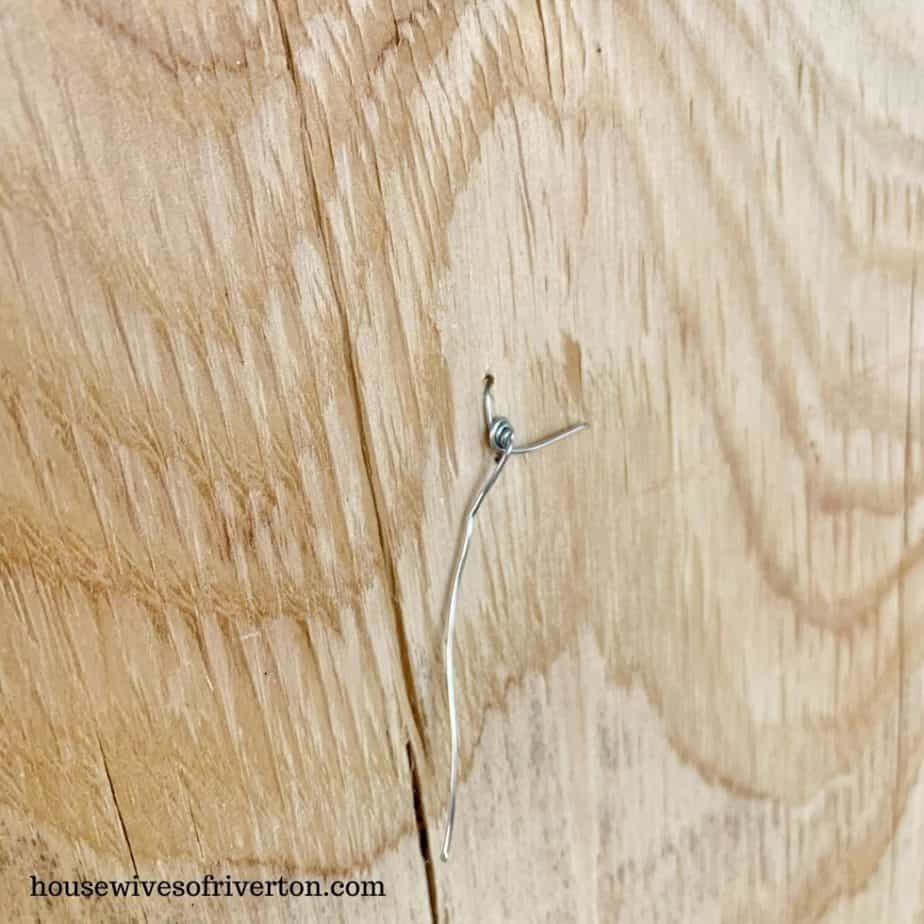
Once you have the holes drilled using a thin wire feed the ends through the holes and pull tight around the broom handle and twist from the back to secure.
And that is it. If you’ve completed all these steps you have a sign completed that I think you will love.
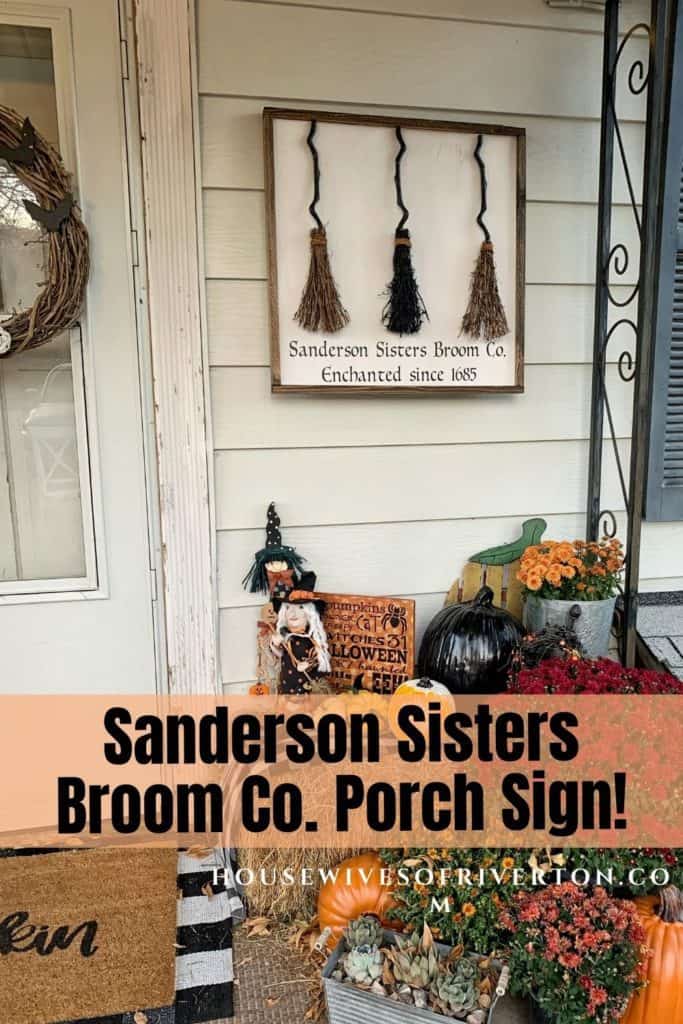
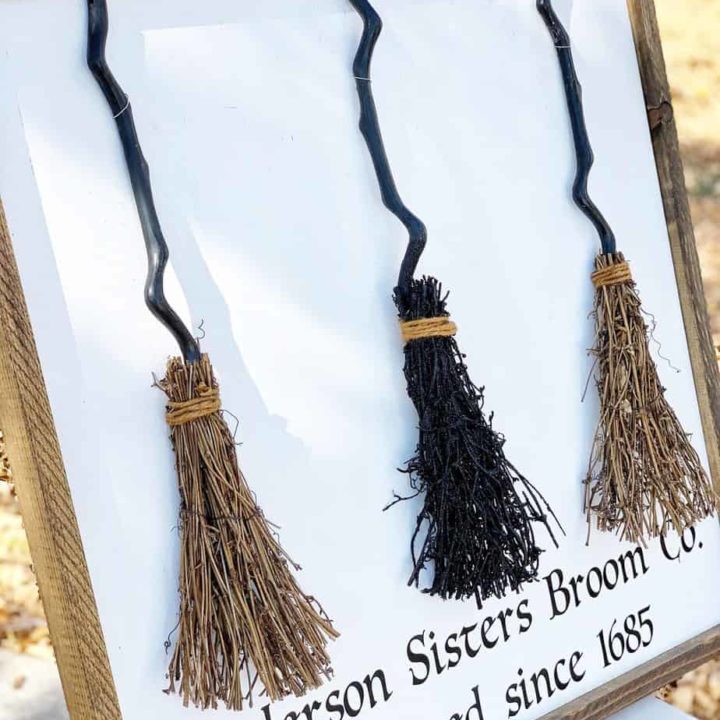
Sanderson Sisters Broom Co. Porch Sign
Materials
- 1/2 plywood cut to size
- 1"x 2" common board cut to size
- Permanent Vinyl (Black)
- Transfer Tape (standard grip)
- White paint
- Stain (choice of color, we used dark walnut)
- Thin wire
- 3 brooms
Tools
- Brad Nailer (or hammer and finishing nails)
- Cricut cutting machine (Explore family of machines or Maker)
- Scraping Tool
- Drill with 1/16 drill bit
- Paint Brush
- Dry lint free cloth for applying stain (I usually use a piece of an old t-shirt)
Instructions
To create your own Sanderson Sisters Broom Co. Porch Sign you'll need to start by building your sign if you don't purchase a premade sign.
Our sign base consists of a 24"x 24" piece of 1/2" thick plywood sanded smooth and painted white (let dry completely) and 4 - 1"x 2" pieces of wood stained Dark Walnut (be sure to let dry completely). Cut 2 to 24" long and the other 2 to approximately 25" long (I like to measure the exact length after I've attached my 24" side pieces).
Using a brad nailer (or hammer and small finishing nails) attach side frame pieces to the back of the sign first and then attach the top and bottom.
(For a complete step by step tutorial on building a sign visit our We the People Farmhouse Sign Tutorial linked above.)
Once your sign is built cut out your Sanderson Sisters Broom Co. vinyl (linked above) and lay out all the pieces to get them the way you want them to look. Your arrangement may vary depending on your sign size and the brooms you end up using.
Once everything is laid out it's easiest to place your vinyl first. That way you don't have to work around the bulk of the brooms to lay it out.
After you've applied your vinyl use a drill and a 1/16" drill bit to drill holes into your board. I drilled mine one above the other right behind where the handle of the broom will be so the holes are hidden by the broom handle and the wire can wrap around the handle to hold it in place. Do this 3 times and secure the broom handles by feeding the wire around the handle and through the holes twisting at the back to tighten and hold in place.
Once you're brooms are attached your sign is DONE! Depending on where you want to place your sign you can add picture hanging hooks to the back of the frame or it sits nicely on a shelf without needing to be hung.
I hope you enjoyed learning how to build your own Sanderson Sisters Broom Co. Porch Sign. If you make one we would love to see it so make sure you tag us on Instagram (@creativehousewives or @cricutinspiration) or use #creativehousewives and #cricutinspiration and we’ll share your project in our Instagram stories!
We have a great discount for our crafting friends! Click and use code Housewives for 10% off and free shipping on purchases over $50! *Not valid on machines, Cricut Access memberships, or digital image purchases*

- Bringing Home Baby Chicks - March 11, 2025
- Is RootsTech for Moms? - February 23, 2024
- How to Get Oil Stains Out of Clothes - May 5, 2023


